


Lab 3Dnatives: testing the BQ Witbox 2 printer
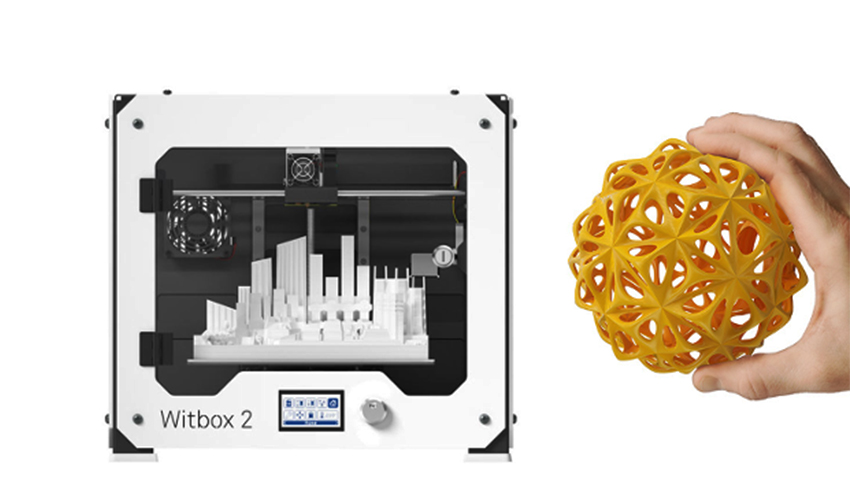
After the success of BQ’s first Witbox printer, the Spanish brand has released the second version, Witbox 2. Known for its A4 format printing, the first version of the Witbox was released back in 2013, with the second version released more recently.
Despite criticisms of the first Witbox such as the difficulty in printing in materials other than PLA or similar, the Witbox 2 impresses with its specs, such as its large printing volume at 21 x 30 x 20 cm. With a minimum layer thickness of 50μm and an affordable price of €1,700, it appears very attractive. Therefore we decided to investigate whether the printer really was up to scratch. Have BQ fixed the shooting? Find out in our complete test of BQ’s Witbox 2.

The Witbox 2 3D printer by BQ
1. Unpacking
Our first thoughts on unpacking were of just how enormous this machine was! However after opening the package, we realised the Witbox 2 is simply well-packaged. This double layering of cardboard and good setting means that anyone who buys a Witbox 2 will definitely receive it in good condition. A good start.
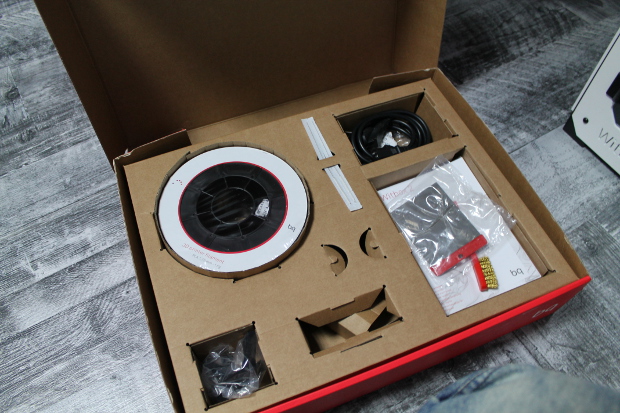
The Witbox 2 comes with various accessories
Whilst unpacking, we noticed the design is very similar to the first version, with a robust build; a chassis that shows a high rigidity, and quality materials. First impressions are definitely positive. A tip: read the instructions here as it will help with the unboxing.
Then, the accessory box. It’s well stocked and guarantees both fast and reliable uses of the machine for the long term. It comes with a spool of 1kg PLA filament, a thick glass tray, a spatula, a brush, a needle for cleaning the nozzle, a 4GB SD card, a USB cable to connect to a PC, as well as teflon tubes for the hot end. After setting this, it’s time to use the installation guide to start-up the machine.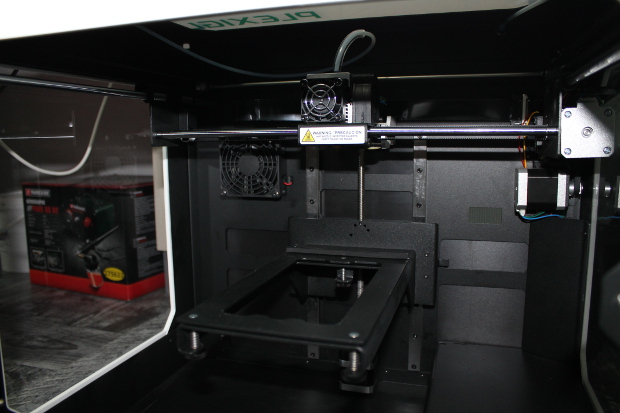
2. Installation
Fortunately, BQ simplified our lives with their customised installation guide, which is available from their website. This guide explains how to install the Witbox 2. Everything is detailed and simple to understand. Even the calibrations of the plate can be done in less than 5 minutes, showing how simple adjusting the machine really is. Allow 15 mins to completely install the printer, including the first calibrations so that it is completely ready to print out an object.
The machine has an internal wizard that can be guided step-by-step to further simplify the task. BQ have also set up a system using a red LED light to indicate if your adjustments are correct, which is handy.

The navigation screen of the Witbox 2
3. Software
The Witbox 2 works with popular slicer Cura, ideal for simple settings to work the machine, and the main settings are all loaded with no need for extras. You can also find some specific profiles on the web to quickly print. Additionally, there are printing profiles for other filaments such as ABS, nylon, and composite filaments based on wood or metal. This means even novices will be able to instantly print objects easily, whilst the more experienced will be able to refine the parameters to further improve their prints.
Navigating the menus of the printer is very simple thanks to a readable screen and an effective knob. Everything is intuitive, from the loading of the thread to the recovery of the file on the SD card. A slight non-issue is we would have liked to have a full-color LCD screen as we start to find it on the recent models of the manufacturers such as Raise3D or Formlabs.
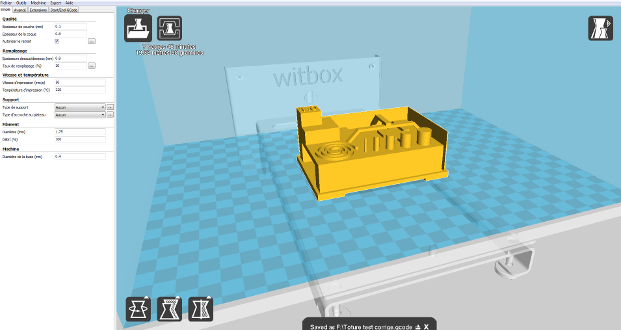
The Witbox 2 is compatible with Cura software
4. Printing
The Witbox 2 is now calibrated, the 3D model is sliced and loaded in the SD card, you can quickly start your first print. To begin, we decided to print a chess piece, at an average resolution. Remember that before you can start, you have to spray the tray. The Witbox 2 does not have a heating plate, so to ensure good adhesion of the part, it is advised that you use glue such as a 3DLac. We advise that you pull out the tray to spray the product. The assembly is easily done via the magnet system, and there is no risk of losing the calibration system.
Once the print starts, our first impressions were about how fast it was! It took only just over 2 hours to print the piece. This is relatively fast considering the quality. Another improvement on the previous machine is that the Witbox is much quieter than the previous model. For a first try, it is rather convincing, with no major flaws.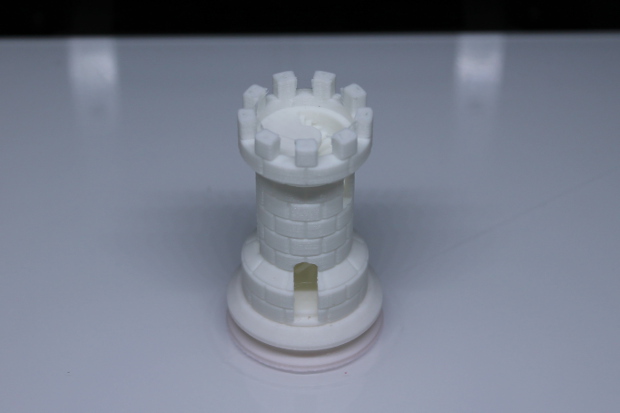
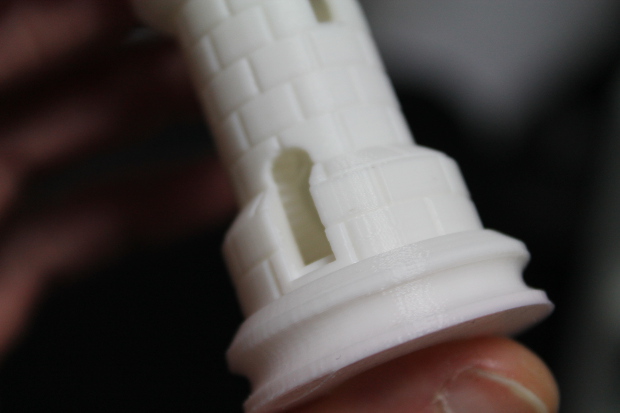
The chess piece we 3D printed

The Ultimaker robot printed in 100 microns in 45 minutes

The Witbox 2 printed this precise object with good accuracy
Finally, concerning the compatibility of the Witbox 2 with filaments other than PLA. We have tried some more technical materials such as the CO-PET NGen from ColorFabb, and even with the 3DLac and correct Cura settings, the printer’s ability to use it was limited. This is likely due to the lack of a heating plate.
Conclusion
- 3D Printer Content 9/10
- Software 7/10
- Print Quality 8/10
- Getting Started 9/10
Positive aspects:
– Ease of use
– Print Quality
– Speed
– Multi-materials
Negative points:
– No heating plate
– Limit on certain materials (tray/speed)
– Attention to the printing speed
Overall, the Witbox 2 is a very good machine, and is simple to use. It will not disappoint either the novice who is looking for their first 3D printer to start with, or the professional who wants a machine to quickly print technical PLA parts.
It has a robust and rigid construction, and a fast speed of printing as well as a high-quality print. One drawback however concerns the heating plate which is still missing and requires a lacquer to adhere the parts. In addition, there is limited capacity for use of materials other than PLA. The Witbox 2 test is overall therefore largely positive with a quality to price ratio that remains above average.


