3Dnatives Lab: Testing the BCN3D Sigmax R19
Based in Barcelona, the manufacturer BCN3D Technologies was born in 2012, at the Polytechnic University of Catalonia. Initially offering KIT machines, the Spanish manufacturer has professionalized its range of machines over the years, and unveiled at the end of 2018 its latest generation of 3D printers consisting of the Sigma R19 and a larger model, the Sigmax R19.
One of the key features of the R19 family proposed by BCN3D is the IDEX technology, also known as Independent Dual Extruder technology. In concrete terms, Sigma and Sigmax include a system of two independent extruders that combine several materials but also speed up the production of series thanks to the Mirror and Duplication modes for simultaneous printing of parts. Other features of the R19 series include a full-color touch screen, a Dual Drive extrusion system from Bondtech™, a hotend specially developed by E3D, an end of filament sensor, and also a heating plate (reaching up to 100°C), and a maximum printing temperature of 280°C.
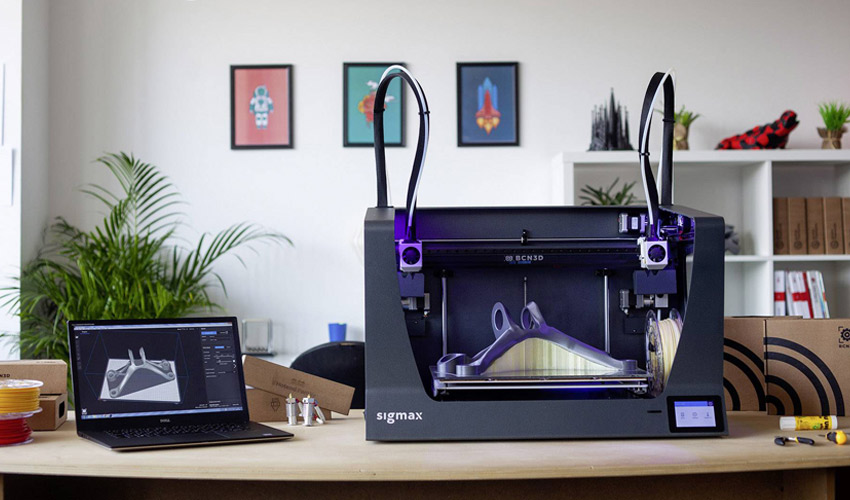
In recent weeks, our 3Dnatives Lab has had the opportunity to get its hands on the Sigmax R19 model with its relatively large manufacturing volume of 420 x 297 x 210 mm. Marketed at a price of €4,434 (including tax), the model seems to be a serious candidate in the race for professional FDM 3D printers. You will find below a complete review of the Sigmax R19.
Unboxing the Sigmax R19 | Credits: 3Dnatives
1 – Unboxing the Sigmax
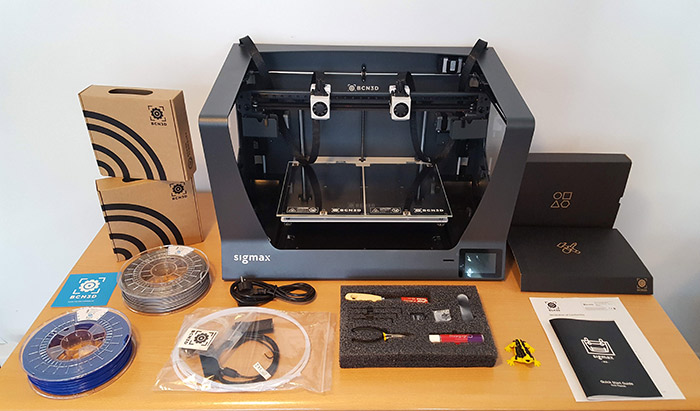
Upon seeing the box it was clear to us that this was going to be a big machine. The Sigmax R19 has dimensions of 675mm x 440mm x 680mm and weighs approximately 20 kilos (44 pounds). When opening the box, at the top we found all the tools and accessories needed in order to get started. The printer came with the following: a large magnetic glass plate, a calibration gauge, a build plate adhesive, a spatula, tweezers, some allen keys, an SD card, a set of shims, two teflon filament tubes, power cable, two 500g PLA spools, and of course the quick start guide and warranty paperwork. The unboxing experience was quite satisfying as everything in the box was neatly positioned in foam and could be taken out very easily.
Filament collection box | Credits: 3Dnatives
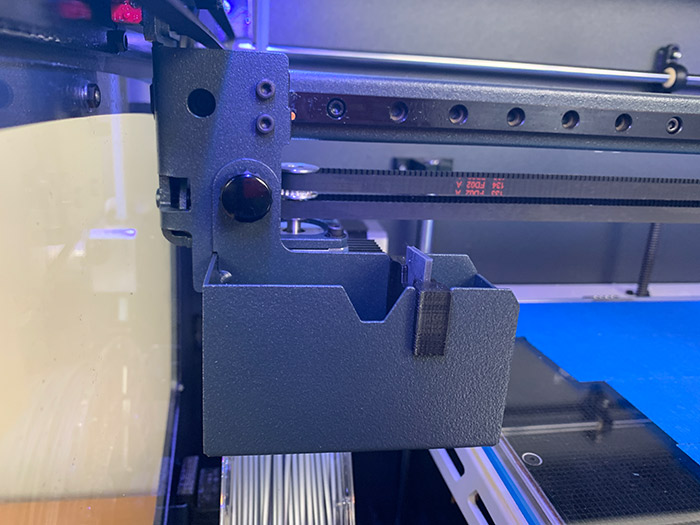
The printer itself is quite impressive, due to its large size and its dark grey steel frame design it offers a modern and sleek feel to the machine, whilst also feeling sturdy. On the front, you will find the full colour touchscreen nicely positioned on the bottom right. Next to it, is the slot for the SD card used for transferring the 3D designs. The power cable is positioned on the back of the machine, the sides are transparent, making the printing process visible from most viewing angles. As the Sigmax R19 is an open chamber machine, you can see the dual extrusion system directly. Each extruder is on one side, and comes with its own filament collection box and nozzle cleaner, to collect any remaining plastic after each print, leaving the machine clean and tidy.
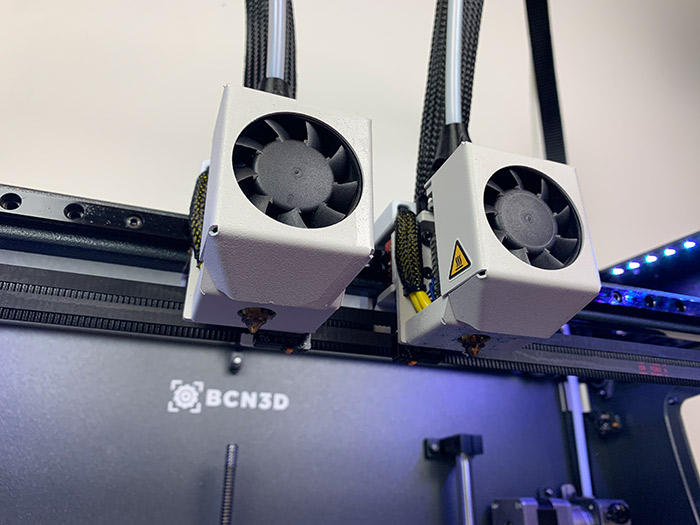
The dual extruder on the Sigmax R19 | Credits: 3Dnatives
The large build plate of course takes up most of the space in the middle of the printer, and the filament spools are neatly located in their dedicated slots, left and right of the build plate. It is also great to notice that the printer consists of several 3D printed parts. For example, parts like the spool holders, several clips, the teflon filament tube holders, some cable protectors are all 3D printed! To be exact, the Sigmax has over 45 3D printed parts in it. Last but not least, the 3D printer is also furnished with LED light strips at the top.
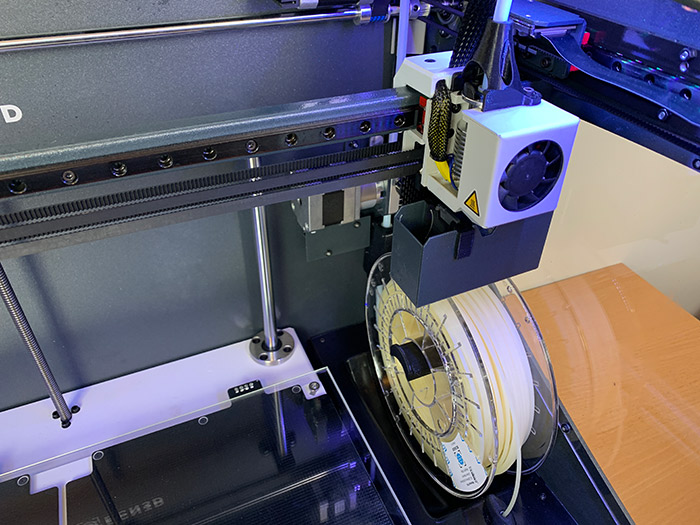
Filament spools on each side of the 3D printer| Credits: 3Dnatives
2 – Installation of the Sigmax 3D Printer
The whole installation process probably took us around 20 minutes but we faced no particular difficulties. BCN3D provides the user with a quick start guide that lists in detail the step by step process of setting up the printer. If you are not a fan of paper manuals though, all procedures are also available via the touchscreen, with animations that clearly indicate what needs to be done.
On the hardware side, the first step is to add the build plate, which attaches magnetically, making the user’s job easier. Then, the filaments need to be added. The spools go to their dedicated slots, whilst the end of the filament just needs to be inserted in a hole that will eventually feed the material through, all the way to the extruder. Following this, the user needs to insert the teflon tubes into the hotends and attach some clips. Then, you just need to plug in the machine and continue setting it up via the screen.
When you turn on the Sigmax R19, you will first be greeted by the touchscreen, and asked to register the printer. We had to go to their website and register our machine’s serial number in order to get a four digit registration number and go ahead. We completed the registration in seconds but unfortunately did not get our 4 digit number within the promised ‘1-2 business days’. When calling their customer service a few days later, we received great support and were given our registration number on the same day. In the meantime, we had continued with setting up the printer as the registration was not required for this.
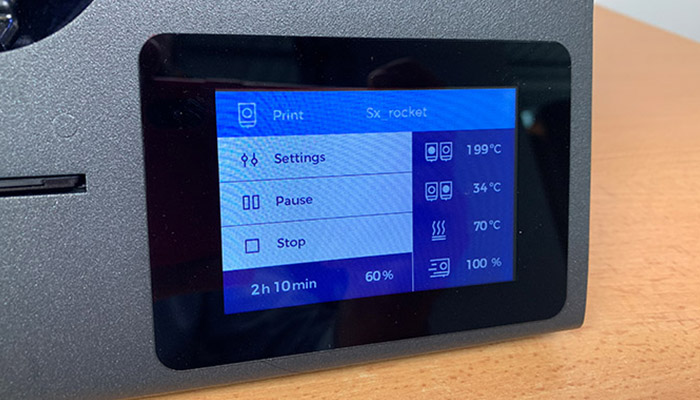
The touchscreen | Credits: 3Dnatives
Calibrating the machine took us some time but was done in a very user friendly way. The touchscreen guides the user through a printing surface calibration, and X, Y and Z axis calibrations. In order for the Sigmax to ensure great printing quality during the Duplication or Mirror mode, the user might need to manually install some shims to mechanically correct the Z offset. This a procedure very specific to the BCN3D Sigmax that we haven’t seen on other printers so far. The steps on how to do so can be found on the website, and all the tools needed come in the box. A tip is to make sure the printer is off and the nozzles’ temperature has dropped down (in our case they had reached 200°C during the calibration process). Once these steps were completed, we could go ahead with downloading BCN3D’s slicer and start 3D printing!
3 – BCN3D Cura Software
For the software part, BCN3D is one of the manufacturers that did not feel the need to reinvent the wheel, opting instead for a custom version of the one of the most famous slicers, namely Cura. Simply called BCN3D Cura, the software uses the architecture and settings available in Cura with an additional feature, the Mirror and Duplication modes, made possible by BCN3D’s IDEX technology.
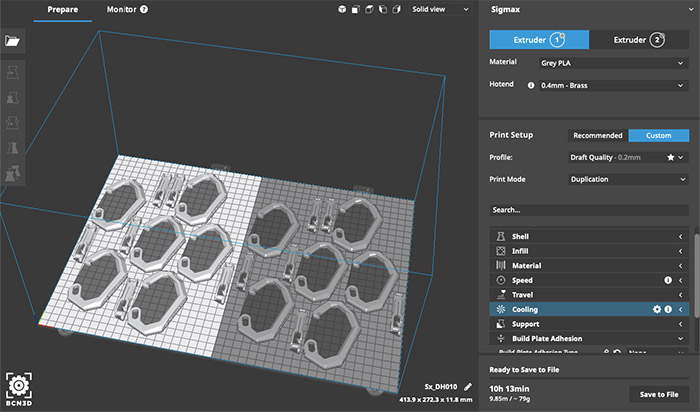
The sigmax uses a custom version of Cura to slice the 3D models
In concrete terms, by activating the Mirror or Duplication option on BCN3D Cura, your tray is divided into two equivalent trays. While the Mirror mode replicates the 3D file by symmetry on the X axis, the Duplicate mode copies the desired model in the exact same way. The result is manufacturing time reduced by half.
For example, the creation of the carabiner 3D model (see below) required 2 hours of printing. For 10 units of the carabiner, in Standard mode (i.e. only one extruder comes to print the 10 pieces), the 3D printer would naturally take 20 hours of printing. However, in Mirror or Duplication mode, it would only take 10 hours for the 3D printer to make the 10 units. Duplication and Mirror modes allow you to halve the printing time of series printing.
4 – First 3D Prints
The Sigmax can print in a variety of thermoplastics, like PLA and ABS as well as in engineering materials like Nylon, PET-G, TPU, PVA and Composites. Whilst it accepts filaments from other manufacturers, sticking to the BCN3D ones is recommended for securing high quality prints. The printer can fit two 500g spools, both in the machine itself and on the sides of the build plate. However, if the user wishes to use larger spools that wouldn’t fit in the dedicated slots, he or she can 3D print two external filament spool holders (the designs come preinstalled in the SD card) and attach them on the rear of the machine.
As with all the 3D printers we review in the 3Dnatives’ Lab, we started off by printing a torture test and the infamous “benchy”. After a few prints, the rods supporting the extruders started squeaking a bit, but it was nothing some WD40 couldn’t fix. We were happy with the results, the finished pieces showed great detail. We then continued by experimenting with dual colour printing, which also went very well, getting a near-perfect result with BCN3D’s renowned Gaudi’s Dragon of Park Güell design. We then switched to printing with PETG and even added PVA for the designs’ support. All prints showed great quality. Perhaps the one thing that wasn’t ideal was the way the build plate attaches to the printer. Even though it is magnetic, the magnets are not too strong, resulting in the whole thing shaking when we used the spatula. We often had to take off the plate from the 3D printer in order to use the spatula. Last but not least, we had to put the IDEX technology to the test. So, we printed in ‘duplication’ and ‘mirror’ mode, unsurprisingly getting great results once again.

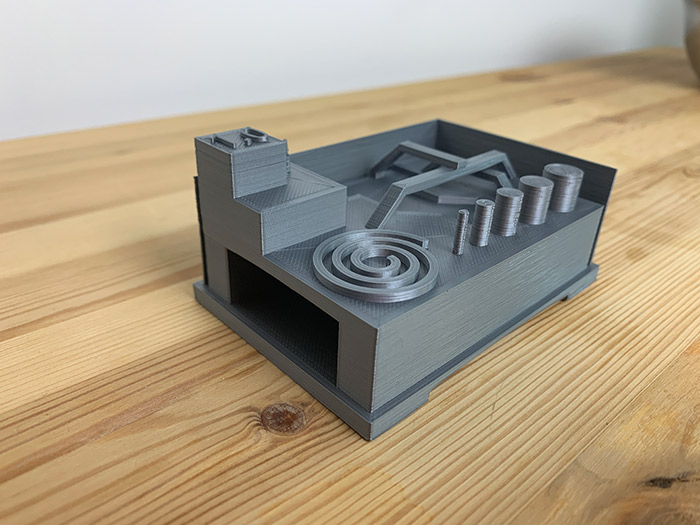
Another Spiral Chess model by JaaYoo
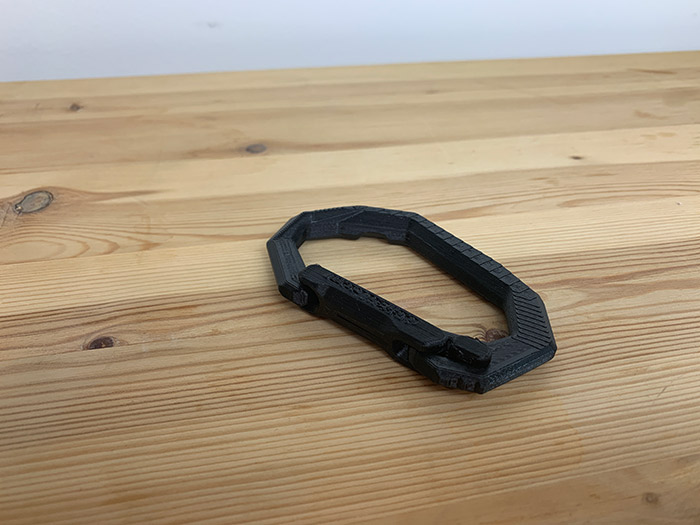
Origami Carabiner model by DDF3D
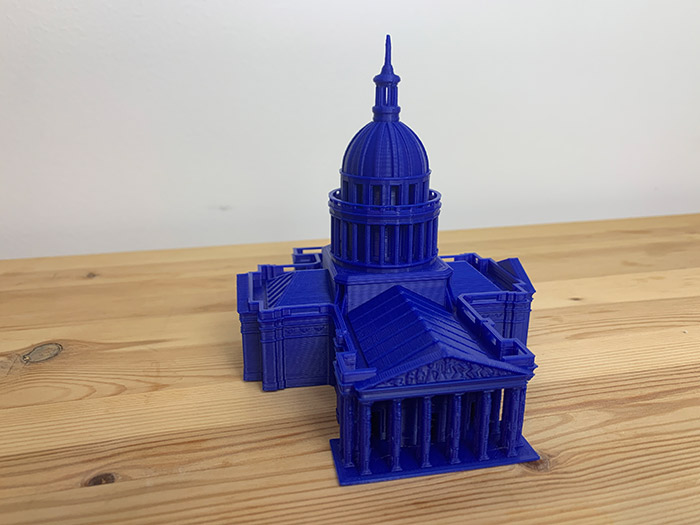
Pantheon model by Max7th
Torture Test by Makerbot
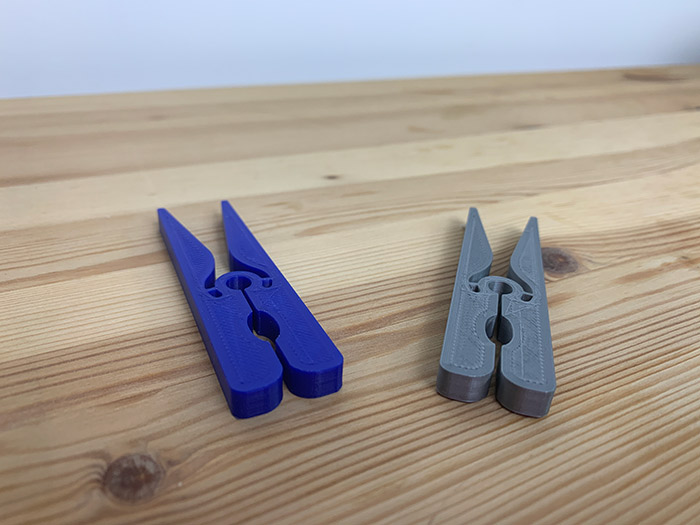
Clothes pegs model by BCN3D
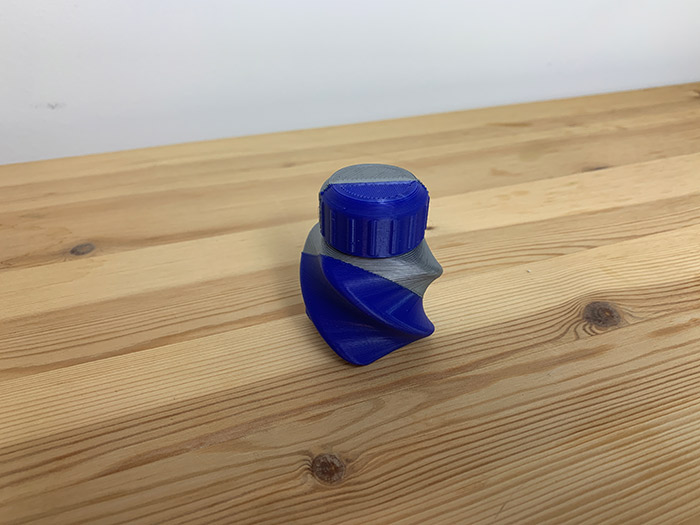
Twisted Bottle & Screw Up model by David Mussaffi
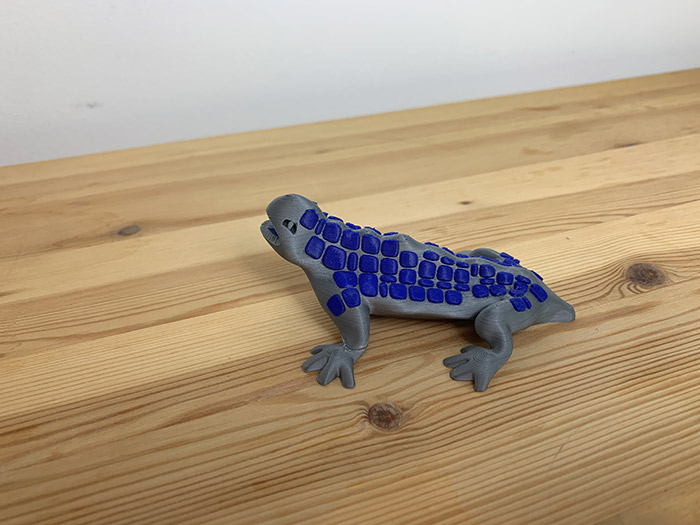
Dual Draudi model by BCN3D
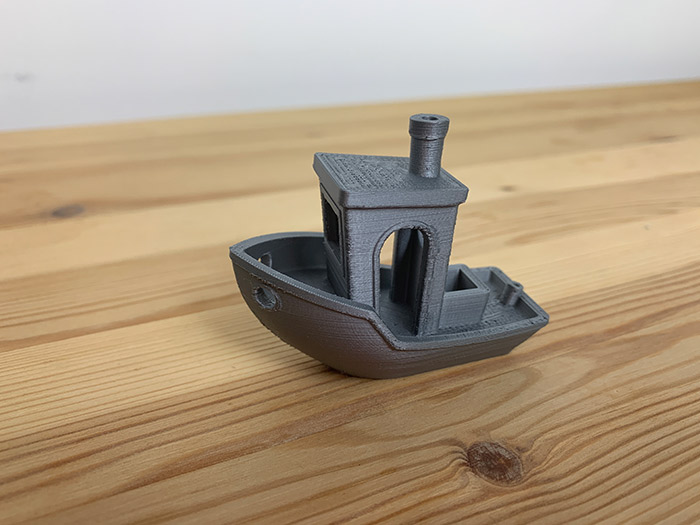
Benchy3D model by CreativeTools
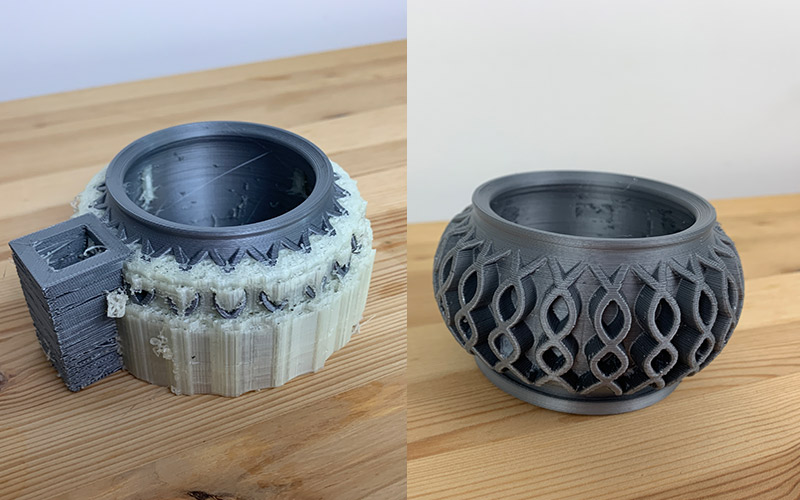
Succulent Planter 11 model by cgpena, 3D printed with PVA supports
Below, you will find our final score and thoughts on the Sigmax R19.
For more 3D printer tests & reviews from 3Dnatives Lab, go to our dedicated page HERE.
Conclusion
- 3D Printer Content 8.5/10
- Software 8.5/10
- Quality of the Prints 9.5/10
- Ease of Use 9.5/10
Positive Points
– Printing quality
– Independent dual extruders
– Reliability
Negative Points
– Open enclosure
– Price
– Building Tray
Whether for multi-material, dual-color printing or for printing multiple models simultaneously, the IDEX technology developed by BCN3D is truly effective. The two independent extruders offer high printing quality and significant time savings for the production of FDM part series. The only negative point is an open printing chamber that may discourage some people from printing more technical materials. A problem quickly solved by the manufacturer BCN3D who already offers a speaker equipped with an optional air filter for 320€.
A machine that is therefore designed for users who want to print 3D parts in quantity while ensuring quality and repeatability that is still far too rare in FDM. The price to pay to move to production? About €4,500, a budget that puts the BCN3D Sigmax in the upper range of desktop FDM 3D printers, in direct competition with models like the Ultimaker 5S, Raise3D Pro2 Plus or Zortrax M300 Dual. To learn more about the Sigmax R19 3D printer, visit the BCN3D Technologies HERE.