


3Dnatives Lab: EinScan-S 3D Scanner by Shining3D Test
Today the 3Dnatives lab will be embarking on a test of the Einscan-S model from Shining 3D. This 3D scanner was born thanks to a Kickstarter campaign in early 2015, where they were able to scrape together a whopping $123,000 USD to develop their product.
As a company who is also present in the 3D printer market, Shining 3D offers the EinScan-S, EinScan-Pro and EinScan-Pro+, for a price that is well below that of professional models that are currently on the market. Before beginning our test, we would like to give a big thank you to Machines-3D for loaning us this scanner for our test!
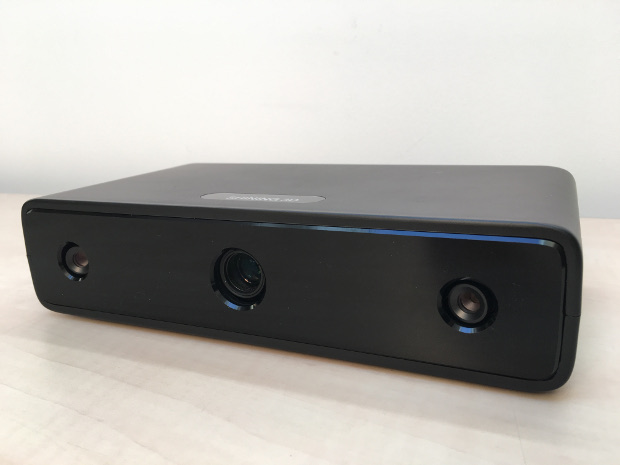
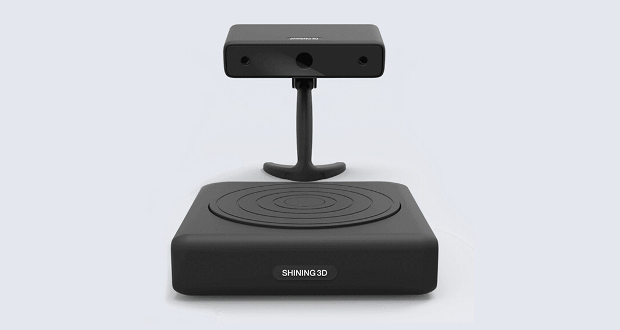
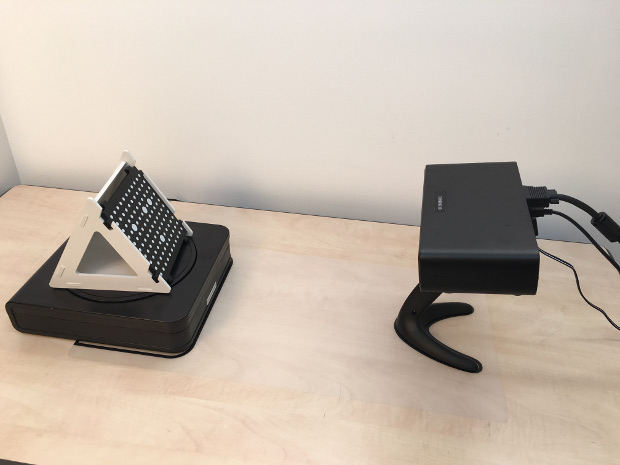
You can see the 2 cameras at the ends and the video projector in the center
The EinScan-S 3D scanner is based on a technology called “Structure Light”. This method captures the 3D model of a physical object, using two cameras and a video projector.
To go more in depth, Scanning begins with light grids being projected onto the object from the scanner’s video projector. These distort themselves depending on the distance and the shape of the object. The object is then placed onto a turntable that rotates 360°.
There are two cameras that are mounted on the left and right ends of the scanner that make a series of photos. The software then deduces the pattern of the shape of the object and connects the different shots between them. The resulting 3D model can then be exported into either an STL or OBJ format that can then be printed in 3D.
Unpacking
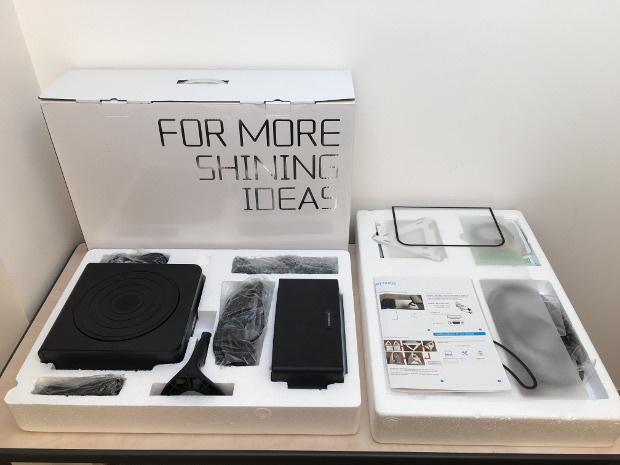
The EinScan-S comes with a rotating table, the scanner, a stand, and a fixing screw. Many cables are also included such as two for the power supply (for the tray and scanner), two USB connection cables, a VGA cable, a VGA to HDMI adapter, and a mini USB cable (which we’re not quite sure what it’s use is as of yet..).
Shining 3D also supplied a calibration template and a positioning mat that ensures the correct distance needed. A quick start guide was also provided in English, which includes a list of the accessories provided. For those French speakers out there, there is a leaflet in French included.
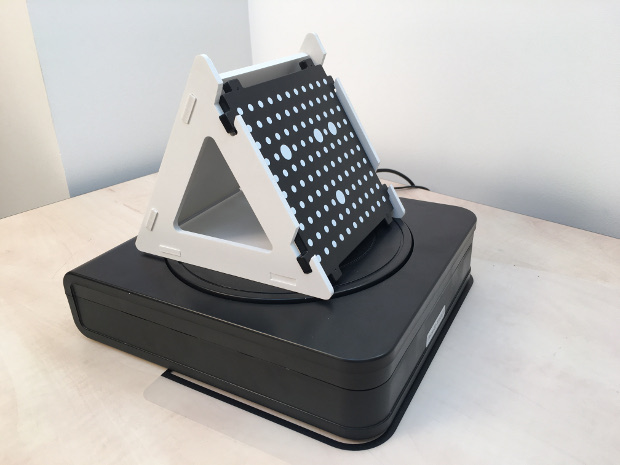
The calibration template on the EinScan-S rotary table
The EinScan-S scanner has slightly larger dimensions than that of the 3D Systems Sense. It can scan objects in automatic mode, with a volume of 20 x 20 x 20 cm., which is equivalent to that of the Digitizer by MakerBot. In manual mode, you can take the scanner in your hand our you can fix it onto a tripod, allowing you to digitize objects a size of less than 70 x 70 x 70 cm.
Installation
Installing the scanner was not very complicated. Using the support mat that was included to position the scanner and rotating platform, we were able to connect the devices to the computer with the software we downloaded from the Shining 3D website.
We should note that with each new installation, the scanner will need to be calibrated. This operation can be done as soon as you’ve changed your location or have changed the brightness. It lasts for less than 3 minutes and it allows you to scan in a way that optimizes the final scanning results. An additional step called “White Balance Test” will allow you to do scans in color.
The only negative point with the installation process is when connecting the cables to the back of the scanner. This is because when connecting them, it makes the device slightly unstable, which results in a change in the orientation of the scanner on the rotating plate. Because of this, is important to make sure that your scanner is stable before you start scanning.
Software
With a minimalist interface, the software may seem simplistic. However, it does offer several scanning options in either automatic or manual mode. In the software, you will be able to choose from 4 brightness modes: bright, medium, dark/ difficult to scan or bright/dark.
The software will then offer you three different qualities of digitization: high detail, middle detail and low detail. Only the last one will let you take into account the texture and the color of the object.
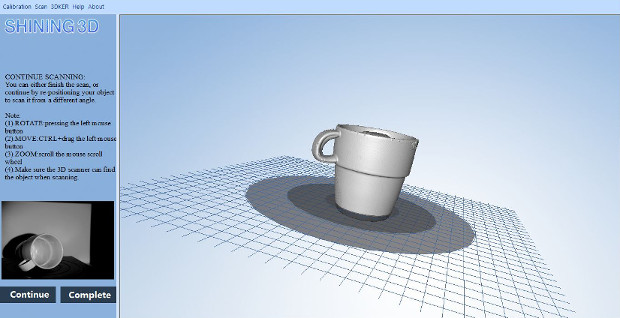
Once the scanning is complete, you will be offered the ability to continue the scan. This gives you the opportunity to reposition the object in order to scan it in another position.
Once the operation is complete, you can print the object directly by saving it as an STL or OBJ file, share it or restart the process. Unfortunately, the software does not provide a way for you to modify/repair the 3D model. Something that would have been practical for those who are familiar with 3D software.
To begin our test of the EinScan-S scanner, we started in 3 different parts:
- A scan of a single monochrome cup
- A scan of a small white monochrome bust
- A scan of a polychrome figure
The rotating plate gives a uniform 360° rotation, in the same way as the MakerBot Digitizer. You will have to do multiple scans in order to reorient the object to get the parts not visible during the first scan of the models.
Below, you can see the results of our EinScan-S:
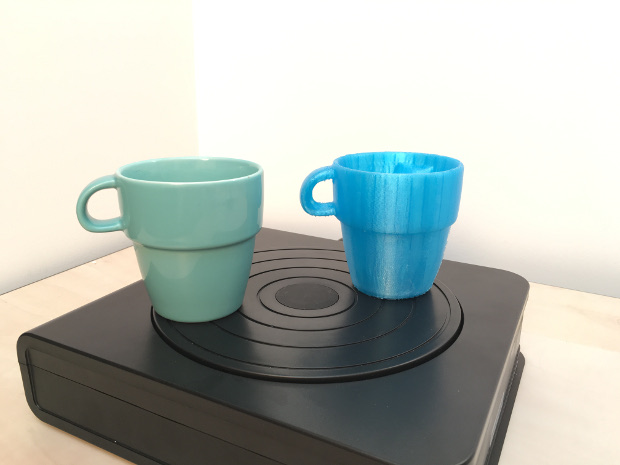
Despite some slight concerns when trying to capture the inside of the cup, the results were almost identical to the original. To go even further, we decided to print the replica in 3D. A result that was very close in proportion to the original.
For our second step, we wanted to test the digitization of a white monochrome bust that was small in size, but displays many fine lines. To optimize the quality of the scan and to accentuate the contrast of the colors, it is advisable to place a dark color background (we chose black). Our digitization of our Zombie bust was successful!
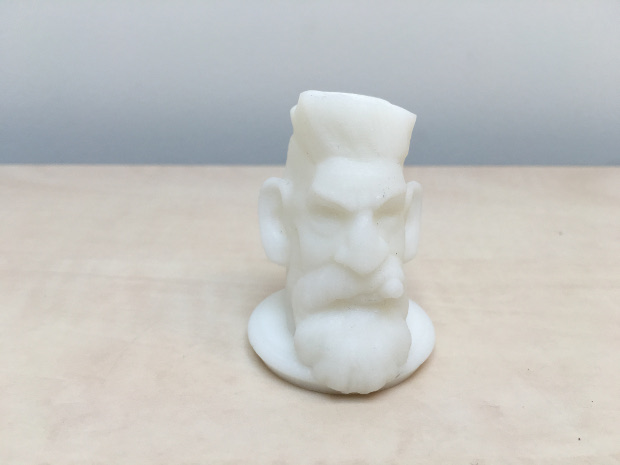
Scan of the Zombie Hunter Head bust by Sculptor
To do the next step, we chose a 3D Buddha bust that featured many details such as the facial features and headdress. The result is not very good despite the little contrast in regards to the digitizing of the bust. In addition, the upper part of the bust protruded from the frame, unfortunately cutting it off.
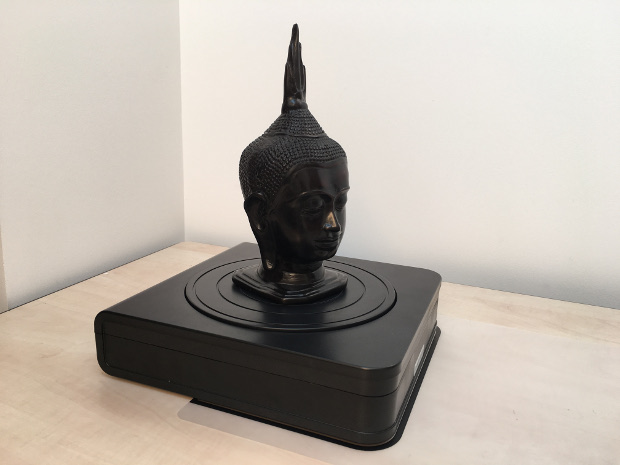
The statue of Buddha with many fine details
To finish, we used a minion figure that offered both light and dark colors. Even though the texture lacked a shine (in terms of colors), the model that we obtained remained very close, if not identical, to the original model.
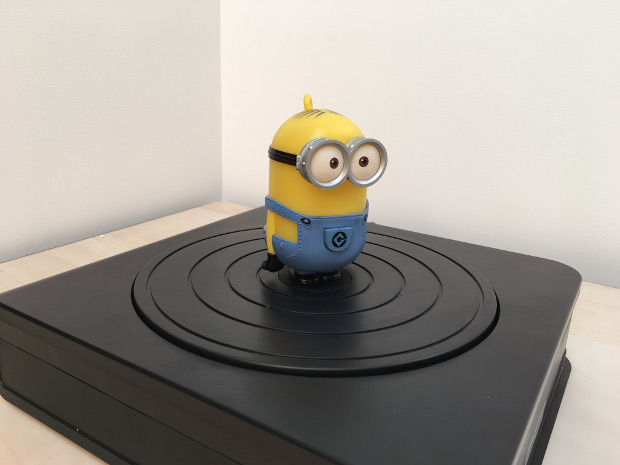
A Minion who displays different colors


