


Lab 3Dnatives: Robo R2 3D Printer Test
Though not as well known in the European market, American manufacturer Robo 3D have been making much noise as of late. As well as releasing their Robo C2 model, they have also released their higher end FDM 3D printer, the Robo R2. These two 3D printers offer a new design and include a variety of new features, all at a fairly low price.
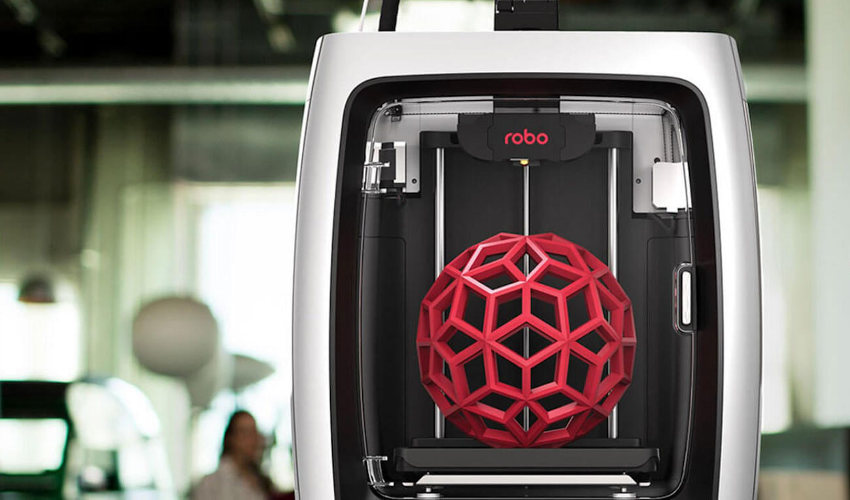
3Dnatives recently had the opportunity to test the Robo R2 3D printer, scoring it impressively with a 8.6/10 rating. This was due to its print quality, large color touchscreen, and low price (under €1000). After this test we have the opportunity to test the Robo R2 3D printer, which includes additions such as a heated plate (up to 100°C) and a larger print volume of 203.2 x 203.2 x 254 mm (vs 127 x 127 x 152.4 mm for the Robo C2).
Another aspect worthy of note is that there will soon be the possibility of adding another extruder to the Robo R2, turning it into a dual extruder 3D printer. Robo 3D have not yet confirmed a release date, but it should release in the coming months.
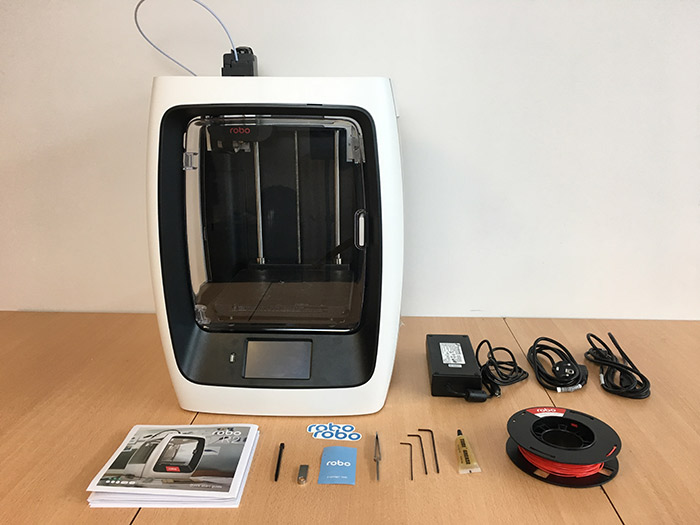
The Robo R2 3D printer with all included accessories.
1. Unpacking the Robo R2
The Robo R2 arrives in a fairly large box in which the 3D printer is well-protected by polystyrene foam and plastic clips to hold the extruder in place. Its larger dimensions of 425.5 x 603.3 x 421.9 mm is the only obvious visual difference from the Robo C2. The printer also comes with a camera to monitor your prints directly from your mobile, an electric cable for the heated plate, and two filament spool holders integrated into the Robo R2’s chassis.
The contents of the Robo R2 are fairly similar to the C2, including the main accessories such as a spatula, a 250g red PLA filament spool, power cables, a USB key, lubricant for the axes, a stylus for the touchscreen, and an instruction guide. The only thing we felt was missing was given the presence of the heated plate, a coil of ABS and BuildTak for the tray.
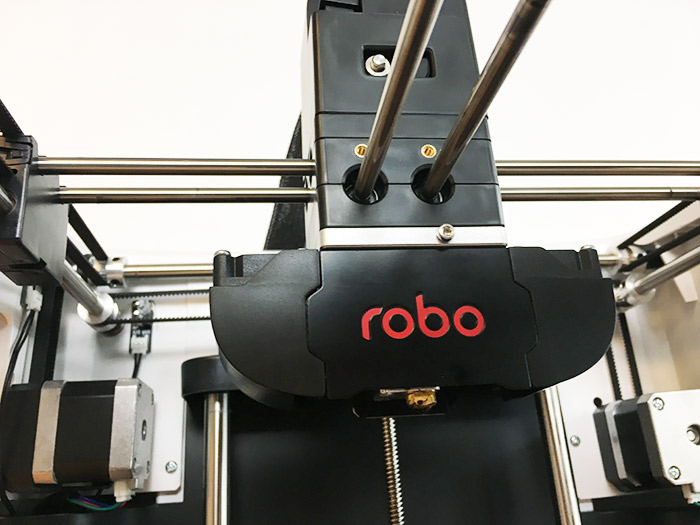
The Robo R2’s extruder is in direct drive.
2. Installing the Robo R2 3D Printer
The quick start guide includes all the information you need to get you started quickly. Firstly, you need to connect the mains, power on the printer, connect to the WiFi network, update the printer’s OS, calibrate the Z axis, and then load the filament. You can easily carry out these instructions on the Robo R2’s touchscreen.
The extruder is in direct drive, with a sensor at the back of the machines which checks for material. Remember to pass the filament through the outermost entrance into the extruder. This helps avoid the printer pausing the print, stating ‘lack of filament.’ This is only a small concern however which should be corrected in updated versions of the software.
The heated plate is already connected normally, but it is useful to remove it so it is easier to remove prints. The cable is located at the back of the tray and is easy to clip and unclip. A message will the show up on the touchscreen asking you to reconnect the plate. You will need to however watch out for the cable twisting, which will prevent the tray from descending.
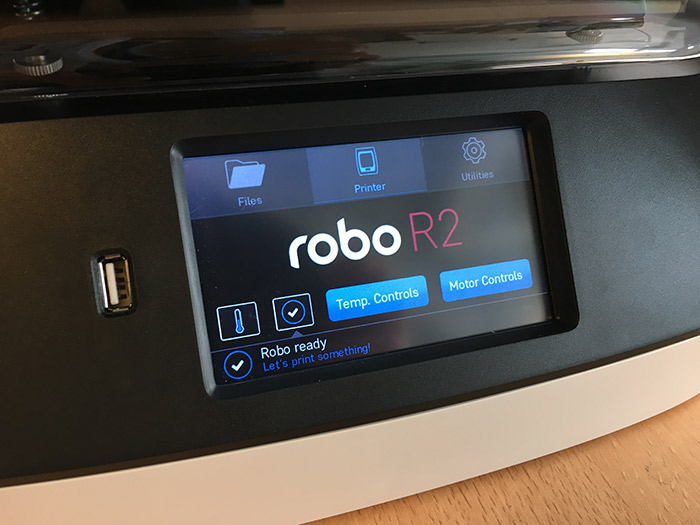
The Robo R2 has a full-color touchscreen which is very easy to navigate.
3. Using Cura Software on the Robo R2
Unsurprisingly, you are recommended to use the Cura 3D software slicer for the Robo R2 on Windows or Mac. On Mac you will need to add the Robo R2 directly via the Cura menu, entering its custom dimensions. The Robo 3D website has all the details for adding print and material profiles, which you can find here.
You can print by connecting your computer, a USB key, Ethernet, WiFi, or from the mobile application. As with the C2, you can store your 3D files in the printer’s internal memory.
4. Printing
Our first 3D printing tests used the PLA filament provided by the brand, as well as a classic white PLA. We tested the print quality out by printing a torture test, and a 3D Benchy to start with. Then, we tested a long 24 hour print of a curved honeycomb vase and a more detailed print of a bust of Charles Darwin by MAAS_collection.
We then used ABS filament with the heated tray (at 100°C) at 230°C. We printed a Forbidden Watchtower by kijai and a G-Clamp by johann517.
The prints were completed without any major hiccups or errors, revealing clean pieces. Warping is possible with ABS models, but is easily negated by changing the temperature of the plate or the extrusion speed. The more profound difficulties were post-printing in removing the print from the tray. This could be difficult with the spatula and also risked damaging the plate by forcing removal. Whilst the C2 included an on-board BuildTak, the brand felt the R2’s PEI-type tray was sufficient. This can make removing prints from the tray complicated.
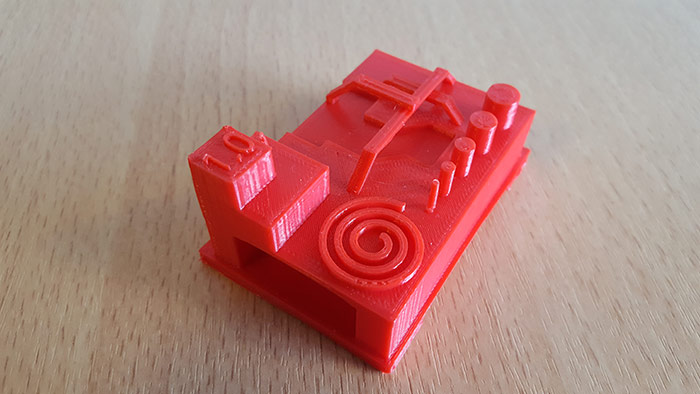
The torture test.
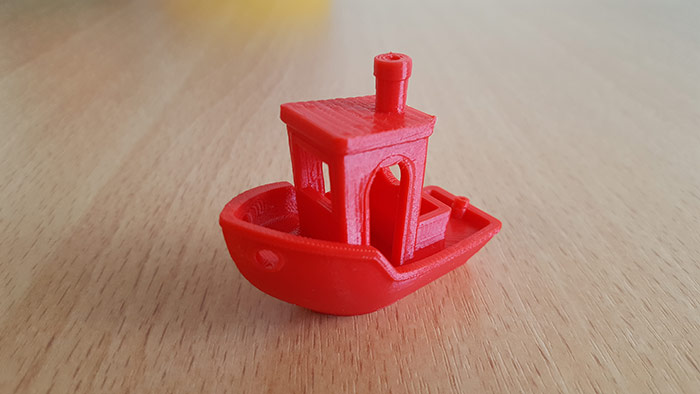
3D Benchy model.
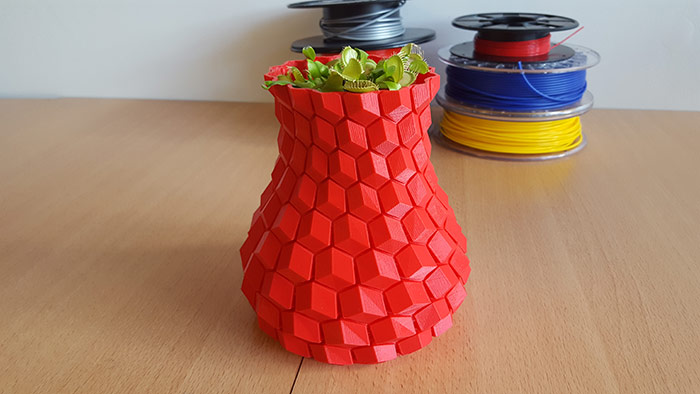
The honeycomb vase print took 24 hours continuous printing.
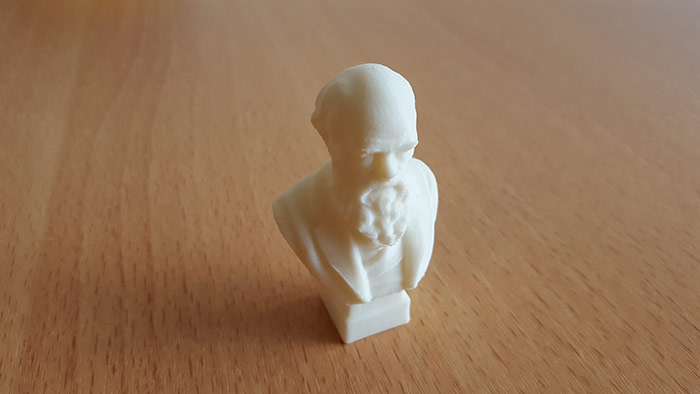
For details, we printed a bust of Charles Darwin.
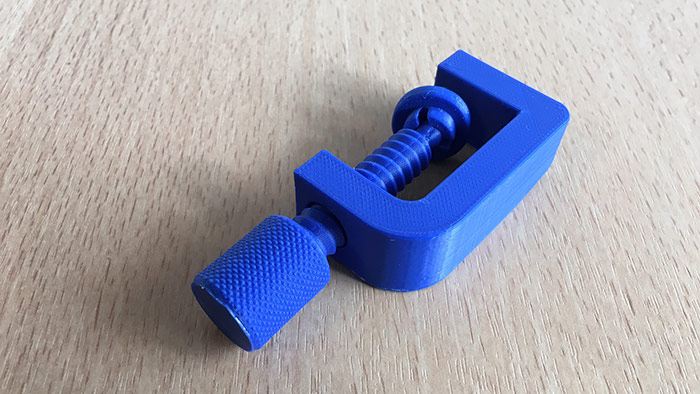
Functional G-Clamp 3D printed with ABS.
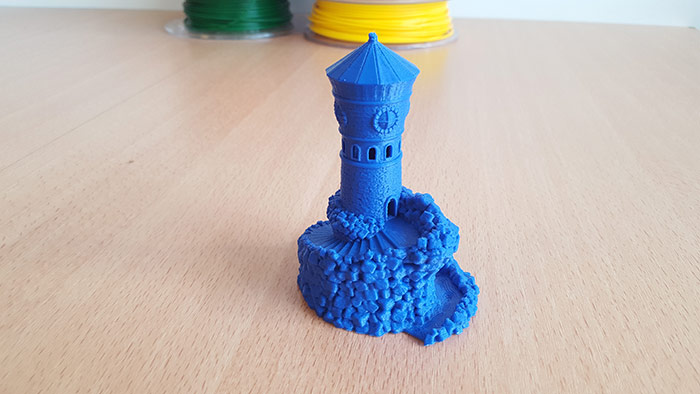
We printed this watchtower print from ABS with the heated tray.
What do you think of the Robo R2? Let us know in a comment below or on our Facebook and Twitter pages! Don’t forget to sign up for our free weekly Newsletter, with all the latest news in 3D printing delivered straight to your inbox!
Conclusion
- Printer contents 9/10
- Software 8/10
- Print Quality 8.5/10
- Ease of use 9.5/10
Positive points:
– Price
– Production volume
– Heated plate
Negative points:
– Removing prints from plate
– Awkward touchscreen
The R2 by Robo 3D offers a larger manufacturing volume and a heating plate compared to the C2. We can see that the manufacturer’s range of machines has been thought out to meet the expectations of most users. Robo 3D have set out to impress with these machines, and expand worldwide.
Overall, it is difficult today to find a closed machine that is Plug & play, equipped with a hot plate and connected to WiFi for under €1700. Robo 3D have managed to achieve this however. Some negatives however include the lack of a Buildtak (although well proposed with the C2) or touch screen being slightly capricious when you want to refrain from using the stylus included with the accessories.


