


Top 3D Printing Projects With Your Raspberry Pi
A Raspberry Pi is a credit card sized computer that can be bought for as a little as $30. The device was invented in an endeavor to encourage people to learn how to program computers. A Raspberry Pi can run on an SD card like those used by cameras and can be charged using a USB phone charger. By combining the accessibility and freedom of manufacturing with 3D printing and programming with Raspberry Pi, the maker community has come up with several innovative projects that you can try out at home! From ventilators, to tablets and telescopes, we’ve compiled a list of some of our favorite 3D printing x Raspberry Pi projects.
Covid-19 Ventilator
In response to the prospective, and later confirmed, shortage of ventilators in countries across the world stemming from the pandemic, MakAir developed a mass-producible open-source Covid-19 ARDS ventilator. The ventilator itself can be 3D printed with either an SLS, SLA, or FDM 3D printer. MakAir recommend using an SLS 3D printer such as the HP Multi Jet Fusion. The ventilator’s control unit comprises a Raspberry Pi 4 computer, plugged to a Raspberry Pi Touch Display. You can find the full instructions HERE.

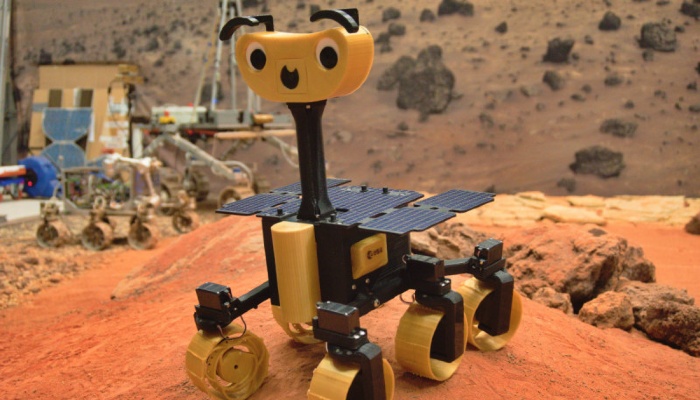
ExoMy, the Mars Rover for Amateurs
Wouldn’t it be amazing if there was a robot meant for space that could be built with a simple 3D printer? Well that’s exactly what Maximilian Ehrhardt and Miro Voellmy from the Planetary Robotics Laboratory of the European Space Agency wanted to create. Named ExoMy, the Martian rover can be 3D printed for only $250. It is composed of 3D printable parts, servomotors, screws as well as a Raspberry Pi 4 and a v2 camera module. Thanks to the affordability and accessibility of 3D printing technology and Raspberry Pi, this project makes space robotics more widely available.
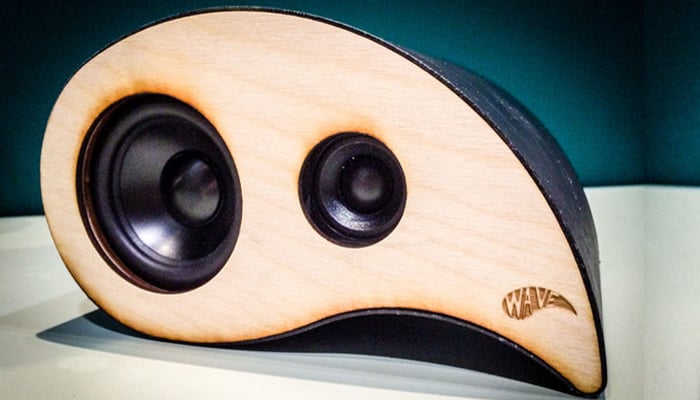
The Wave Speaker
The speaker, named The Wave because of its shape, was first designed as part of an engineering and design course at the Technical University of Denmark. The course offers students the opportunity to develop and design new prototypes, such as this speaker with its unusual geometry, using additive manufacturing. Printed in 3D, The Wave is powered by a Raspberry PI and connects WIFI, allowing music to be played on the speaker directly from the user’s phone. For those who wish to use additive manufacturing to create their own speaker you can find the instructions on Thingiverse!
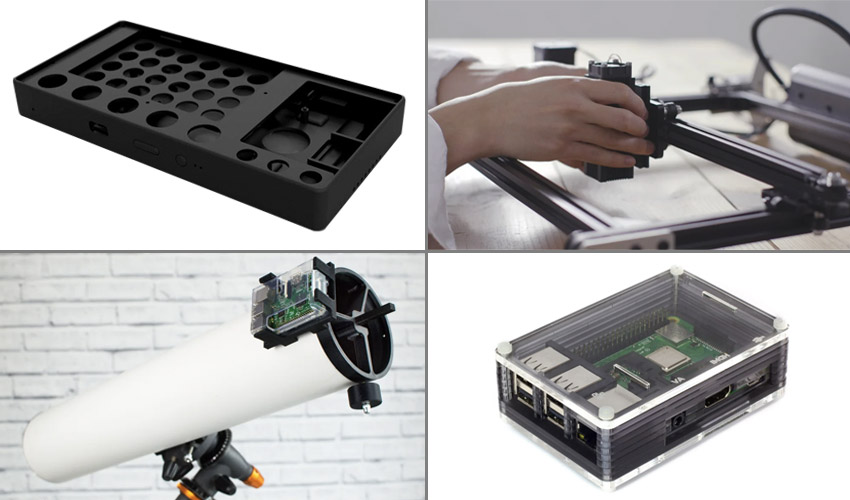
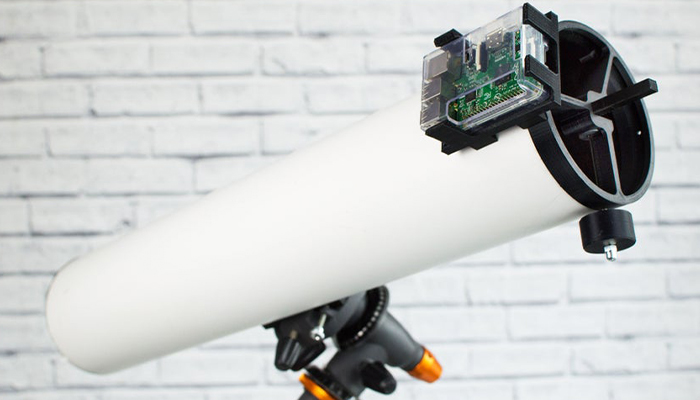
PiKon, the 3D printed telescope
This telescope is a fusion of Raspberry Pi and Icon. The PiKon is the result of a collaboration between the University of Sheffield and Alternative Photonics. Designed for the Festival of the Mind, PiKon aims to demonstrate what citizens are able to do with new, low-cost technologies (3D printing and a Raspberry Pi). Apart from the primary and secondary mirrors, all the components of the telescope were 3D printed. The telescope prototype is connected to a Raspberry Pi with a 3D printed adapter. The Raspberry Pi is equipped with an infrared camera, making it possible to photograph the night sky, but also to record the shots. If you are passionate about astrophotography and new technologies, do not hesitate to find all the information necessary to build your own PiKon HERE.
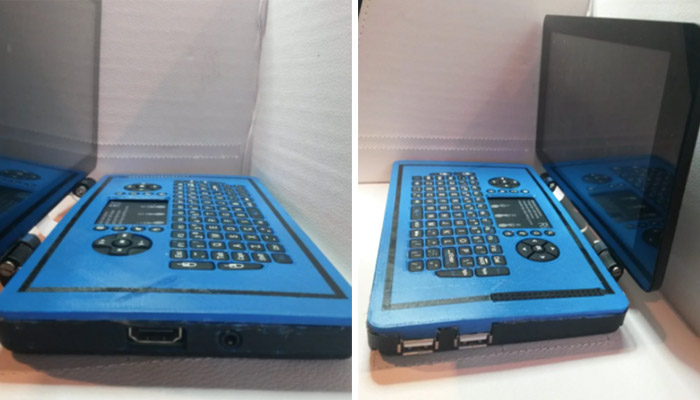
A 3D Printed Laptop
If you have a Raspberry Pi and a 3D printer, you can create your own laptop with this Thingiverse file. As you can imagine, this is not an easy project and basic knowledge in electronics is needed. You’ll also need screwdrivers, wire cutters and a soldering iron in order to build the laptop. After you get all the tools, you will need to follow the instructions to assemble the laptop step by step. To achieve this, the author specifies that he used the Prusa Steel 3D printer to create the parts, with a resolution of 0.2 and a filling of 20%.
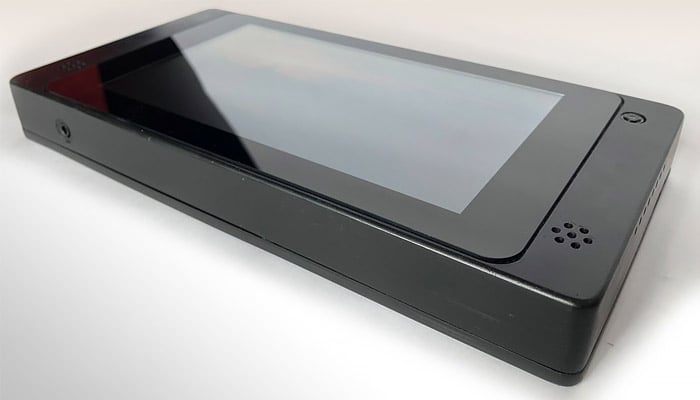
A 3D Printed Tablet
Similarly, our next project is complex but equally impressive. In order to build this tablet, you will of course need a 3D printer and a Raspberry Pi as main elements. The project requires a few other parts which the author details on the website. If you want to get started with this printing project, keep in mind that the commitment is fairly long term. Nonetheless, we encourage you to try to create your own tablet and share the result with us! You can find the website with all the assembly instructions, as well as a video explaining all the steps you need to follow HERE.
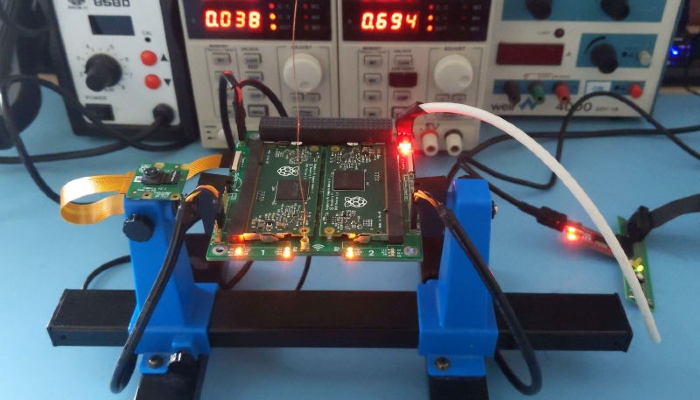
Dual Redundant CubeSat Flight Computer
Our next model is a dual redundant CubeSat flight computer. Redundancy increases the reliability of hardware in space so the idea is that if one system breaks down or no longer responds, another can take over and continue its task. Student Alex Pirie has been working on this project since 2014, and decided to turn to the Raspberry Pi for its low cost and compact size. You can find more information HERE.
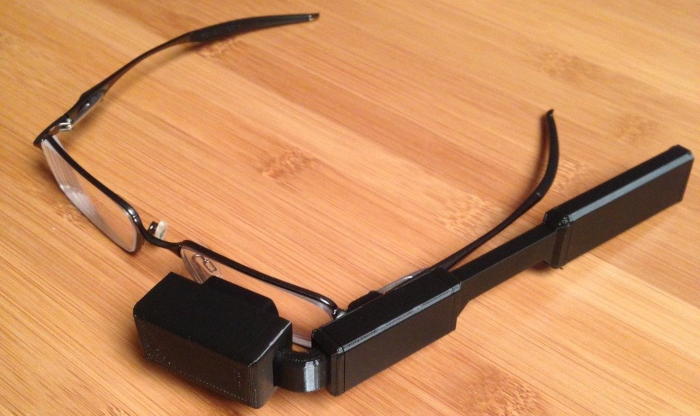
Video Glasses
With this project you can turn any pair of glasses into a wearable mounted computer powered by Raspberry Pi. You’ll need a few things to get you started: NTSC/PAL video glasses; a Raspberry Pi; miniature wireless usb keyboard with touchpad; 3d printer; flat pliers; 30awg wire wrap; a heat shrink pack; screwdriver set; and a composite video cable. For the 3D printing aspect, there are just eight parts that can be printed and assembled in about two hours. The final part acts as a snap-fit enclosure that houses the components inside the NTSC/PAL video glasses. You can download the STL files and instructions HERE.
Build your own 3D Scanner
This project is a little different in that it does not necessarily need to be made with a 3D printer (though it can be!) but it will definitely come in handy for any 3D printing projects. In this step-by-step guide, users can learn how to make their own 3D scanner, with the updated versions even large enough to scan an entire adult person (up to 2m tall). To get started you’ll just need Raspberry Pis, PI cameras, SD cards, Led Strips and powerful power supplies, though the mounts, tripods and other parts could be 3D printed. There is assembly required and some coding (the owner provides python script that can be downloaded), but once you’re done you can make your own 3D scans of your loved ones which you can then 3D print! If you’re interested, the guide and the files can be found HERE.

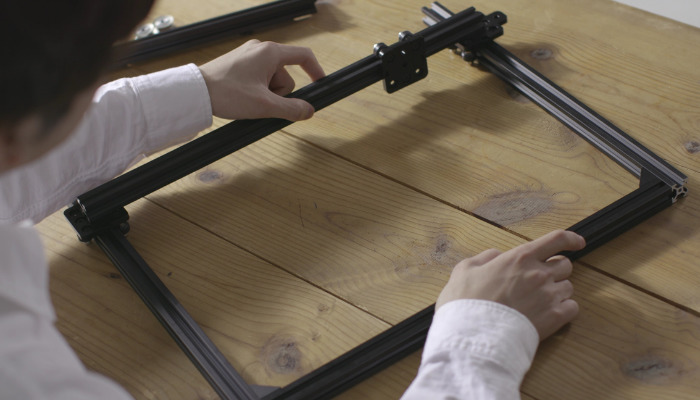
DIY desktop laser cutter and engraver
According to the page on Thingiverse, FABOOL Laser Mini is an open-source, ready-to-assemble desktop laser cutter and engraver. You will need a hex wrench and spanner, but assembly itself will only take about two hours. The end product has a work area of 300x230mm. Raspberry Pi is one of the compatible software, though others are also supported, including Windows, Mac OS X, and Linux. This updated version has improved usability, a stylish design and about ¼ of the previous assembly time. You can find the files HERE.
What do you think of these 3D printing and Raspberry Pi projects? Let us know in a comment below or on our Linkedin, Facebook and Twitter pages! Sign up for our free weekly Newsletter here, the latest 3D printing news straight to your inbox!


