


Painting vs. Dyeing: Which Coloring Method to Choose for 3D Printing?
A wide variety of technologies can be found in the field of additive manufacturing including those able to directly 3D print parts in color. However, this is not the cast for all and most of them tend to create parts in a standard color and then color must be applied during post-processing. In fact, in many industries and applications, such as consumer goods, having colored parts can be an essential feature of final products. Therefore, implementing post-processing techniques that can apply color to newly printed models can greatly facilitate manufacturing processes. Two of the most widely used methods in 3D printing are painting and dyeing.
Although at first glance they may seem very similar, the truth is that, depending on the additive manufacturing technology used, materials and end uses, it will be more appropriate to use one or the other. It is worth mentioning again that there are some 3D printing technologies that allow you to create multicolor parts directly in the manufacturing process. These methods include material jetting (injection of material in the form of resin), binder jetting (injection of colored binder), and filament multiextrusion (printers with two heads that exchange materials). For all other polymer technologies, additional steps will be required to apply color to the final parts. To better understand the differences between dyeing and coating, here is a comparison of the two processes, with a focus on polymeric materials.
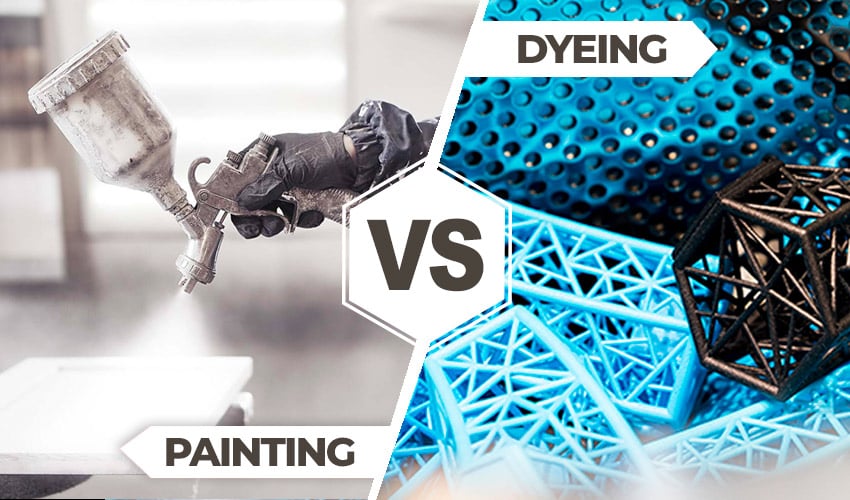
Painting (left) and dyeing (right) are common ways to color parts in post-processing for 3D printing
How Do Painting and Dyeing Compare?
Painting
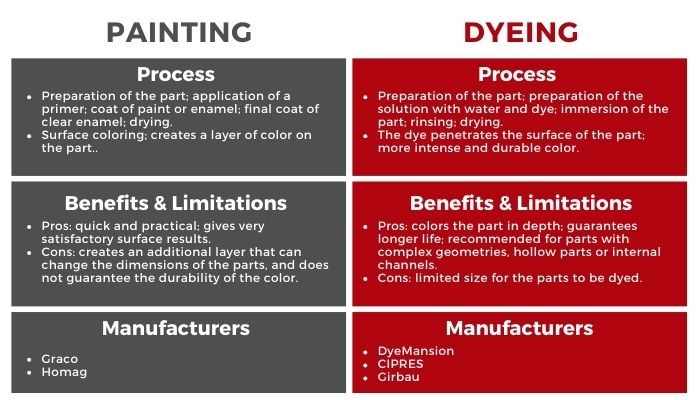
Painting refers to the coloring of parts by applying acrylic paints or enamels. Depending on the final application of the part to be painted, one will opt for manual or automated painting. In any case, the process involves several steps, which take over in the last post-processing stage: application of a primer to prepare the surface, base coat (color) and finally clear coat (clear enamel) to protect the finished part. As for the manual process, although painting with brushes is possible, the most popular, even at the professional level, is spray painting since it allows for more uniform coloring.
Preparation of the part is essential before any staining operation. Obviously, this will depend greatly on the technology, the materials used, and the final application of the part, which may require manual or more professional surface finishing operations. For example, in SLA 3D printing, after removing the support structures, sanding of the marks left by the supports will be required before applying the primer. For FDM printers, when painting PLA or ABS 3D prints with high layer thickness (lower resolution), it may be necessary to sand the entire model before painting so that the lines of the layers are no longer visible.
Once the post-processing has been completed, the supports, any glue or powder removed from the model and the surface sanded, it will be necessary to fix the piece for painting, whether manual or automated. The first step will be to add an initial coat of primer, after which the surface will need to be rechecked for additional imperfections and, if necessary, removed. Another layer of primer is then applied, and after the drying time specified by the manufacturer, the surface of the part will be ready to be painted. The first coat of color is applied and, if necessary, multiple coats can be applied to achieve a uniform and more intense color. Finally, a final polish with a coat of clear enamel is also recommended.
You can use the tool of your choice to apply primer and color. The most recommended are airbrushes and spray cans. It is also possible to add details or draw on the pieces with ordinary brushes. If you use automated systems usually the principle is or same, but humans are replaced by robots, dispensers and the automatic spray guns that operate in a controlled chamber.
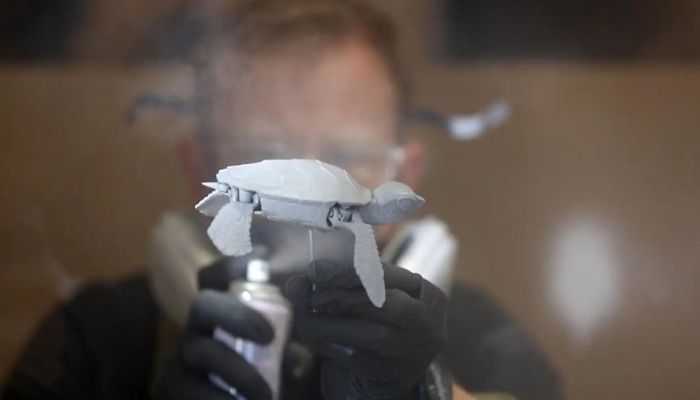
It is important to use the right protections when painting (photo credits: Formlabs)
Regarding the final drying time of the colored piece, depending on the tools used, it can take up to a week for the color to be well fixed on the surface of the piece. During all painting operations it is important to use protection, such as gloves and a mask to protect oneself from inhalation of paint fumes. Clearly with automated systems this problem is negated. Finally, the types of paints and therefore finishes can be different depending on the desired end result. There are semi-matte, semi-gloss and even metallic paints to give, for example, a gold or silver effect.
Dyeing
Dyeing is a process that occurs by impregnation: the piece is immersed in a liquid dye solution at a high temperature for a specified time. The duration of immersion will determine the intensity of the color. The part then absorbs the color in the first surface layers. As in the case of painting, for dyeing the preparation of the part is an essential first step. It will then be necessary to clean the part, remove substrates, dust or excess material, and finish the necessary surface finishing steps before beginning with dyeing. Dyeing is a process that can be carried out either manually or with machines specifically designed for this function, with the last option being the one most widely used in industry.
As for the type of dye used, there are many colors available on the market, and it is also possible to apply a UV-resistant dye, so called because it has the added feature of resisting direct exposure to sunlight without losing color intensity. Another key difference between the two methods is in fact that dyeing is a more durable method of coloring, resistant to wear and fading over time.
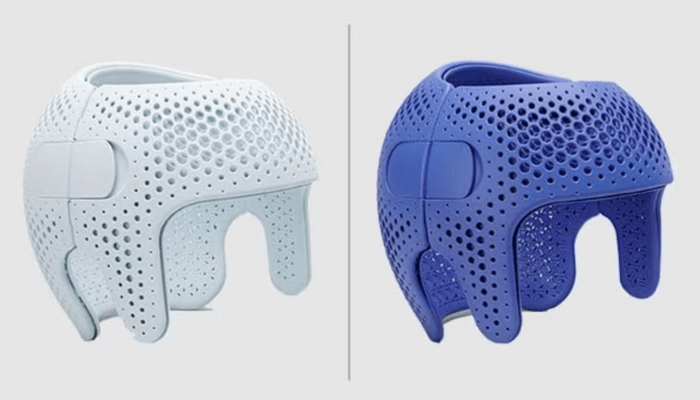
Photo Credits: HP
If you opt for a manual dyeing process, you will first need to prepare the solution by combining dye and water (following the manufacturers’ instructions). The amount of water must be sufficient to completely cover the 3D print you want to dye. It will then be necessary to bring the water to a boil (even using a kettle or with a microwave oven) and pour it, carefully, into the container containing the dye. You can then grab the piece with the help of tongs and dip it into the solution. It is important to do this while the water is still very hot, otherwise the dye will not be absorbed properly. When you are satisfied with the color obtained, you can withdraw the piece once more with the help of the tweezers and shake it slightly to remove the excess dye. After soaking, you should rinse the part thoroughly to remove any residual dye; the last step will be to place it on a sheet of paper towels and leave it to dry.
If, on the other hand, you opt for professional dyeing, there are several 3D print dyeing machines on the market. These work on the same principle: the parts to be dyed are placed in a rotating basket, where they are dyed, rinsed, and then dried, in a more or less automated fashion. This method is clearly advisable for larger-scale, industrial production of parts.
Compatible Technologies and Materials for Coloring
As mentioned at the beginning, there are additive manufacturing technologies that allow multicolor parts to be created directly during the process. However, for many others that work with polymers, some additional steps will be required to apply color to the final parts.
Regarding dyeing, this process is mainly used for parts produced with polymer powder bed technologies such as SLS, Multi Jet Fusion, HSS or SAF. These methods are compatible with polymer powders, for example, nylon (PA11, PA12), polypropylene, TPU, etc. After the printing process, the parts usually have a permeable surface, which is ideal for absorbing the dye and retaining the colored pigment. This is especially clear when working with nylon, as this material has high permeability. It is worth mentioning that companies such as HP have developed 3D printers, such as the Jet Fusion 5420W, specifically designed to create white parts that promote dye adhesion during post-processing.
3D printed models using resin methods, such as SLA or DLP, can also be dyed. This will require the use of specific dyes suitable for these parts and materials. In addition, the choice of material will be critical to the effectiveness of the dyeing process. By dyeing transparent resins, the color of the final part will be more translucent and less vibrant than, for example, opaque resins, which do not allow light to pass through.
There is the possibility of adding color before resin 3D printing processes. For this purpose, it is necessary to mix an alcohol dye of the desired color with the resin in question. The dye will dissolve with the resin, generating a solution that can create uniformly colored parts similar to standard colored resins, but without the need for post-treatment after fabrication.
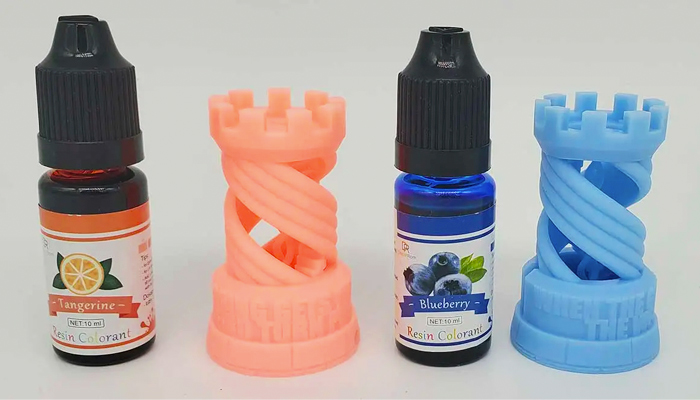
Two 3D resin printed pieces colored by dyeing with two different colors
For FDM technology, the process of dyeing parts will also be possible before production. As with resin, we can dye solid filaments or pellets in advance. In addition, it is also possible to dye parts afterwards, although this is not a commonly used technique. This is because standard thermoplastics, such as PLA or ABS, are now available in a wide range of different colors, so it is easier to directly print parts in the desired color.
However, some more advanced materials, such as nylon (PA6) or high-performance materials, are often not available in different basic colors. In this context, it will make more sense to use dye to color the parts, since polyamides are inherently sensitive to light and thermal or chemical oxidation. Nylon can be dyed with UV-resistant dyes for specific applications that require it.
On the other hand, the painting process is compatible with almost all polymer-based additive manufacturing technologies, as long as it is applied retrospectively. Despite the possibility of working with many different technologies, the choice between coating and dyeing will also depend on the final application, as we will see below.
As mentioned above, the adhesion of color and its retention over time depend on the material used. Because of the permeability of nylon, for example, paint will be absorbed more readily, while other more impermeable materials will be subject to faster wear. One aspect that differentiates painting from dyeing is that painting cannot be done before production, as in the case of dyeing, but must always be applied once the parts have been manufactured.

Nylon is a material characterized by high permeability (photo credits: Markforged)
A similarity between the two processes is that, before applying color to the pieces, appropriate post-processing will need to be performed. As mentioned in the explanation of the processes, this post-processing includes removing the substrates and finishing the surfaces in order to achieve a smooth surface that will allow the color to be applied smoothly. In addition, another common point is that good color adhesion will obviously depend on the material used, but also on the base color of the parts. This means that darker surfaces will not offer the same pigment intensity as lighter ones.
Benefits and Limitations of Painting vs. Dyeing
Both coloring techniques have benefits and limitations. To start with painting, this is essentially a surface coloring technique for the part. This means that while it will be quick and practical and can give very satisfactory results, it does not guarantee durability. In particular, the layer of color can easily come off due to scratches or surface wear, allowing the underlying color to show through.
Another thing to keep in mind with painting is that, as anticipated, this requires care and preparation of the product because it does not hide imperfections. That is why, as already mentioned, it is particularly important to smooth the surface, removing any marks left by supports or any printing defects. Very useful in this regard is the primer, which helps to make the surface more uniform before it is colored.
The coverage is partially uniform, although the porosity of the material can sometimes be visible. A limitation of painting, unlike dyeing, is that it goes to create an additional layer of color on the part, even if it is very thin, this may go to change its dimensions and properties, which is critical for some parts intended for engineering uses for example. This is not the case with dyeing, on the other hand, where the color that penetrates inside the part.
Turning then to dyeing, this represents the best aesthetic and technical solution for products made by additive manufacturing, as it deeply colors the part and thus ensures a longer-lasting color. UV-resistant dyeing also offers long-lasting protection from UV rays, preventing the color from fading over time. An important difference between the two coloring options is that dyeing is the only possible technique, or at least the advisable one, when treating parts with complex geometries, with hollow parts or channels that would be inaccessible via single-color painting. Not surprisingly, this process is used for parts produced by industrial powder bed machines (as mentioned above, with technologies such as MJF, SLS or SAF technologies); or with resin 3D printing technologies.
One limitation of dyeing, however, may be the size of the parts. While you do not have major limitations with painting, dyeing requires a large enough tank or machine to hold the parts and thus is not advisable for excessively large parts. The same is true for machines on the market that can hold a limited number of parts to be dyed and thus have a small size.
Another difference to consider between the two dyeing solutions is that with painting we will use only the color needed, while with dyeing a certain amount of dye will be needed to prepare the solution. After dyeing, in some cases, it is still possible to reuse the solution for subsequent operations. Finally, varnishing certainly allows the use of multiple colors and selected coloring of the piece, while in the case of dyeing a limitation might be the use of only one color for the whole piece.
Applications
As you can imagine, one of the main reasons a 3D printed part is colored is for the aesthetic reasons. 3D printing, regardless of the technology used, can leave surface imperfections, visible layers, surface roughness, etc., so coloring a part, in addition to imparting the desired color, along with other post-processing techniques certainly helps to improve the aesthetics of the part and make it look more polished and homogeneous. This is especially important in sectors such as fashion, interior design or consumer goods where a high level of customization is required, think packaging or the eyewear and footwear sectors.
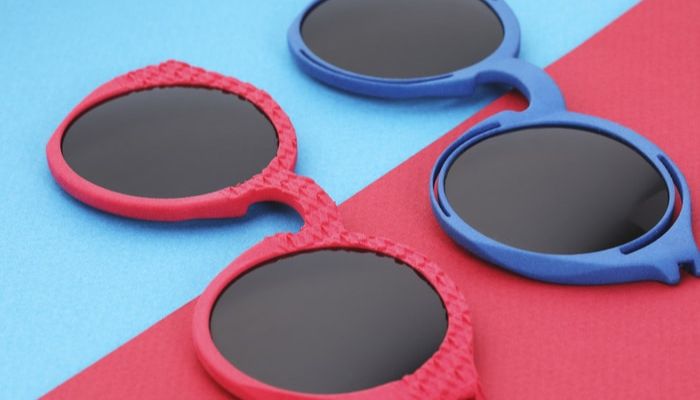
Photo Credits: Sculpteo
The medical sector is also one of the main sectors where part coloring is important. Imagine, for example, prosthetics and medical devices, which are custom-made for patients and are often produced with a white material precisely to be able to facilitate customization. One of the advantages of 3D printing is precisely the ability to customize parts. This is in terms of shape but also aesthetics.
Another interesting application is the creation of 3D printed surgical guides. These are mainly 3D printed with multicolor and multi-material technologies (such as Material Jetting), but for convenience they can also be made with desktop resin or FDM machines, and then colored. Very useful for training before surgeries, these parts are often colored with different colors to distinguish blood vessels, tumors, or highlight areas that are difficult for surgeons to reach.
Finally, 3D-printed parts are also colored because of the properties that certain paints or dyes can impart to the part. We have already talked about UV-resistant dyes, which are essential for ensuring the longest color life and protecting parts that are particularly exposed to sunlight. There are similarly heat-resistant or water-resistant paints, which are then used precisely because of these properties.
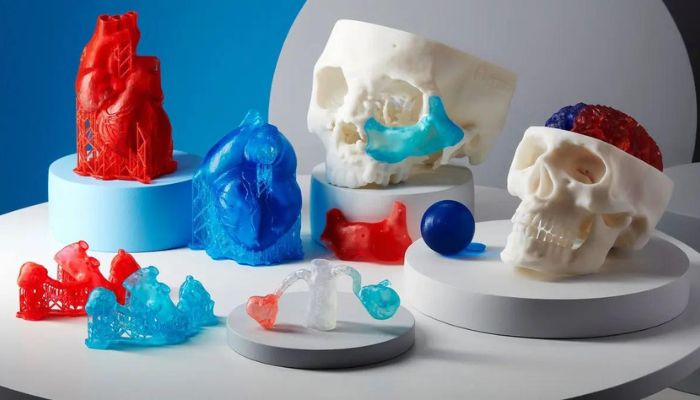
In the medical field, there are many applications that require colored prints
Some of the main industries that color 3D printed parts for these purposes are, for example, the automotive or sports industries, for car interiors, accessories, sports instruments, and in general parts that have both functional and aesthetic uses. It goes without saying that all applications in sectors subject to specific standards and tests, which include, for example, the medical or food sector, will require particularly durable dyes or paints that comply with current regulations, and any additional surface treatments to seal the surface or make it sterile.
Manufacturers and Price
One of the most well-known companies in additive manufacturing is DyeMansion, with its DM60 solution based on DeepDye technology. Compatible with parts created with SLS, SAF, MJF, HSS, SLA and DLP and CLIP technologies, this cloud-based machine has unlimited color options to apply. In the industrial sector, Girbau also stands out with its DY130 machine, which is specially designed for EOS plastic machines or HP’s Multi Jet Fusion. For its part, the German company CIPRES has an industrial solution for dyeing parts, called eCOLOR.
An important difference between dyeing and painting is that for the former there are more professional solutions on the market, while for the latter there are fewer options for industrial processes to automate the actual dyeing. Some of the most prominent companies for automated painting of parts are Graco or Homag. Their solutions offer significant reductions in labor and operating costs, reducing material waste by 30 percent. In addition, specific tools, such as spray guns, aerosols, brushes or other similar painting tools, are required to perform the process manually. The price of these tools can range from $5 for the simplest ones to $100 for the most professional ones.
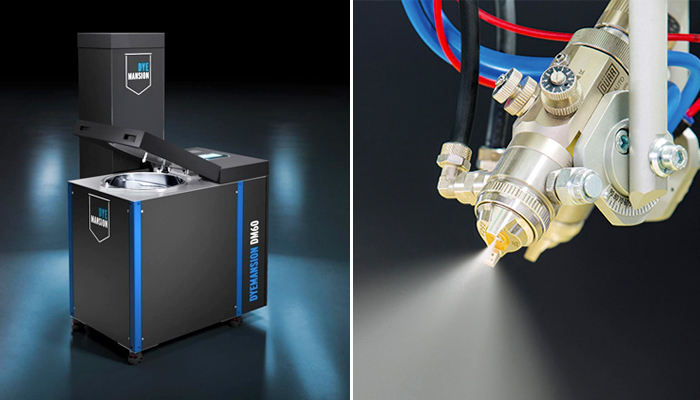
At left, the DyeMansion DM60 solution for dyeing parts. At right, Homag spray gun for painting
In addition to the equipment, it is important to consider the cost of the paint, dye, or pigment used to color the pieces. Among the major companies offering homemade plastic dyes is Rit Dye, with a price per jar of dye usually around $8 (236 ml). Also in this market is Dylon, with dyes costing around $15 (350 g). Both companies have a very wide range of different colors for multiple uses.
However, the more industrial machines, such as DyeMansion, tend to rely on an ink cartridge system. The price varies depending on the size of the cartridges and their use (single or multiple). It is worth mentioning that other companies, such as Formlabs, have developed dye-like solutions to modify color before production. Their so-called “ColorKit,” priced at just over $200, allows for mixing pigments of various colors with the base resin to print colored parts with ALS.
On the other hand, the material used to perform the painting will depend on the type of work done, with brushes and paintbrushes, or by spraying with aerosols and sprays. Spray cans are usually priced at about $10; however, if professional guns (manual or automatic) are used, the price of a can of paint can reach $70 per liter. On the other hand, liquid paints for manual application are affordable and prices depend on the brand, but also on the type of paint (acrylic, vinyl, matte, etc.).
In both cases, one must take into account the additional cost required to protect the user from contact with these materials, which in some cases can be harmful to health. This protection includes gloves, masks, coveralls, etc.
In conclusion, it can be understood that the dyeing process is more expensive than painting if we focus on the industrial machinery and automated solutions that exist on the market. However, when applying color to parts manually, the painting tools are usually more complex, which results in a higher associated cost.
Do you prefer painting or dyeing for coloring 3D printed parts? Let us know in a comment below or on our LinkedIn, Facebook, and Twitter pages! Don’t forget to sign up for our free weekly newsletter here, the latest 3D printing news straight to your inbox! You can also find all our videos on our YouTube channel.


I think painting is the best
I truly believe painting is the best — it’s such a relaxing and creative way to express yourself!
Creating art really feels great. It’s a wonderful interaction.
Creating art feels really good. It’s a meaningful and enjoyable interaction.