


OpenFlexure, an open source microscope to 3D print

Professional microscopes used in laboratories are usually very expensive, therefore many educational institutions cannot afford them. Along with the DIY trend, we find a new culture of collaboration and sharing that is growing every day. This is the case of the OpenFlexure project, presented by Joel Collins and Richard at the University of Bath in the UK. With the aim of offering an efficient solution to schools, laboratories and universities, these open source microscopes can be created through additive manufacturing, for less than $20.
Producing a high-end microscope can cost hundreds of dollars. However, one of the main advantages of 3D printing is that it allows manufacturing costs to be reduced in small series. Both in terms of initial costs, and equipment maintenance, OpenFlexure is a microscope that is accessible to everyone. For only $18 it covers the cost of the printed plastic, a camera and some fixing accessories. Collins said, “We want these microscopes to be used all over the world: in schools, laboratories, clinics, and even homes, if they want the microscope to play with. You just need to make it and start using it. And we want it to be affordable.”
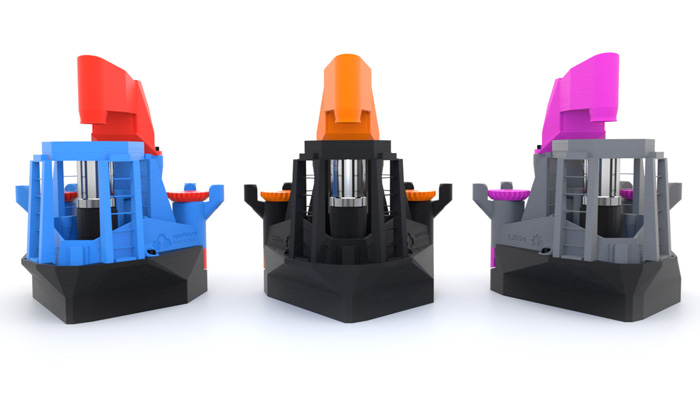
Three versions of the OpenFlexure open source microscope
How do you make your OpenFlexure microscope?
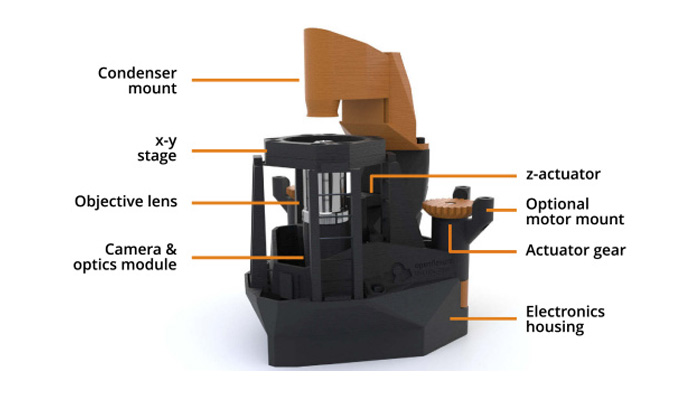
If you bet on this project, here’s what you need to know before you get started. The OpenFlexure is a fully automated laboratory grade instrument (thanks to a Raspberry Pi) with motorized sample positioning and autofocus control. Its design method makes it suitable for small spaces, such as schools or homes. In addition to its main functions, we can customize it with trans and epiluminescence lighting, polarization contrast imaging and epifluorescence imaging. It is designed with an intuitive software interface that allows easy and simple use of the microscope.
The main feature of OpenFlexure is that it allows local assembly thanks to the open source models. For this, it is necessary to 3D print the microscope parts that you will find in the STL files HERE. Don’t just print everything from the STL folder, as there are several possible configurations. The assembly guide that comes in the same web, contains instructions about which parts to print and how to build it. This design aims to minimize both the amount of post-printing assembly required, and the amount of unprinted parts needed. Most of the expense is on the Raspberry Pi and its camera module. The manufacturing process requires only about 200g of plastic and some nuts to assemble. After that, all that is left is to download and install the software to start using the microscope.
Once you have 3D printed the parts you must follow the assembly instructions.
This initiative has already started to expand and currently more than 100 microscopes have been produced for educational and medical projects in Tanzania and Kenya. Bowman says: “Our Tanzanian partners, STICLab, have modified the design to better suit their local market. We have demonstrated another key strength of open source hardware: the ability to customize, enhance and take ownership of a product.” What are you waiting for to start creating your own microscope? Let us know what you think of this project in a comment down below or on our Facebook and Twitter pages! Don’t forget to sign up for our free weekly Newsletter, with all the latest news in 3D printing delivered straight to your inbox!


