How Do Metrology-Grade 3D Scanners Contribute to a Controlled Manufacturing and Inspection Process?
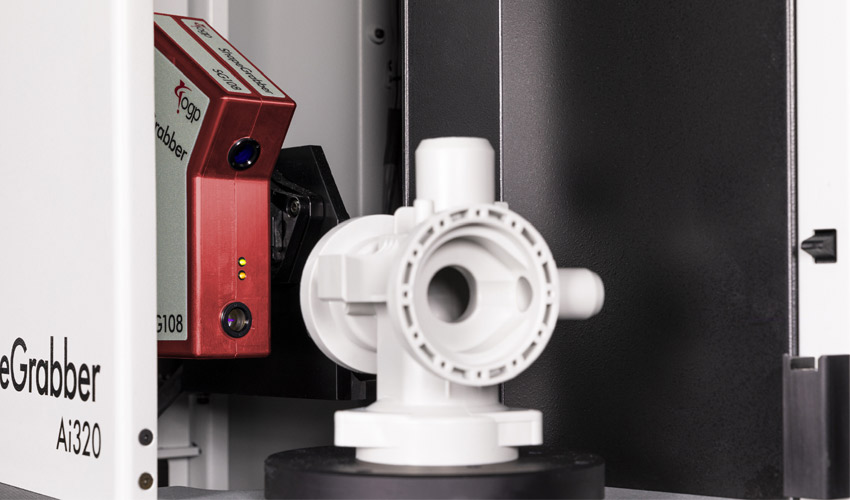
When it comes to adopting additive manufacturing in their company, manufacturers often focus on the machine itself, without necessarily taking into account the entire 3D printing workflow. However, the choice of CAD software, post-processing solution or inspection tool for the created parts are essential links in terms of gaining productivity and efficiently integrating this manufacturing method. This is a point that SolidCAM is particularly attentive to, having already conducted several studies to understand which solutions are the most suitable for their customers. As part of those efforts, they turned to OGP, an industry leader in inspection equipment, to explore metrology-grade 3D scanners and the many advantages they offer, especially to machine shops.
Metrology is the science of measurement, typically the inspection of manufactured parts to ensure they meet their designs. As 3D printing becomes more and more common, we’re beginning to see more organic parts that become increasingly difficult to inspect. Inspecting parts like this is typically performed by CMMs (coordinate measuring machines) where a robot is used to measure the shape of a part by touching it repeatedly via a probe. While this method has long been proven to be effective, it has some limitations such as the need to write the inspection program before starting the data analysis. However, for several years now, the market has been offering more advanced solutions, allowing users to save time and to be more precise. These metrology-grade 3D scanners can be particularly useful when combined with additive manufacturing.
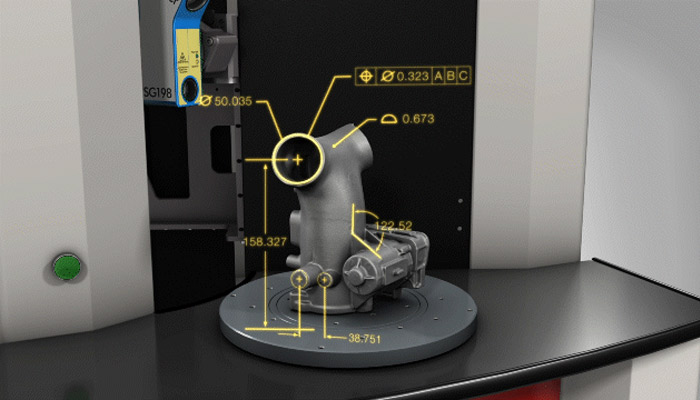
Metrology-grade 3D scanners are ideal for part inspection (photo credits: ShapeGrabber)
Metrology & Inspection
One of the most common uses of metrology-grade 3D scanners in additive manufacturing is for part inspection. As 3D printed parts become increasingly complex in design and form, 3D scanners are proving to be much more flexible than other inspection methods, and offer some key advantages. With CMMs, you need to know upfront exactly what you’d like to measure, and how. Then you need to write your inspection program accordingly and can then begin collecting your data on those identified features.
Peter Genovese, Applications Engineer at SolidCAM, explains, “With a 3D scanner, you just scan the whole part and you have access to all the features of the part at any time. If a user realizes after three months that a new feature of that part turns out to be critical, you can update your entire inspection report with just a few clicks, even if the parts have long since left your building.”
This flexibility also means the operator does not need to start with an inspection routine pre-programmed before anything else can begin. Instead, the operator can start scanning the part while they create the inspection report and identify regions of interest, allowing for more efficient operation.
Reverse Engineering Thanks to 3D Scanners
The adoption of a metrology-grade 3D scanner also facilitates reverse engineering. This process is used to understand how a part was manufactured: its properties, functions and structure are analyzed in order to reproduce the part and modify it. We start with an existing part and “deconstruct” it to understand how it works, create a copy or propose a new version. In many industries such as automotive or aerospace, reverse engineering is more and more popular, especially to produce spare parts that are no longer manufactured today or for which the original drawings are no longer available.
Thanks to 3D scanners, users can very easily scan the part of interest to obtain a 3D model. From there, they can either have the model directly 3D printed, or import it into a CAD program for additional refinement and alterations. The combining of 3D scanning and additive manufacturing can greatly increase productivity in these kinds of efforts.
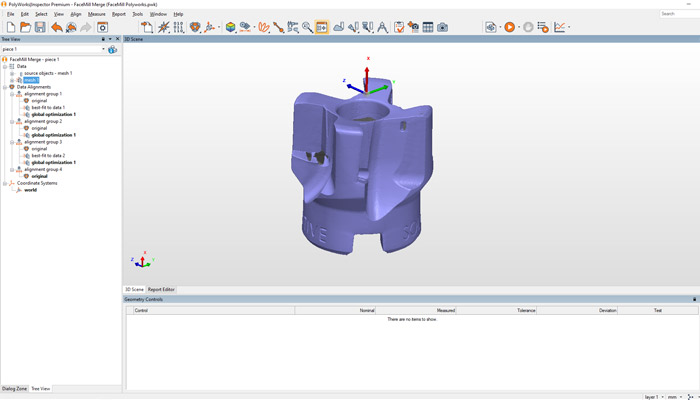
3D scan data of a 3D printed facemill (photo credits: SolidCAM)
Analysis & Optimization
One of the advantages of additive manufacturing is the ability to rapidly iterate to produce the “perfect” part that meets all our needs and criteria. We can easily adjust variables, play with parameters, and modify the design to take full advantage of 3D printing. That being said, if these operations are common in the market, then what about the analysis of these iterations? This iterative phase can generate dozens or even hundreds of different parts: how can users quickly evaluate their performance? This is where a 3D scanner can facilitate this analysis process. Metrology-grade 3D scanners can be used to create semi-automated inspection routines to quickly and efficiently ingest data from dozens of part iterations. The user can collect data on his samples and thus make an informed choice on the manufacturing process.
Kenny Betz, Additive Account Manager at SolidCAM, explains: “Cataloging prototypes and iterations of parts through their design journey can be a costly and time-consuming process. Utilizing a 3D scanner allows us to capture that data quickly and accurately and provide a robust history of the part for future analysis and refinement.”
A 3D scanner also contributes to a better optimization of the printing phase. The scanned data can be integrated into optimization software that is used to refine the part. Among the different solutions on the market, we can mention Live Sinter from Desktop Metal: it is a multi-physics simulation software that simulates the sintering process for parts printed on the Shop System, a metal binder jetting solution. It allows for optimization of the mesh in order to avoid printing errors and to take into account all the factors that can alter a part during the sintering process.
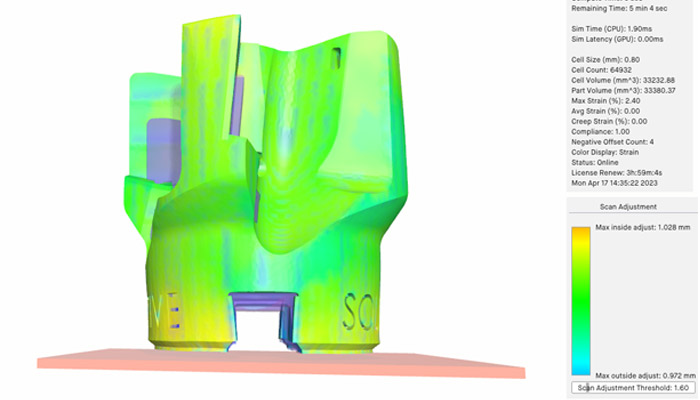
The Live Sinter software showing the adjustments it has made to the facemill model based on scan data (photo credits: SolidCAM)
SolidCAM says, “While the simulation makes some fairly accurate assumptions about the printing and sintering processes and environmental factors, the most reliable way to tune the software is to import scan data from parts you’ve printed on your system and allow the software to adjust its predictions accordingly.”
The integration of a metrology-grade 3D scanner can help optimize the entire 3D printing process; from modeling and printing, to optimization and inspection. The inclusion of this type of system into your manufacturing ecosystem can dramatically improve a company’s success with incorporating additive manufacturing. If you are interested in learning more, do not hesitate to contact the SolidCAM teams who can help you in this process!
What do you think of the use of metrology-grade 3D scanners with 3D printing? Let us know in a comment below or on our LinkedIn, Facebook, and Twitter pages! Don’t forget to sign up for our free weekly Newsletter here, the latest 3D printing news straight to your inbox! You can also find all our videos on our YouTube channel.


