


3Dnatives Lab: Testing the Isun3D L120 from eSun
Best known for its range of filaments for FDM 3D printers, the Chinese company eSun recently entered the resin 3D printing market with the Isun3D L120, a machine at a price below 1,000€ ($1,130)! This is one of the selling points of this machine as it is currently competing against popular SLA 3D printers such as Formlabs’ Form 2 or Uniz3D’s Slash +.
The L120 is based on light curing technology, the liquid resin is solidified thanks to the LCD screen . On paper, the printer offers interesting performance with an X/Y accuracy of 0.05mm and a Z accuracy of 0.02mm, thanks in particular to its LCD screen offering a resolution of 2K (1440 x 2560). Another point to note is that Isun3D is an open solution, which means that it has the advantage of being compatible with a wide choice of resins available on the market.
To learn more about the performance of this affordable and open resin 3D printer, we were pleased to receive the Isun3D L120 in 3Dnatives’ Lab. Find out more about this complete test below.

1. Unpacking the Isun3D L120
Once out of the box, the Isun3D reveals its small size: with dimensions of only 210 x 210 x 386 mm and only weighing 8 Kg it is truly a desktop 3D printer. As a result, it offers a maximum building volume of 120 x 60 x 135 mm compared to Form 2 (145 x 145 x 175 mm) and Slash+ (192 x 122 x 200 mm). However, it is important to remember that when we talk about resin 3D printing, building volumes are generally smaller compared to FFF/FDM machines.
The Isun3D L120 is delivered with its printing tray, resin tray, power cord, Ethernet cable, 3 allen keys and finally an orange UV protection cover that simply “sits” on top of the machine.
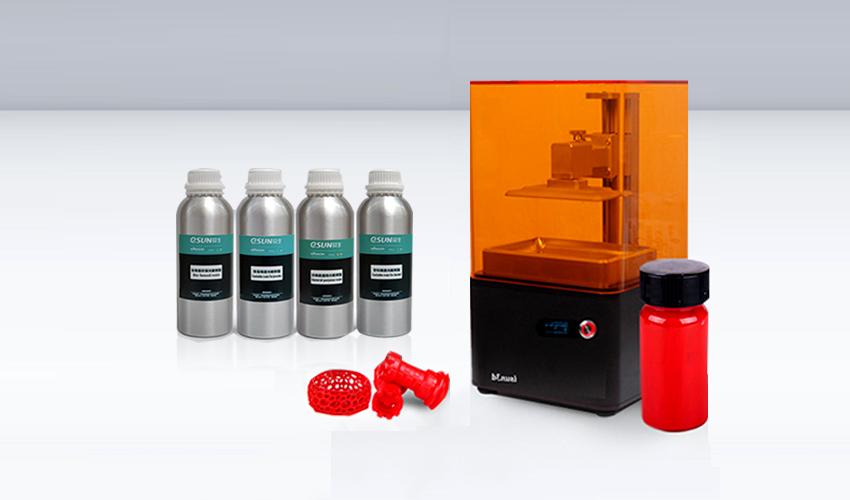
As part of this test, we were also provided with a bottle of white resin from eSun and an isopropyl alcohol bottle that is used to clean the parts, two additions that are not included with the machine by default. We also received a complete kit for the post-treatment of the parts, including protective gloves, a resin filter, two rinsing tanks and a rake to clean the tank. This kit is not included in the basic package, but you should be able to find all the things mentioned above easily in shops.

Close-up of the Isun3D L120 3D printer
2. Installation of the 3D printer
After unpacking the Isun3D L120, the first step was to connect it to the computer. Although the printer has a front-panel display, it is unique in that it can be controlled directly via a web browser from a PC, smartphone, iPad or other device.
Once connected using the Ethernet cable (required for the first connection), you must then connect to the IP address displayed on the Isun3D screen from your web browser (Chrome browser is recommended). This brings you to the printer management page (only available in English) with different tabs: Print Jobs, Printables, Printers and Settings. The Print Jobs part thus makes it possible to import the file previously prepared on a slicing software (see next chapter) or to start printing.
At this stage of the test, however, two points should be noted. The first is that printer management and file slicing are not done within the same interface, forcing the user to juggle between the slicer and his web browser. Nothing dramatic, but it can be slightly annoying in the long run. The second point concerns the connection to the printer management interface, which can be hazardous. In short, once you are connected, all you have to do is enter your WiFi settings in order to avoid the Ethernet cable.
The next step is to calibrate the machine to ensure that the tray is parallel to the flash screen. To do this, simply follow simple steps detailed in the user manual written by A4 Technologie (available in French and English). This quick operation is important and will have to be repeated as soon as the machine is moved or your prints no longer adhere properly to the tray.
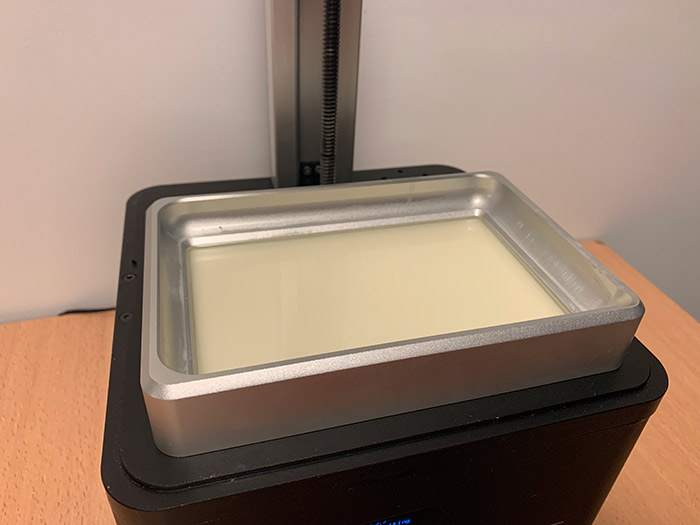
You can fill this tray manually with a wide range of compatible resins
You can then install the resin tray before filling it manually with the desired material (in the same way as on a Slash+ 3D printer for reference). There is no automated filling of the tank, nor any resin cartridge that can easily be inserted into the machine. An experience that is a little less “Plug & play” and that may discourage some people: but in reality doesn’t present any real difficulties.
3. Slicing software
The Isun3D L120 printer is currently compatible with three free slicers to prepare 3D models for printing, namely Isun3D, SmartMaker and NovaMaker. These tools allow the file to be exported not in G-code format but in .CWS format, recognised by the Isun3D L120 printer. As part of the test, we tested the Isun3D software which offers a simple and clear interface.
In addition to the functions of moving, scaling or rotating the 3D model, the software allows you to generate your own 3D printing media, but also to create them in an intelligent way with the “Add support auto smart” option. However, this last option is not yet finalised, as confirmed to us by the team at A4 Technologie. A future software update could potentially correct this problem. Your best option for creating media will always be to rely on your experience!
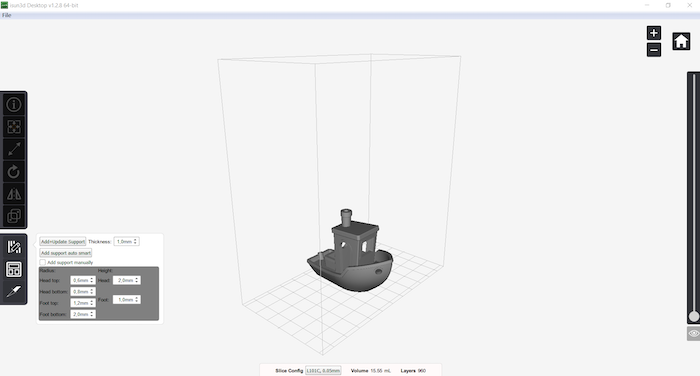
The slicing software from eSun is one of three that you can use for the Isun3D L120
The last important point before printing will be the Slice Configuration menu, which will allow you to select the printing parameters. This is a crucial step to ensure that the part will adhere well to the tray for the first layers and that the 3D printer is perfectly configured for the material used. Among the available parameters, we find the layer thickness, the number but also the exposure time of the first and following layers. Once again, these parameters will have to be calibrated according to your impressions.
4. First impressions
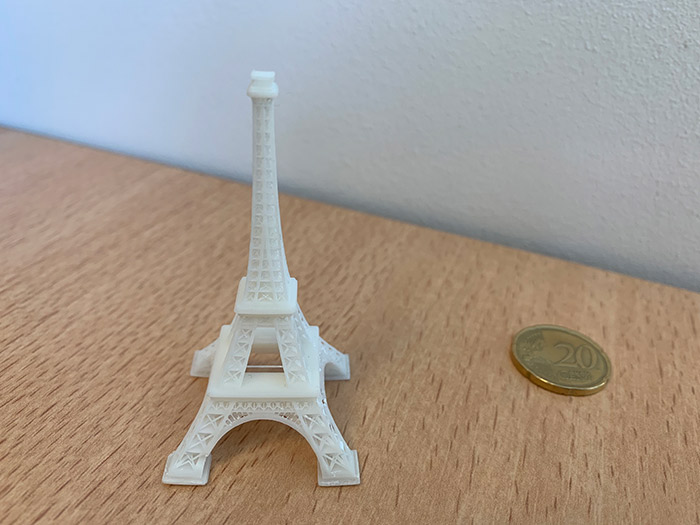
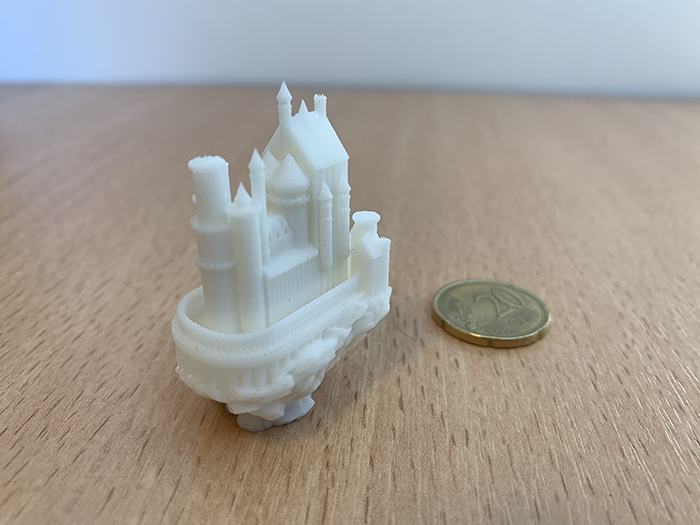
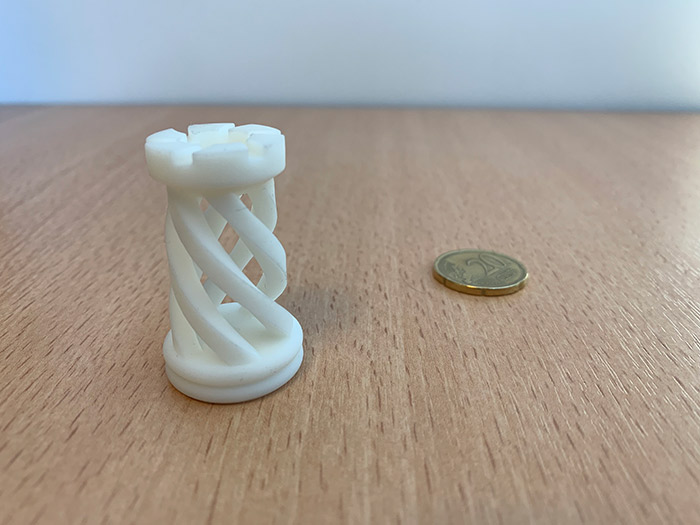
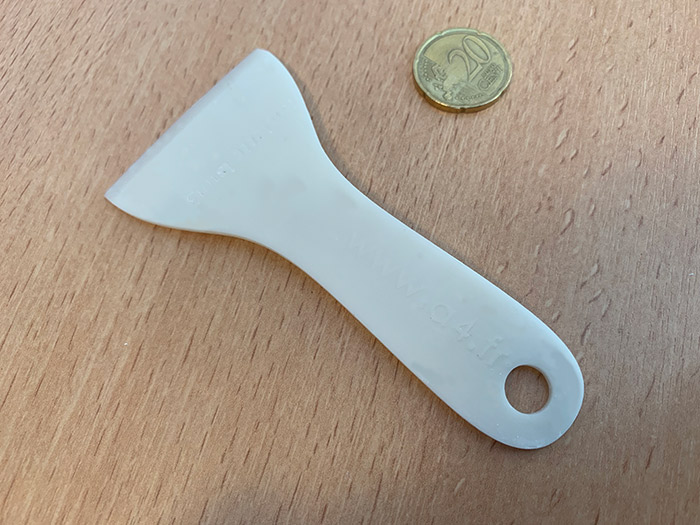
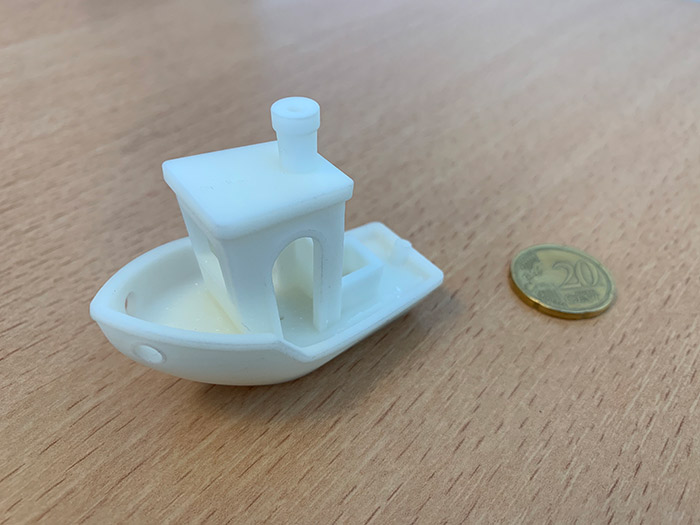
Once the machine is ready and your 3D files are sliced, all that remains is to start printing from the printer’s management interface. As part of the test, we started by printing a well-known 3D model, the CreativeTools 3D Benchy, which serves as a torture test to verify the correct calibration of the machine and the proper management of bridges, details and curves. Among the other models made, we printed a spatula provided by A4 Technologie, which can then be used to clean your resin tray, a BigBadBison chess piece, a medieval castle from TobyCWood and an Eiffel Tower from B9Creations.
The few problems encountered during printing mainly concerned the management of the media, although they are generally less necessary than with a 3D printer with filament extrusion. Sometimes you will have to do it several times before you find the right amount of material. A very positive point is the volume when printing with this machine. The machine is indeed almost silent – a real pleasure when printing in a living room or office.
You are also advised to check, and carefully remove, between each print the potential solidified resin deposits that may have accumulated within the resin tray, otherwise you risk damaging your next prints. Once the printing is finished, cleaning is also important to remove all excess resin to avoid the appearance of small stains on your model.
Below you can find our rating! What do you think of this of this 3D printer? Let us know in a comment below or on our Facebook and Twitter pages! Check out more 3D printer tests HERE and compare hundreds of 3D printers HERE.
Conclusion
- 3D Printer Content 8/10
- Software 8/10
- Printing Quality 8.5/10
- Ease of Use 7.5/10
Positive points:
– Price
– Open machine
– Very good noise level
Negative points :
– Slicer and printer management dissociated
– Media management
– Control screen not very useful
If you are looking for a 3D resin printer but your budget does not allow you to invest in a machine worth more than €1,000, then there is a good chance that the Isun3D L120 is for you. Let’s be clear, this model does not offer the Plug&play side of a machine such as the Formlabs Form 2, we only find the bare minimum in terms of user experience and accessories, but the L120 does the job!
It is a small and virtually quiet machine, which makes it a real office machine. The other major advantage of this 3D printer is the ability to use a wide range of resins available on the market. Although we were not able to test this experiment, you should also be able to dye eSun resins to obtain the desired colour. In conclusion, the L120 is a machine that will allow you to experiment for the first time resin 3d printing at a lower cost. A machine not to be put in the hands of children, however.


