


How to Avoid the “Elephant Foot” Effect in FDM 3D Printing
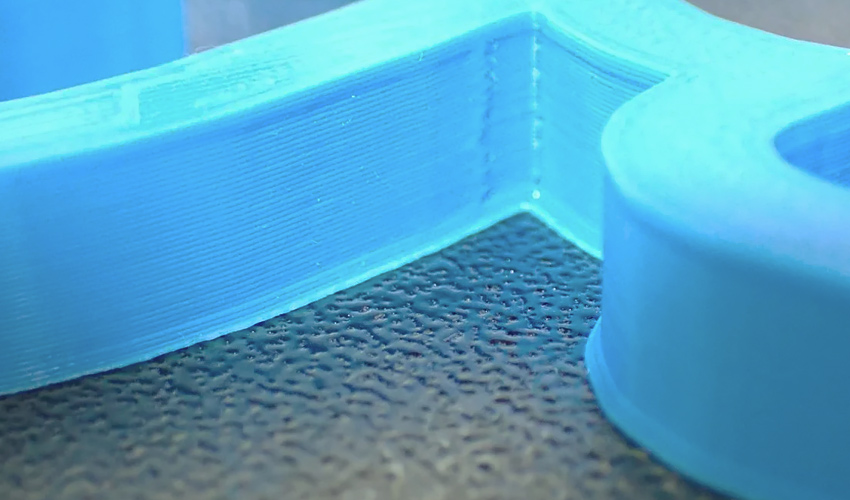
Additive manufacturing offers a significant advantage in design freedom. However, this advantage can be jeopardized when the 3D printer lacks proper configuration or the design and modeling phase is not optimized. Consequently, a range of 3D printing issues may arise, such as stringing, warping, and ghosting. One prevalent problem is known as the “elephant’s foot,” commonly seen in FDM 3D printing when the first layer extends wider than intended, resembling the shape of an elephant’s foot.
This issue arises due to the close proximity of the printing nozzle to the base plate during the printing process, resulting in a “z-stepping” effect. Consequently, the nozzle exerts pressure on the first layer while extruding, causing it to stretch and adversely affecting its adhesion to the plate. The presence of the elephant’s foot substantially diminishes the overall dimensional accuracy and manufacturing tolerances of the final part. Because of this, part assembly becomes challenging, if not impossible, due to an inaccurate fit. Additionally, the visual appearance of the part is also compromised by this error, despite some improvement being attainable through post-treatment. Nonetheless, the elephant’s foot remains noticeable in many instances, impacting the overall aesthetics of the part. In this guide, we will delve into the causes of this common 3D printing error and provide valuable insights on how to prevent it.
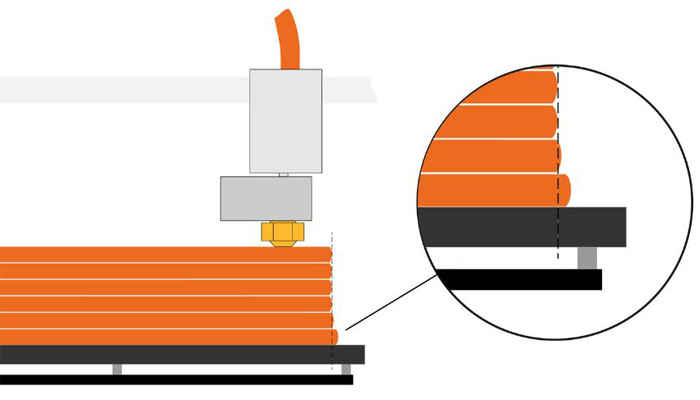
Photo credits: Prusa
Tips to Avoid Elephant Foot In 3D Printing
To begin with, ensuring proper alignment of the printing plate and maintaining an appropriate distance between the nozzle and the plate is crucial. Manual calibration can help achieve this. To calibrate, you’ll need a thin layer of paper or a slim metal piece. The chosen holder is then moved between the nozzle and the printing tray until encountering slight resistance, indicating the correct distance. Conducting a test print of the first layer will verify the calibration’s accuracy.
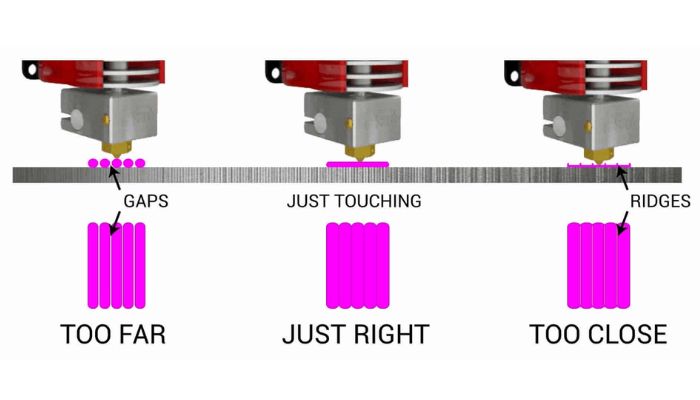
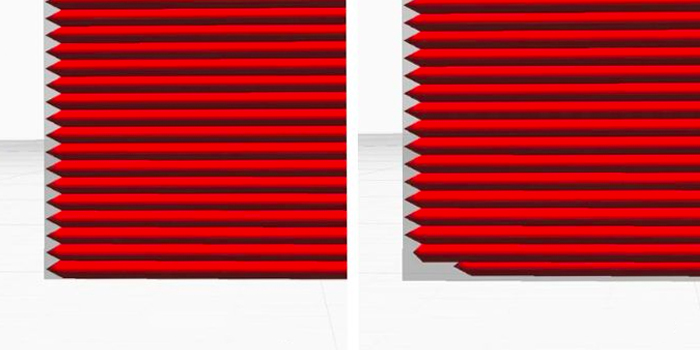
The test print can result in three scenarios: the nozzle being too high, too low, or set correctly. Voids in the layer indicate the nozzle is too high, while grooves are seen if the height is too low due to the printing nozzle. In both cases, recalibration is necessary. A successful alignment will produce a smooth print result, as depicted in the picture below:
Distance between the nozzle and the printing plate is key
Additionally, it is essential to ensure that both the tray and the extruder temperatures align with the manufacturer’s recommendations. Failure to do so may lead to various printing issues. If the desired results are not achieved after following the previous steps, you can attempt an indirect solution.
A recommended approach is to implement rafting during the printing process. Rafting involves printing several layers of material before commencing the actual part printing. As a result, the final object will be printed on a sort of “raft” that needs removal during post-processing. The presence of this raft acts as a buffer between the first layer and the printing plate, causing the elephant foot to form on the raft itself.
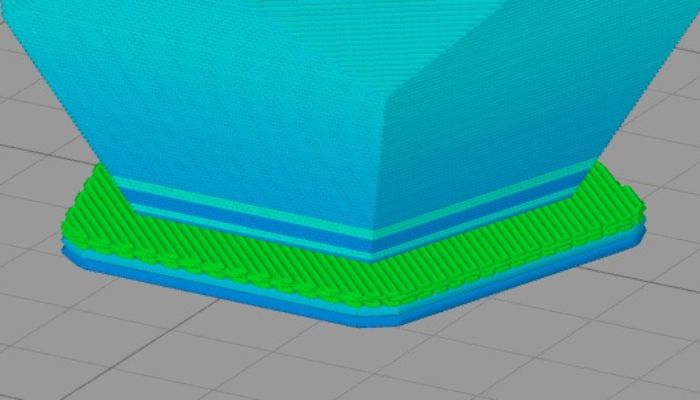
When using a raft, the elephant’s foot is formed on the raft and not on the model itself (Photo credit: Simplify3D)
Improved Results Through 3D Modeling
To avoid the elephant foot in the final 3D printed part, you can make adjustments during the 3D modeling phase and use specialized software. One effective approach is to manually apply a slight 45° bevel to the bottom edge of the model. This modification limits the appearance of the elephant foot since the defect is usually formed in the free space created during 3D modeling.
There are also software programs designed to address this issue. For example, the PrusaSlicer software offers an “Elephant’s Foot Compensation” parameter in its advanced and expert modes. By using this setting, the first layer is modeled slightly narrower than the other layers, effectively accounting for the elephant foot without compromising the overall appearance of the part. Although the preview of the 3D model might appear distorted, it will print as intended.
Another popular tool for adjusting the design is Cura, which allows parameterizing the horizontal expansion, specifically the X and Y axes of the model. To counteract material shrinkage, commonly seen in plastics like ABS or nylon, a positive value is used. However, to address the issue of a flattened and wider first layer, a negative value should be used in this setting. The principle of this method is similar to the one used in the Prusa solution, giving you the freedom to choose based on your preference for 3D printing software.
In Cura you can set a negative horizontal expansion to avoid printing errors (Photo credits: Cura)
Lastly, the elephant foot effect can be addressed during post-processing. While the solutions offered through 3D modeling can reduce crushing in the X and Y axes, the issue in the Z axis remains unresolved. If dealing with the Z axis seems challenging, you can rectify the manufacturing defect during post-processing. One effective method is to use a deburring tool to remove the excess material. Prices for such tools can vary significantly depending on the supplier, with an average range between 10 and 30 dollars.
To sum up, the elephant foot in 3D printing can cause various issues with parts. Now you are equipped with the knowledge of how to calibrate the printing tray properly, leverage the 3D modeling process, and eliminate this defect during post-processing.
Have you ever encountered the “elephant foot” effect when working with 3D printing? Let us know in a comment below or on our LinkedIn, Facebook, and Twitter pages! Don’t forget to sign up for our free weekly Newsletter here, the latest 3D printing news straight to your inbox! You can also find all our videos on our YouTube channel.


