How to Avoid Blobs in 3D Printing?

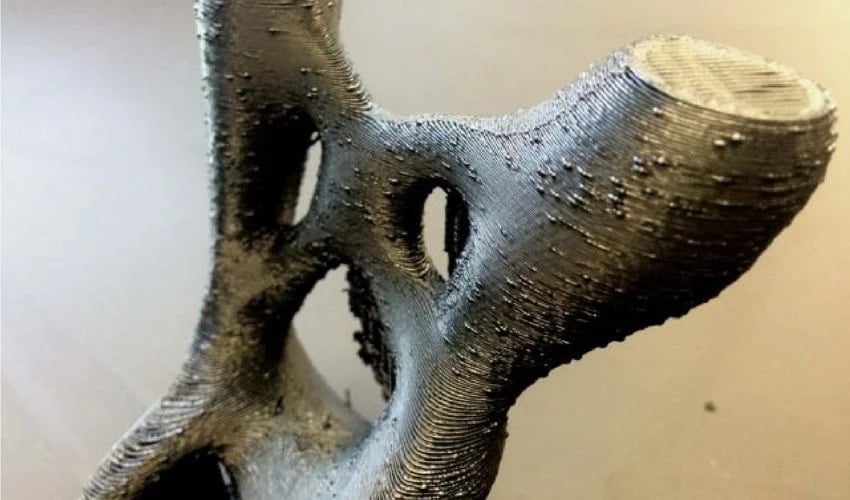
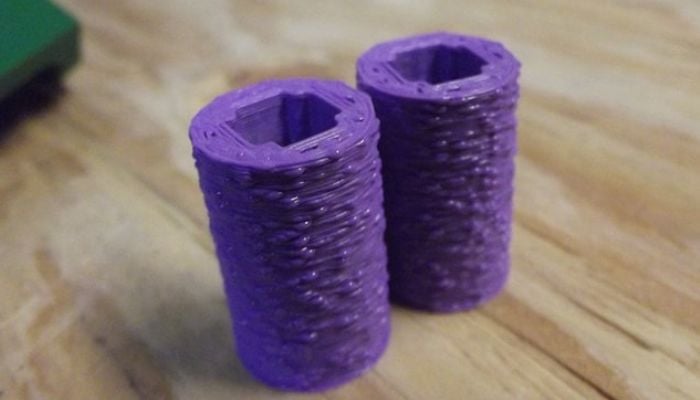
3D printing, like any manufacturing process, has its advantages and disadvantages, and comes with its own set of constraints. Indeed, it’s not uncommon to encounter problems and obstacles when creating parts and structures of varying complexity. Examples include over-extrusion, warping and elephant’s foot. This time, we’d like to talk to you about the phenomenon of blobs and zits (generally smaller), which can appear on parts made using 3D printing. These are small spots or droplets of filament that can be seen on the surface of parts produced with FDM/FFF. They usually appear where the extruder has started to remove material and return after printing. Over time, this becomes visible as a defect on the surface of the part.
There are many reasons why blobs and zits appear during FDM 3D printing, for example shrinkage. During retraction, a small amount of filament is drawn back into the nozzle to avoid any subsequent problems with the filament. However, if too little or too much filament is shrunk, or if shrinking is too slow or too frequent, these defects can occur.

Blobs and zits appear as small droplets of filament on the surface of 3D-printed parts (photo credits: Chris Cecil).
The temperature and speed of the nozzle can also contribute to the formation of blobs. Too high a temperature increases the viscosity of the material and can cause large quantities of filament to exit the nozzle uncontrollably. A print speed that is too high or changes frequently can also lead to a reduction in surface quality. Finally, insufficient cooling of the various layers of material can also be at the root of these imperfections, as the material can slip and cause irregularities. Now that we know the causes, let’s look at possible solutions to this problem.
Extruder Calibration to Avoid Blobs While 3D Printing
As mentioned above, poor extrusion can lead to the formation of blobs and zits during the 3D printing process. That’s why you first need to calibrate the extruder correctly. This can be done with E-Step Calibration, a parameter in the 3D printer’s firmware that determines the number of steps the extruder must take to extrude one millimeter of filament. If calibrated correctly, the exact length of filament required will be extruded.
If this is not the case, or if the filament width does not conform to specifications, adjusting the flow rate may be a way of solving the problem. This controls the amount of filament extruded, and prevents too much material coming out of the nozzle, which can lead to the formation of blobs. Also make sure that your 3D printer’s nozzle is clean and unobstructed, as this can lead to insufficient and irregular extrusion, causing imperfections on the surface of your parts.
Retraction Adjustment
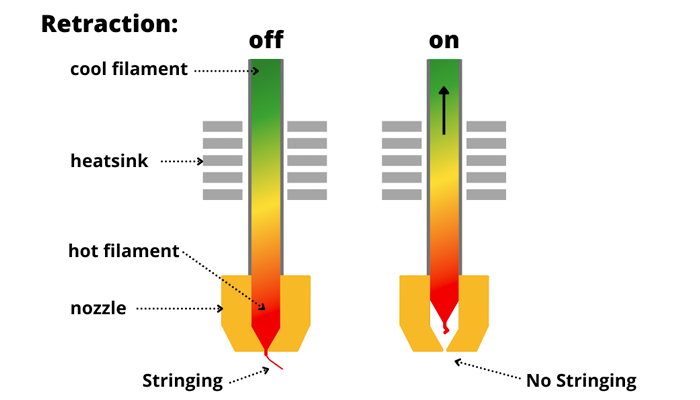
The retraction setting is used to retract the filament from the extruder tip. This prevents the material from coming out unintentionally due to accumulated pressure in the nozzle. Retraction is a useful function that helps prevent threads from forming. However, incorrectly setting the speed, distance and frequency of retraction can lead to blobs while 3D printing.
The retraction speed determines how quickly the filament must be retracted and reinserted through the hot end. If this speed is too slow, the filament cannot be withdrawn from the nozzle in time and the material comes out, causing blistering. To avoid this, increase the shrinking speed by around 25%.
Another shrink parameter that can prevent these blobs from forming during 3D printing is the shrink distance, which controls the amount of filament that must be shrunk at each retraction. If this distance is too great, there will be a gap between the nozzle and the filament, causing air to enter the nozzle and our blobs to appear on the part. On the other hand, if the gap is too small, the amount of filament shrunk will be insufficient and excess material may be expelled from the nozzle, also causing irregularities. To find the optimum retraction setting, start by slowly and gradually increasing the retraction distance.
Finally, if you still notice blobs, try gradually reducing the distance until you find the ideal fit and there are no more visible spots. Not to mention, it may also be useful to avoid retractions entirely, or at least reduce their frequency. To do this, activate or increase the minimum shrinkage distance on the slicer. The minimum retraction distance is the shortest distance the nozzle can travel before a retraction is permitted. This will reduce the frequency of retractions and therefore the appearance of blobs and zits.

Photo Credits: The 3D Printer Bee
Reducing Temperature and Speed
If the printing temperature is too high, the viscosity of the material will increase, making it too fluid and potentially uncontrollable. Try lowering the temperature by 5 to 10°C first, bearing in mind that the recommended printing temperature may vary from one filament to another. While ABS should be printed at higher temperatures (230 to 260°C), PETG should be printed at between 210 and 250°C and PLA at a lower temperature, between 190 and 220°C.
You should also make sure that the printing speed is not too high, as this could adversely affect the quality and precision of your part. The different layers of material will not have time to settle completely, resulting in uneven, uneven surfaces. First reduce the speed to between 5 and 10 mm/s and gradually find the optimum print value.
In addition to reducing temperature and print speed, you can also increase the ventilation or cooling of your printer to combat blistering. You can also increase the speed of the slicer fan in 10% increments until you notice a reduction in blobs.
Activate Coasting to Reduce Blobs During 3D Printing
Some slicers, such as Cura, PrusaSlicer or Simplify3D, feature a coasting function that can help prevent blob formation. As mentioned, there is pressure at the end of the extruder that causes the filament to flow through the nozzle, even when it stops moving. If this happens, this function can help. This parameter predicts the pressure in the hotend and stops the flow of material just before the end of a print to prevent blistering. Simply activate coasting in your slicing software.
Now you know what causes imperfections and how to avoid blobs and zits, it should be possible to enjoy smooth, flat surfaces on your 3D printed parts in the future.
Have you already encountered blobs in 3D printing? Let us know in a comment below or on our LinkedIn, Facebook, and Twitter pages! Don’t forget to sign up for our free weekly newsletter here for the latest 3D printing news straight to your inbox! You can also find all our videos on our YouTube channel.
*Cover Photo Credits: re3D


