


The Complete Guide to Fused Deposition Modeling (FDM) in 3D Printing
FDM 3D printing, short for fused deposition modeling, is an additive manufacturing process that melts and extrudes thermoplastic filament layer by layer to build 3D objects. It is the most accessible and widely used 3D printing technology on the market today. This accessibility is fueling massive economic growth: the FDM market is projected to skyrocket from $3.26B in 2026 to $8.37B by 2031, maintaining a robust 20.74% CAGR.
Scott Crump invented and patented FDM in 1989, launching it commercially in 1990 through his company, Stratasys. For years, strict trademark protections meant only Stratasys could legally use the “FDM” moniker. However, the landscape shifted in 2005 with the birth of the open-source RepRap movement. Led by Adrian Bowyer, the team introduced FFF (Fused Filament Fabrication) as a legally unconstrained alternative for the maker community. Ultimately, FDM and FFF describe the identical material extrusion technology, differing only in brand name, not mechanics.
How FDM 3D Printing Works
FDM printing is widely regarded as one of the most fundamental and accessible 3D printing technologies. Here’s the process breakdown:
- Material Feeding: The journey begins with thermoplastic material, most commonly loaded into the printer as a spooled filament. A motorized extruder grips and drives this filament toward the hotend using one of two configurations:
Direct Drive: The extruder motor sits directly on top of the print head, pushing the filament straight into the hotend. This short path offers razor-sharp filament control and is the gold standard for printing flexible materials like TPU, though the extra weight on the toolhead can cause vibrations at very high speeds.
Bowden: The heavy extruder motor is mounted away from the action on the printer’s rigid frame, pushing the filament through a long, flexible PTFE tube to reach the toolhead. This makes the print head incredibly light and fast, but the internal friction makes retraction trickier and flexible filaments difficult to print.
- Melting in the Hotend: The filament enters the print head’s thermal zone, known as the hotend. Here, the plastic undergoes resistance heating until it reaches its specific melting point, transitioning into a precise molten state.
- Precision Extrusion and Motion: Guided by the digital design file, the printer’s motion system moves the print head along the X and Y axes. As it moves, the molten plastic is forced through a fine, narrow nozzle to trace the geometry of the first layer.
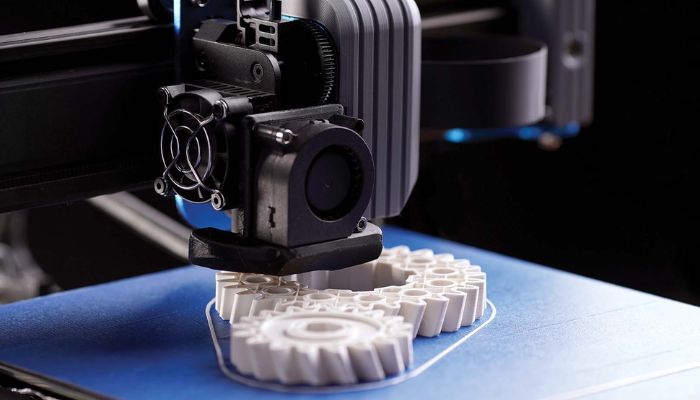
- Layer Deposition and Bonding: The nozzle deposits the plastic onto a specialized build plate. Cooling fans target the newly extruded paths to accelerate solidification, forcing the plastic to bond seamlessly with the layer beneath it.
- Z-Axis Incrementing: Once a single layer is complete, the motion system shifts along the Z-axis (either lowering the build plate or raising the print head) by a fraction of a millimeter. The printer then repeats the extrusion process, building the object one layer at a time until completion.
While standard FDM printers utilize spools of filament, some industrial systems substitute filament for plastic pellets fed through a hopper. However, whether starting with a spool or a pellet, the core mechanics remain identical: creating an object by stacking melted plastic layer by layer.
Types of FDM 3D Printers
To fully understand the modern landscape of FDM 3D printing, it helps to categorize machines by their mechanical motion systems, known as kinematics. How a printer coordinates its print head and build plate directly impacts its printing speed, footprint, and overall accuracy. Here are the five primary types of FDM 3D printing configurations on the market today:
1. Cartesian & CoreXY Printers
The vast majority of consumer and professional FDM 3D printing systems operate on linear X, Y, and Z axes, but they handle this motion in two distinct ways:
- Traditional Cartesian (“Bed Slingers”): These machines feature independent motors for each axis. Typically, the print head moves left-to-right (X) and up-and-down (Z), while the entire build plate moves back-and-forth (Y). Popularized by brands like Prusa, entry-level versions are often sold as kits for users to assemble.
- CoreXY Systems: In a CoreXY setup, the build plate only moves vertically along the Z-axis. Two stationary motors work in tandem using a complex belt matrix to flash the lightweight print head anywhere on the X and Y horizontal plane. This reduces moving mass, allowing for extreme speeds without sacrificing quality. Fully-assembled brands like Bambu Lab rely heavily on variations of this high-performance architecture.
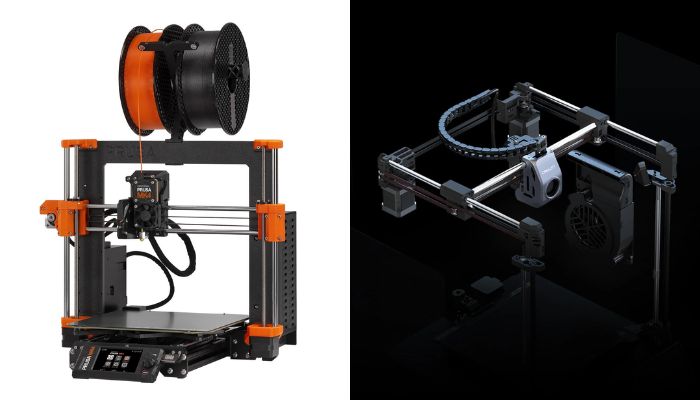
A cartesian printer from Prusa (left) and a Core XY printer from Creality (right)
2. Delta FDM Printers
Delta printers are instantly recognizable by their tall, triangular frames. They feature a completely stationary, circular build plate, while the print head is suspended by three sets of vertical, motorized arms. By coordinating the height of these three arms, the print head can dart across three-dimensional space with incredible speed and agility. Because the build plate doesn’t move, Delta printers excel at tall, vertical prints without causing the object to wobble. However, their circular build volume restricts wide prints, and the complex mathematical firmware makes manual calibration notoriously difficult for beginners.
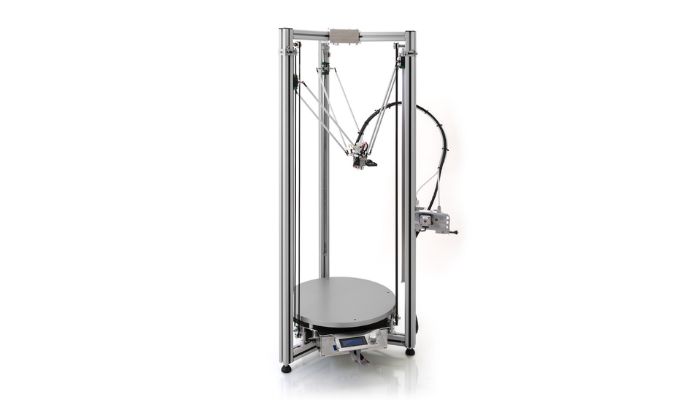
Delta 3D printers are now pretty hard to come by. This one is from the brand Delta Tower.
3. Polar 3D FDM Printers
Instead of tracing a square grid, Polar 3D printers utilize a circular coordinate system based on angle and length. Rather than moving the print head across a bridge, the build plate itself spins and slides radially on a single rail, while the extruder moves vertically. With their unique geometry, they typically require fewer total motors than Cartesian layouts, making them highly space-efficient for producing round or spiral objects (like vases or cones). That said, polar printers remain rare. Their resolution is mathematically lower on the outer perimeter of the build plate compared to the center, leading to inconsistent dimensional accuracy.
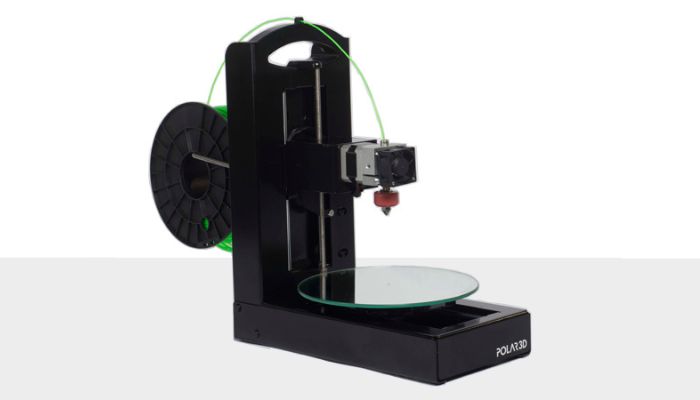
Polar3D used to sell Polar 3D printers, but today there are no commercially available solutions, although Polar printers continue to exist as DIY kits and personal projects like Joshua Bird’s “core-RΘ.” (Photo Credits: Polar3D)
4. Robotic Arm FDM Systems
Once confined strictly to automotive assembly lines, multi-axis robotic arms have evolved into a highly capable industrial FDM 3D printing method. Instead of being constrained inside a box frame or over a tiny plate, an industrial extruder head is mounted directly to a highly articulating mechanical arm. Because they are not bound to a standard flat plane, they offer unparalleled directional flexibility. They can print large-scale objects, such as aerospace tooling or entire architectural structures, often utilizing high-flow plastic pellets instead of traditional filament. Note that the machinery is often massive and capital-intensive. Leading industrial manufacturers like KUKA and ABB frequently partner with specialized extrusion companies (such as Massive Dimension) to deploy these advanced systems.

Photo Credit: Caracol
5. Hybrid FDM Manufacturing Printers
Hybrid manufacturing bridges the gap between additive manufacturing (building up) and subtractive manufacturing (cutting away) within a single machine enclosure. Typically built on a rigid Cartesian or heavy robotic arm frame, a hybrid machine features an interchangeable toolhead system. The machine will first roughly FDM 3D print a part, and then swap its extruder out for a high-speed CNC milling bit to shave edges and cut away details. While these solutions carry premium price tags, they drastically reduce production time for industrial-grade parts that require both complex internal structures and smooth finishes.
This solution from Snapmaker offers Dual Extrusion 3D Printing, as well as laser and CNC capabilities.
Advanced FDM Upgrades: Multi-Material and IDEX Printing
As FDM technology matures, modern workflows are moving away from single-filament printing. If you need to print complex geometries or multi-colored parts, there are two primary industrial approaches:
- IDEX (Independent Dual Extruders): These printers feature two entirely separate print heads on the same gantry. While one head prints the main object, the second head parks itself to prevent plastic oozing. This allows you to seamlessly print a model using standard plastic alongside a water-soluble support material for impossible geometries. IDEX systems can also work simultaneously in “Mirror” or “Duplication” mode to double production speeds.
An IDEX system from BCN3D
- Material Switching Systems (AMS/MMU): Popularized by brands like Bambu Lab and Prusa, these systems feed multiple separate filament spools into a single print head. The printer automatically cuts, retracts, and purges the filament to switch colors mid-print. While highly automated, this method generates more material waste during the “purging” process compared to an IDEX system.
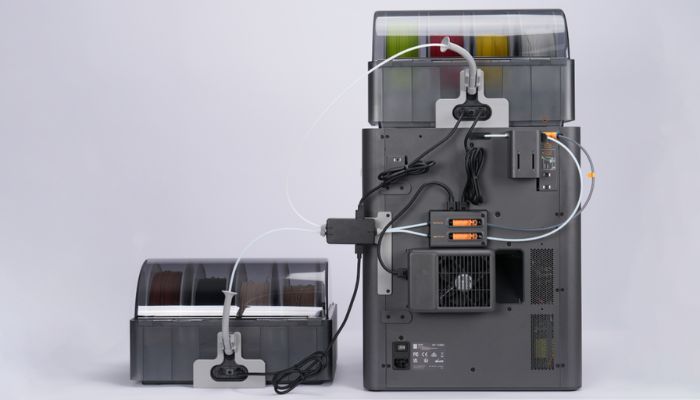
A look at Bambu Lab’s material switching system behind the X2D.
How Much Does an FDM 3D Printer Cost?
When budgeting for FDM 3D printing, the price of the machine itself is just the first step. To map out your actual investment, you need to look at upfront hardware tiers alongside recurring material and maintenance expenses.
1. The Upfront Hardware Investment
The initial cost of an FDM setup varies significantly depending on your goals:
- Entry-Level / Budget: $250 – $500, Excellent, capable machines perfect for beginners
- Mid-Tier / Enthusiast: ~$1,000, Faster print speeds, automated calibration, and enclosed designs.
- Professional / Industrial: $2,000 – $4,000, Top-tier reliability, larger build volumes, and engineering-grade material capabilities.
2. Ongoing Material and Accessory Costs
Owning a printer requires a steady supply of consumables and environment-control gear:
- Filament Spools: Standard PLA filament (the most common material used in FDM 3D printing) typically costs between $20 and $30 per 1 kg spool.
- Filament Dryers: Because 3D printing plastics absorb moisture from the air, a dedicated filament dryer ($40 to $200) is highly recommended to prevent print defects.
3. Hidden and Associated Operating Costs
To keep your FDM operation running smoothly, keep these secondary expenses in mind:
- Maintenance & Hardware Wear: Components like nozzles, PTFE tubes, and toolheads are wear-and-tear items that will eventually require low-cost replacements.
- Material Waste: Print failures, support structures, and filament purges (during color switching) are a normal part of the process and will result in minor material loss over time.
- Digital 3D Models: While an enormous ecosystem of free 3D models exists online (via platforms like Printables and Thingiverse), specialized premium designs or commercial licenses may require a direct purchase or subscription fee.
FDM 3D Printing Materials
One of the greatest advantages of FDM 3D printing is its compatibility with a massive library of thermoplastics. FDM 3D printing materials can be broken down into three categories:
1. The Standard Filaments
The majority of daily printing relies on three incredibly reliable, cost-effective polymers:
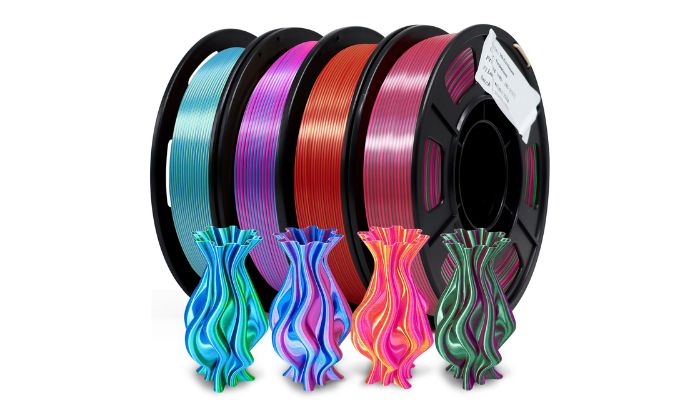
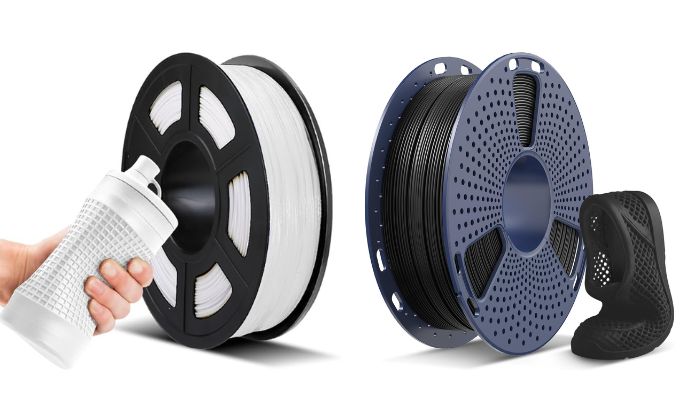
- PLA (Polylactic Acid): A biodegradable plastic derived from cornstarch. It is the absolute standard for beginners due to its ease of use, low print temperatures, and minimal warping.
- PETG (Polyethylene Terephthalate Glycol): It combines the easy printability of PLA with the superior impact and chemical resistance of tougher plastics.
- ABS (Acrylonitrile Butadiene Styrene): A classic engineering plastic known for its excellent heat resistance and durability, though it requires an enclosed printer to manage toxic fumes and prevent cracking.
PLA is one of the most common 3D printing materials (Photo Credit: YOUSU PLA)
2. Advanced & Composite Materials
For functional prototypes or specialized use cases, standard plastics can be blended or chemically altered:
- Flexibles (TPU/TPE): Rubber-like filaments used to create gaskets, phone cases, and wearable items.
- Composite Filaments: Standard plastics infused with microscopic particles of carbon fiber, glass, wood, or metal. These composites drastically alter the weight, stiffness, or cosmetic look of the final print.
- Novelty Bio-Composites: For unique aesthetic finishes, eco-conscious manufacturers produce specialized filaments embedded with organic waste products like coffee grounds, beer brewing byproducts, or hemp fibers.
TPU is great for making flexible objects (Photo Credit: JAYO)
3. High-Performance Polymers
At the industrial tier, FDM 3D printing utilizes specialized engineering-grade materials like PEEK, PEI (Ultem), and Polycarbonate (PC). These require ultra-high-temperature nozzles and heated chambers but yield parts capable of surviving extreme mechanical stress and chemical exposure.
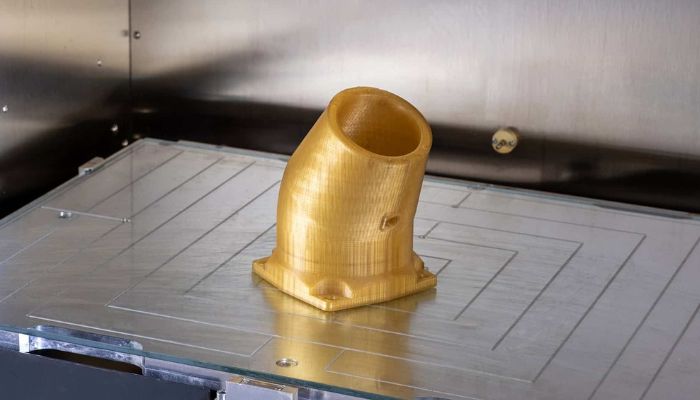
Engineering-grade materials can be used for industrial applications. (Photo Credit: BigRep)
Filament Specifications: Understanding Diameters
When buying material for an FDM 3D printing workflow, filaments are sold tightly wound on spools and manufactured in two sizes:
- 1.75mm: This is the undisputed standard for the vast majority of consumer, prosumer, and ultra-fast CoreXY printers. It offers broad compatibility across almost all major brands.
- 2.85mm: Historically popular, 2.85mm filament is increasingly rare. It is primarily kept alive by legacy industrial systems, universities, and select older fleets (such as legacy UltiMaker or BigRep machines). Most modern manufacturers have phased out this diameter in favor of high-flow 1.75mm systems or direct pellet extrusion.
Frequently Asked Questions about FDM 3D Printing
What is FDM 3D printing and how does it work?
FDM (Fused Deposition Modeling), also referred to as FFF (Fused Filament Fabrication), is a material extrusion process that builds three-dimensional objects by melting thermoplastic filament and depositing it layer by layer through a heated nozzle. A motorized extruder feeds filament into the hotend, where it melts and is precisely extruded onto a build plate. Once each layer solidifies, the Z-axis increments and the process repeats until the object is complete.
What are the main types of FDM 3D printers?
FDM 3D printers are classified by their motion systems (kinematics). The five primary configurations are: Cartesian/CoreXY printers (the most common, with independent linear axes), Delta printers (tall triangular frame, stationary circular build plate), Polar printers (rotating build plate on a radial coordinate system), Robotic Arm systems (multi-axis industrial machines for large-scale output), and Hybrid manufacturing printers (combining FDM extrusion with CNC milling in a single machine).
What materials can be used with FDM 3D printing?
FDM 3D printing is compatible with a wide range of thermoplastics. The three most common filaments are PLA (easy to print, biodegradable), PETG (impact-resistant and chemically durable), and ABS (heat-resistant, requires an enclosed printer). Beyond these, FDM supports flexible filaments such as TPU, composite materials infused with carbon fiber or metal particles, and high-performance engineering polymers like PEEK, PEI (Ultem), and Polycarbonate for industrial applications.
What is the difference between direct drive and Bowden extruder configurations?
In a direct drive setup, the extruder motor is mounted directly on the print head, enabling precise filament control and reliable printing of flexible materials like TPU, with minimal stringing. In a Bowden configuration, the motor is fixed to the printer frame and pushes filament through a long PTFE tube to a lightweight toolhead, allowing faster print speeds due to reduced carriage mass. However, Bowden setups introduce slack in the filament path, making flexible materials significantly harder to print reliably.
How much does an FDM 3D printer cost?
FDM 3D printer pricing spans three broad tiers. Entry-level machines suited for beginners range from $250 to $500. Mid-tier enthusiast printers with automated calibration and enclosed designs cost around $1,000. Professional and industrial systems with larger build volumes and engineering-grade material capabilities range from $2,000 to $4,000. Beyond the machine itself, ongoing costs include filament spools ($20 to $30 per kg for standard PLA), filament dryers ($40 to $200), and periodic replacement of wear parts such as nozzles and PTFE tubes.
What filament diameter should I use for FDM 3D printing?
The vast majority of modern FDM printers use 1.75 mm filament, which has become the industry standard for consumer, prosumer, and high-speed CoreXY systems due to its broad compatibility. The alternative, 2.85 mm filament, is a legacy diameter still used by certain older industrial platforms such as select UltiMaker and BigRep machines, but it is increasingly rare as most manufacturers have transitioned to 1.75 mm or direct pellet extrusion systems.
How to Get Started with FDM 3D Printing
Select a printer based on your budget and use case. Entry-level Cartesian machines ($250 to $500) are ideal for beginners. Mid-tier CoreXY systems around $1,000 offer faster speeds and automated calibration. Professional enclosed systems ($2,000 to $4,000) are suited for engineering-grade materials and larger build volumes.
Choose your filament based on the requirements of your part. PLA is the best starting point for beginners due to its low print temperatures and minimal warping. PETG adds impact and chemical resistance for functional parts. ABS suits heat-resistant applications but requires an enclosed printer. For flexible parts, use TPU. For high-performance industrial applications, consider PEEK, PEI, or Polycarbonate.
Thermoplastic filaments absorb moisture from the air over time, which causes print defects such as bubbling, stringing, and weak layer adhesion. Before printing, place your filament spool in a dedicated filament dryer to remove absorbed moisture and ensure consistent extrusion quality.
Feed the filament through the extruder into the hotend and adjust retraction settings accordingly to prevent oozing.
The standard nozzle diameter is 0.4 mm, which supports layer heights between 0.1 mm and 0.3 mm. Lower layer heights (0.1 to 0.15 mm) produce finer surface detail. Higher layer heights (0.2 to 0.3 mm) print faster but with less resolution. Avoid exceeding the recommended layer height range for your nozzle to prevent stair-stepping artifacts and poor layer bonding.
The quality of FDM printing is frequently affected by two factors: the nozzle diameter and the layer height. A larger nozzle diameter allows for higher individual layers. However, excessive layer height can result in a loss of detail and produce stair-stepping errors.
Source or design a 3D model and import it into your slicer software. The slicer converts the model into G-code instructions the printer follows layer by layer. Configure print settings including layer height, infill density, support structures, and cooling fan speed. Free models are available on platforms such as Printables and Thingiverse, or you can design your own using CAD software.
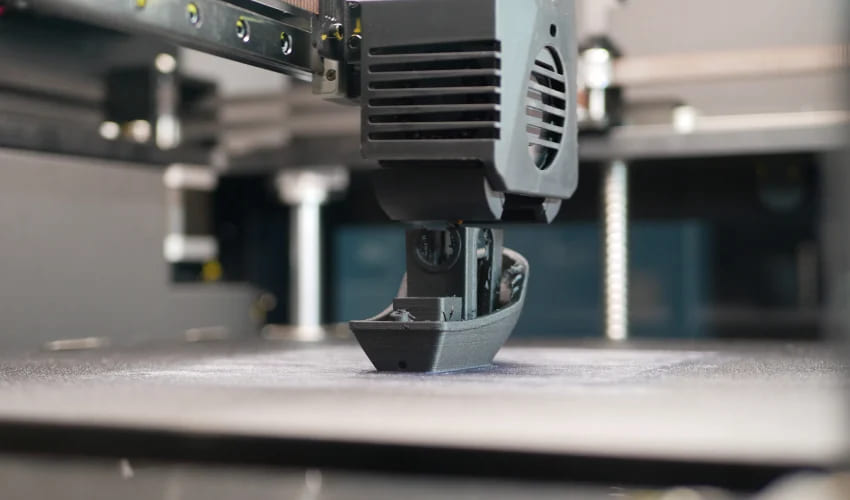
The first layer is the most critical stage of any FDM print. The nozzle traces the geometry of the base while depositing molten plastic onto the build plate. Ensure the nozzle is correctly calibrated to the build plate height so the first layer adheres firmly without being over- or under-extruded. Cooling fans activate after the first layer to accelerate solidification and promote bonding between subsequent layers.
Step 8: Remove the print from the build plate and do any post-processing necessary
Post-processing could include removing supports, sanding, vapor smoothing, painting etc: anything you’d like to do to make your part feel complete!
What do you think of our FDM guide? Let us know in the comments below or on our LinkedIn and Facebook pages. Plus, sign up for our free weekly Newsletter to get the latest 3D printing news straight to your inbox. You can also find all our videos on our YouTube channel.


how can i cite this site properly if the author’s last name is not properly given