


What Are the Different Methods for Surface Finishing in 3D Printing?
Additive manufacturing has experienced tremendous growth in recent years, evolving from a niche technology to an increasingly industrial method allowing for everything from prototyping to the production of end-use parts. However, despite 3D printing’s benefits, notably in terms of design freedom and customized production, the technology alone is not capable of creating professional-quality finished parts. Often, various post-processing processes are required to obtain high-quality final models. This involves a number of different steps.
For example, we previously gave an introduction to post-processing in additive manufacturing as well as a closer look at the importance of cleaning 3D printed parts. In addition to this, it is also essential to address the roughness of such parts depending on the material and technology used. Therefore, today we want to delve into yet another aspect in this complete guide to surface finishing in 3D printing. This type of treatment is often necessary in order to change the appearance of the raw part, smooth surfaces, adjust its size and shape or improve its service life.
The sanding, one popular method of surface finishing for 3D printing parts, can be done manually, although automatic tools are also available.
Surface Sanding
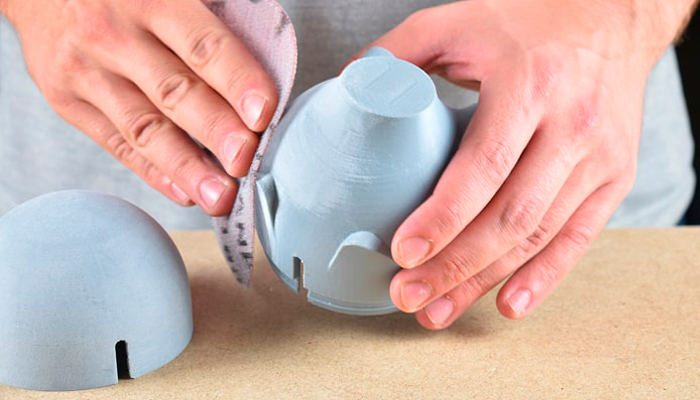
In 3D printed parts, especially those created by extrusion methods, layer lines and other possible imperfections are often visible. To remove these surface defects, one of the most commonly used methods is sanding. This system involves the use of a rough material such as sandpaper of different grit sizes to remove the coating lines and provide a uniform finish free of imperfections. It is very useful if any type of subsequent coating is to be applied to the surface, as the surface will need to be smooth for optimum application.
Sanding is typically done by starting with coarse grit sandpaper and progressing to finer grit sandpaper to obtain an increasingly smoother surface. However, it is important to be careful when sanding so as not to damage the geometry of the model. Also, a drawback of this method is that it can be difficult to reach some spots on the parts, especially small holes and undercuts. Sanding can be done manually, although this can be time-consuming. For this reason, there are also automatic sanding tools and machinery available on the market.
Shot Peening and Bead Blasting
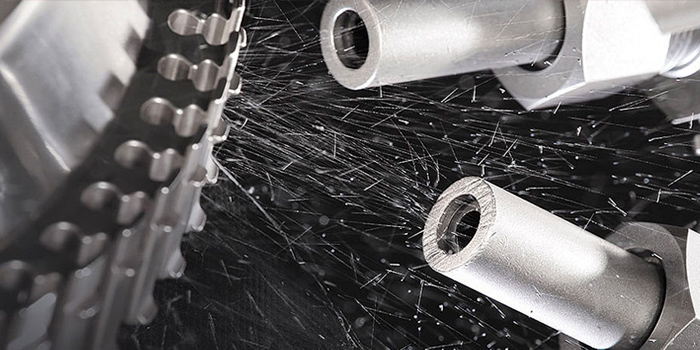
Both shot peening and bead blasting are other common techniques used for surface finishing in 3D printing. They are generally used on a wide variety of metal parts, including aluminum alloys, steel, titanium, copper and other metals. These processes allow for improved part strength and durability, however, there are some key differences between them.
Shot peening involves the use of small metal or ceramic spheres, which are shot by high velocity compressed air against the surface of the part. This impact generates controlled plastic deformation in the surface layer of the part, which in turn increases fatigue strength and reduces the possibility of cracks and fractures. Shot peening can also improve corrosion resistance and adhesion of subsequent coatings.
On the other hand, bead blasting involves the use of small beads of glass, metal, plastic or other abrasive material to clean, polish or texture the surface of the part. Unlike shot peening, which causes deformation of the outer shape of the part, bead blasting only removes the top layer of the material. It is used to improve the aesthetic appearance of the part, remove dirt and corrosion and prepare the surface to receive subsequent coatings.
The main difference between shot peening and bead blasting is very simple. The first method generates plastic deformation on the surface of the part, which improves its final strength and durability. The second method only smoothes the top layer of the material, improving the aesthetic appearance and preparing the surface for subsequent coatings. These post-processing techniques are especially useful for parts that will be subjected to mechanical stresses or strains, such as gears, springs, turbine components and structural parts of aircraft and vehicles.
Polishing Methods in 3D Printing: Vibratory Finishing and Tumbling
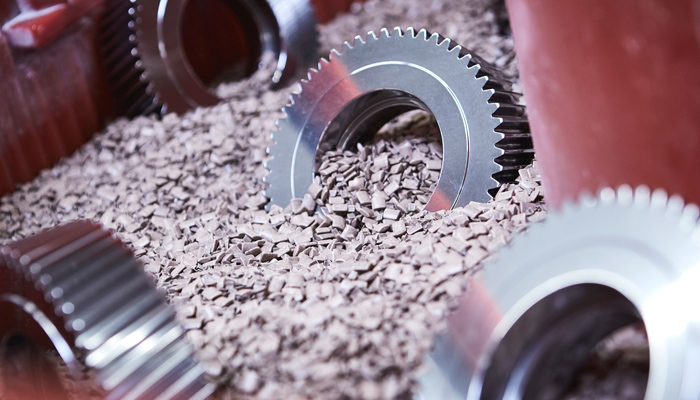
Unlike the previously mentioned methods, in which the parts are treated one by one, polishing systems are used to process several 3D printed objects at the same time. In this group we can identify two techniques that, although they may seem similar, have some substantial differences between them. These are vibratory finishing and tumbling (also known as tumbling or rumbling). Both technologies consist of placing 3D printed parts in a drum or tumbler next to an abrasive material that, when combined with the tumbling or vibrating motion, will generate the friction necessary for the parts to obtain an optimal finish. However, the choice between one method or the other will depend on the specific requirements of the part and the desired result.
Although both methods achieve quality finishes, vibratory polishing is generally more suitable for achieving a smoother, more homogeneous surface by creating a more uniform distribution of material on the parts. Thus, vibration is ideal for large parts, or parts with rounded edges that do not have a high level of detail. On the other hand, tumbling is based on a centrifugal cylinder system that applies a smoother motion, making it better for smaller, more delicate and finely detailed parts. Speed is another differentiating aspect of the two methods. While vibratory finishing is a faster technique, tumbling usually requires more time to obtain high-quality surfaces. Depending on the desired finish and the materials used, tumbling can take from a few hours to several days. Vibratory finishing, on the other hand, can achieve the same results in a fraction of the time, often in a few hours.
This post-treatment technique can be used on both metal and plastic parts.
In summary, vibratory finishing and tumbling are effective methods for post-processing both metal and plastic parts, but differ in their motion, speed, surface finish and suitability for different part geometries. In addition, care must be taken when mixing different types of abrasive media, as some combinations cause an imbalance and result in an uneven finish or damage to parts.
Vapor Smoothing
Vapor smoothing is another method of obtaining a smooth surface of a 3D printed part, with the main difference being that the finish will be glossy instead of matte. For this, a gaseous solvent is used to melt the surface of the component until it is uniform. Once the parts are exposed to the solvent in the vapor chamber, they are introduced directly into a cooling chamber to stop liquefaction. Liquefaction is the process in which a substance in a solid or gaseous state changes directly to a liquid state, due to a radical change in its physical conditions. This cooling ensures that only the surface is melted and the desired shape of the object is maintained.
This vapor smoothing process also serves to fill the pores on the outside of the object and seal the surface, making the parts useful for containing liquids or gases. Although this technology is compatible with a wide range of thermoplastics, it should be noted that it cannot be used with certain materials as it could cause a harmful chemical reaction. Incompatible plastics include polycarbonate (depending on post-processing machine), polyphenylsulfone (PPSF), ULTEM 1010 and ULTEM 9085.
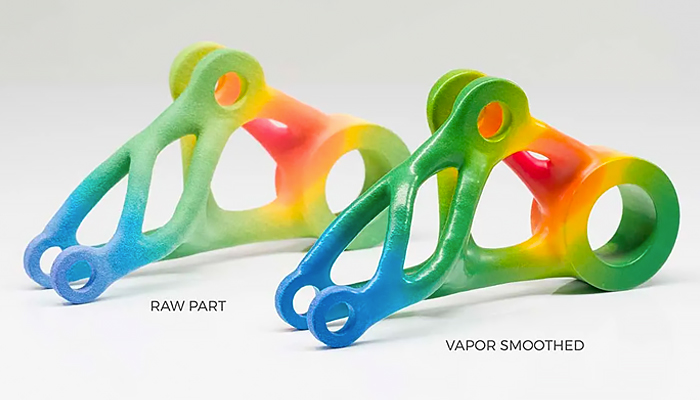
Comparison between the raw part and the part after steam smoothing (photo credits: AMT)
An alternative to vapor smoothing is solvent dipping. As the name implies, it involves dipping 3D printed parts in a solvent rather than exposing them to the vaporized chemical. Although the results are quite similar to those of vapor smoothing, it is more difficult to maintain dimensional accuracy because the solvent acts more quickly and aggressively. This method is often useful if the parts are larger than the size of the vapor chamber.
Epoxy Resin for Surface Finishing: Coating and Inflitration
Epoxy resins are a class of reactive polymers containing epoxide groups (three-membered cyclic ethers containing two carbon atoms and one oxygen atom). When treating 3D printed parts, these resins allow for a sealed surface finish, making the part airtight, as well as increasing its resistance to high temperatures and certain chemicals. This method is ideal for parts that have to face harsh operating conditions. When applying this type of resin, we can choose between two methods: coating and infiltration.
Epoxy coating is usually applied by hand. This reduces costs by avoiding the need to purchase expensive equipment, but at the same time increases the time and amount of labor required for application. In addition, this technique is more suitable for small production runs, small-sized components or items that only need to seal a portion of their surface. However, there are areas that cannot be accessed with this technique, such as internal channels and undercuts. Also, it may not be the ideal choice for parts that require precise dimensions, as the epoxy coating will slightly increase the thickness of the part.
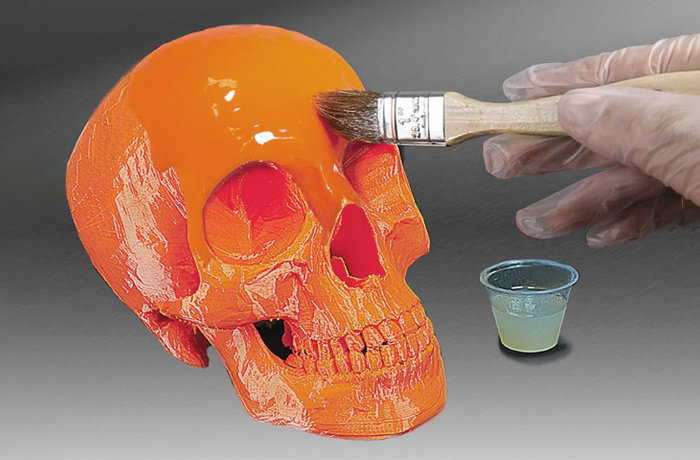
An example of manual coating of epoxy resin
On the other hand, the epoxy infiltration system counteracts many of the limitations encountered when applying it by hand. In the infiltration method, the part is dipped in epoxy and a vacuum chamber is used to introduce the resin into the object, thus filling the pores. This process takes about three hours to complete and is less labor intensive, which means it is more practical and faster when applied to large components. However, the main disadvantage compared to hand coating is its higher cost. It requires a vacuum chamber, an oven to preheat and cure the resin, all in addition to the cost of the epoxy resin itself.
The Role of CNC Machining in Post-Processing
As we know, additive and subtractive technologies can be used complementarily to combine the benefits of both methods. Among the best known subtractive manufacturing systems we find CNC machining which, although not strictly a post-processing method, can be used as a resource for quality surface finishing in 3D printing. This is especially interesting in the case of technologies such as direct energy deposition (DED).
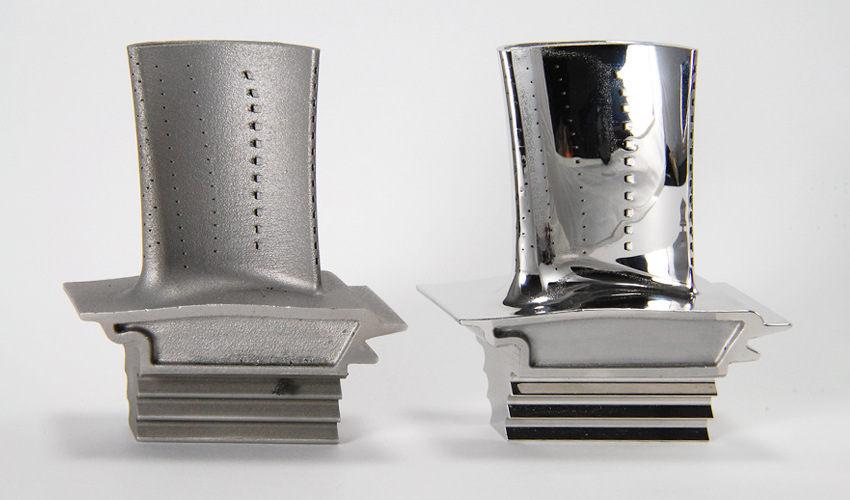
In these, the resulting parts have a very rough surface, as the metal is melted directly during the extrusion process. Therefore, a CNC machining step is always necessary to obtain a smooth and defined surface. Due to this, a number of hybrid manufacturing solutions are available on the market that integrate both processes to speed up the production steps.
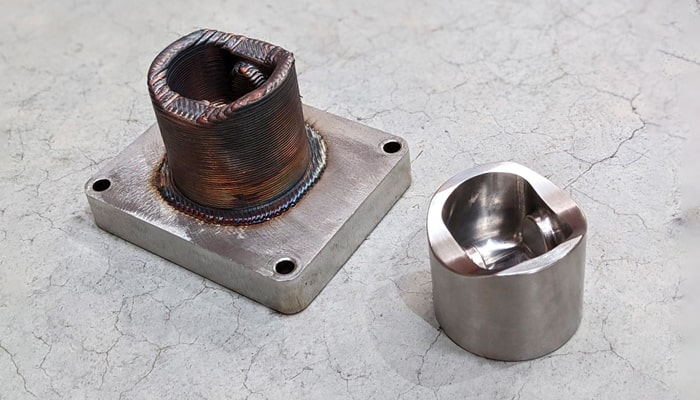
On the right, the part after CNC machining (photo credits: Meltio)
What do you think of the different methods for surface finishing in 3D printing? Let us know in a comment below or on our LinkedIn, Facebook, and Twitter pages! Don’t forget to sign up for our free weekly Newsletter here, the latest 3D printing news straight to your inbox! You can also find all our videos on our YouTube channel.
*Cover Photo Credits: EOS


