


3Dnatives Lab: Testing the Dagoma Disco Ultimate 3D Printer
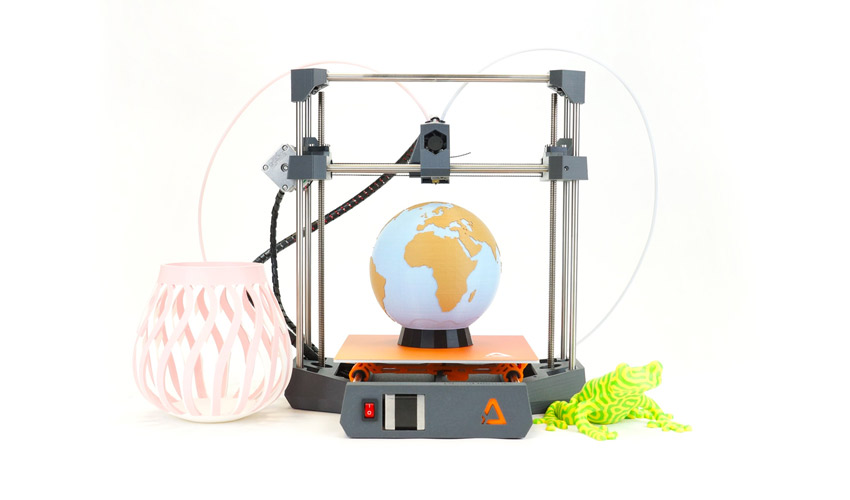
Based in Roubaix, Dagoma is one of the most successful companies amongst the French manufacturers, well-known for its DiscoEasy 200 DIY 3D printer, sold at a price of less than 300€ ($333). Four years after its debut on the market, and following the launch of additional models such as the Explorer 350 or the Magis (formerly Neva), the 3D printer manufacturer recently unveiled a new 3D printer kit, the Dagoma Disco Ultimate, an improved version of the DiscoEasy 200 that is still affordable. It retails for 399€ ($442), or 499€ ($554) for the two-color version.
To learn more about this new Dagoma model, we were pleased to receive the Disco Ultimate in its two-color version at 3Dnatives’ Lab. So what are the improvements made to the Ultimate Disco? What can you expect from a 3D printer that costs less than 500€? Who is this machine for? And most importantly, is it worth the investment? Find our complete review of this 3D printer below.
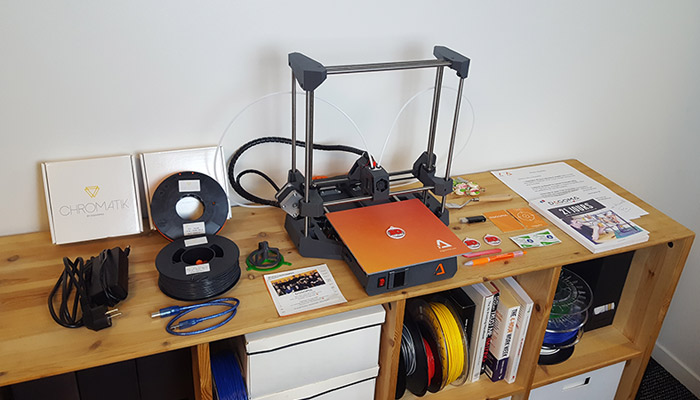
The Disco Ultimate 3D printer and its various accessories
1. Unpacking the Dagoma Disco Ultimate
The 3D printer is delivered in kit form and you will have to follow the various detailed assembly steps in an online guide available directly on the Dagoma website. It takes about 2 to 3 hours to assemble the 3D printer. For this test, we received an already assembled version of the Ultimate Disco.
When unpacking the machine, you will find various accessories delivered with the Ultimate Disco Pack: the power supply, a USB cable, an SD card (2GB mini), a 2.5mm hexagonal screwdriver, a spatula, a business card target for calibrating the tray but also Lutti candies with which Dagoma has formed a partnership. It should also be noted that the Ultimate Disco tray is equipped with a Buildgrip to improve the adhesion of the first layer.
As part of the test, Dagoma also sent us a USB key to read SD cards, two reels of Dagoma PLA filament (Chromatik Orange and Chromatik Gris) and two reel holders printed in 3D. Finally, the Ultimate Disco Pack contains a 150-page “21-day Training” guide and a subscription to the 6-month SelfCAD Premium software.
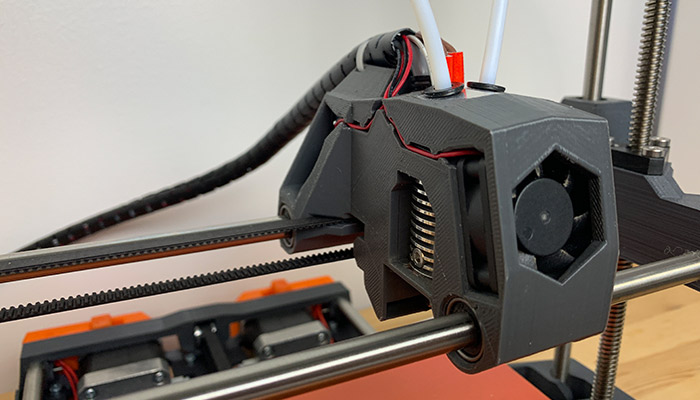
The printing head of the printer, its structure has been 3D printed
With its open architecture and several 3D printed components, the Ultimate Disco remains very close visually to its big sister, the DiscoEasy 200. New features include the two-color add-on, the standard Extruder+, which offers automatic insertion & ejection, the presence of a side button (to pause or load/unload filaments), end-of-filament detection but also flexible filament compatibility and the standard Expert Pack. The latter makes it possible to gain in precision and reliability thanks to the addition of machined trapezoidal rods, a new print head model and anti-backslash/anti-play nuts. Finally, the Ultimate Disco includes a new electronic board called DAGOMA F5, which is supposed to be quieter.
Note that the Extruder+, the Expert Pack and the two-color option are sold separately on the Dagoma website as an add-on for 19.90€, 89.90€ and 169.90€, respectively. The only add-on that is not present in the version we tested is the control screen, sold for €49.00 which allows additional control of the machine, directly from the 3D printer.
A small innovation, Dagoma includes in the pack its “21-day training” guide, available in paper or electronic version. This guide covers both basics such as creating Gcode, printer maintenance or 3D modeling and allows you to go further with your 3D printing projects. A good idea from the manufacturer that allows users to really take advantage of their 3D printer!
The play/pause button the side of the 3D printer, with which you can stop a printing job and unload filament
2. Installation of the Dagoma 3D printer
Once the 3D printer is assembled, simply plug in the power supply and turn it on with the on/off button on the front panel. To load the filaments, it’s easy with the Extruder+. By simply pushing the filament at the extruder offset at the back of the machine (bowden type), the 3D printer automatically drives the filament. Once the printer is heated up (nothing to do either on this side), your filament will be extruded.
The next step is to calibrate the tray, a step that requires the use of the Dagom’app, which can be downloaded from the Software section of the Dagoma website. The software allows the tray to be calibrated semi-automatically using a target (business card type) in less than 3 minutes. It should also be noted that the Dagom’app will allow you to update the firmware of your printer during future updates. To start these operations, you will need to connect the Ultimate Disco using the USB cable provided with the machine that connects directly to the electronic board. This can be a difficult task because the cable is very short. We did feel the absence of a WiFi connection – maybe the price you have to pay for an affordable machine?
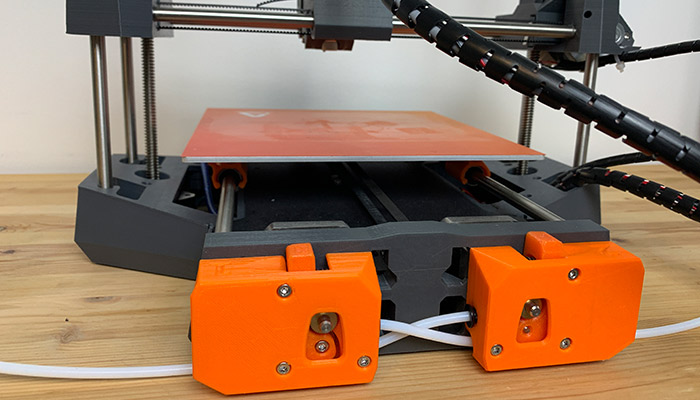
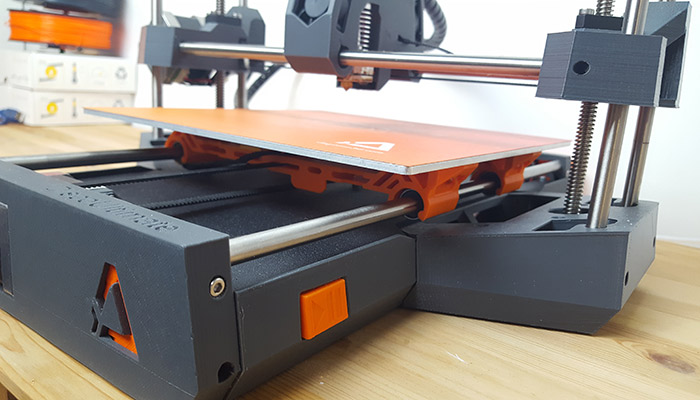
The two extruders located at the rear of the machine (bowden type) allow the two-color mode
Regarding the dual-color mode of the 3D printer, it is managed by a single extruder included within the print head, with a filament loading/unloading and purging system to ensure that there is no mixing of the two colors. A clever system that keeps the Ultimate Disco affordable once again.
3. CuraByDagoma Software
For the slicing part, Dagoma did not want to reinvent the wheel and therefore offers a customised version of Ultimaker’s famous Cura slicer specially designed for the Ultimate Disco. Simply called CuraByDagoma, the software uses the basic options of Cura, allowing you to position, enlarge or rotate the model, but above all to define the 3D printing parameters.
In wanting to keep the 3D software simple, the number of options was quite limited. In fact, you can only choose the layer thickness (100, 150 or 200 microns), the density also called infill (0%, 17% or 33%), the type PLA filament (with the possibility to change the extrusion temperature but not the speed), the use of printing media, the purge volume necessary for printing with two filaments and finally the addition of a pause during printing (to change the filament for example). The most experienced users will quickly be limited when using CuraByDagoma, however the manufacturer confirms that Disco Ultimate is compatible with other slicers such as Simplify3D or Cura from Ultimaker.
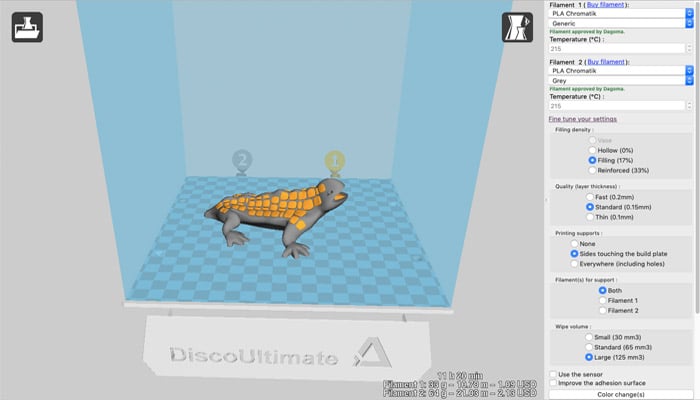
The CuraByDagoma software
4. First impressions
Offering a dual extrusion system is always a difficult challenge on a desktop 3D printer and many manufacturers have failed to successfully integrate such an option. Often the selling price of the machine is much high and/or results are quite similar. In the case of Dagoma, we were therefore rather unsure before we started, but the overall experience of their extrusion method proved relatively simple, and the results were satisfactory. Also, the dual extrusion is done on a single printing head and the price of the two-color Ultimate Disco is only 100€ higher… In short, we were pleasantly surprised by the 3D printed parts in two colors.
The few dual-extrusion difficulties encountered were quite basic problems such as an improperly loaded filament or a problem with adhesion to the plate (solved by adding glue). From the point of view of the quality of the two-colour parts, we did notice some some inconsistencies (slight burrs and colours not as sharp as in single extrusion) despite the filament purging system.
More generally, the printing process went quite smoothly without any major problem. The absence of a control screen can be quite disturbing at first (especially since we are used to testing machines equipped with a screen by default), that’s why we advise you to add the add-on Screen which costs only 49€. This will allow you to modify the extrusion temperature, the printing speed or the fan speed, to have several 3D models on the SD card or even to modify the nozzle offset.
-
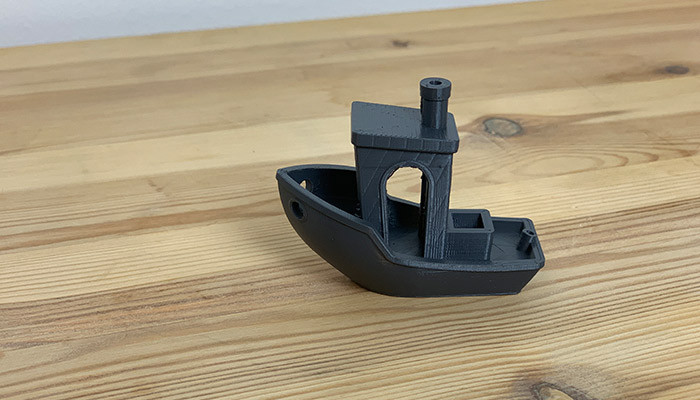
- 3DBenchy by CreativeTools
-
- Torture Test by Markerbot
-
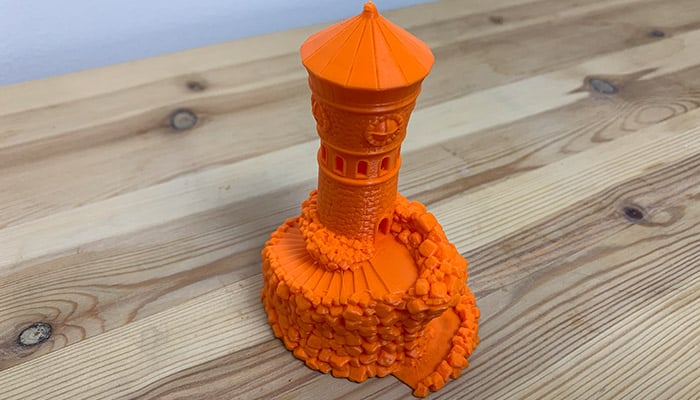
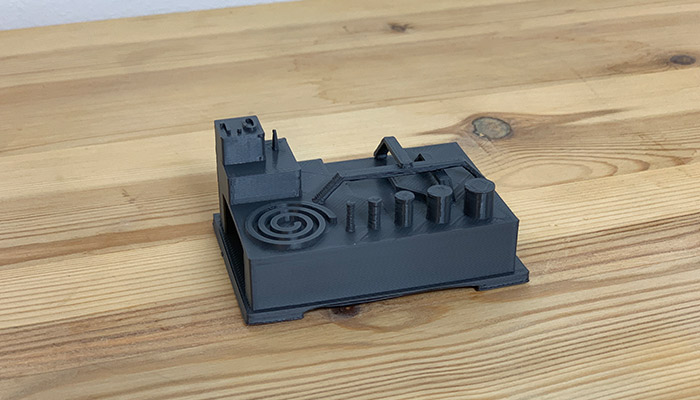
- Forbidden Watchtower by kijai
-

- Turbine by Vladac (we changed the filament during the middle of the printing job)
-
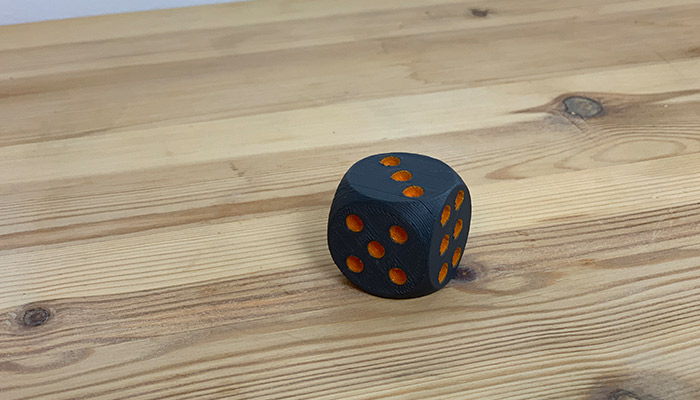
- Dice by Gcreate
-
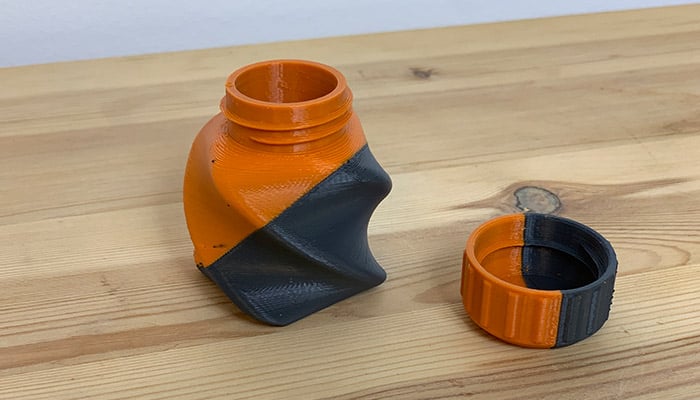
- Twisted Bottle and Screw Cup by David Mussaffi
-

- Dual Drodi by BCN3D
Below you can find our rating! What do you think of the Dagoma Disco Ultimate 3D printer? Let us know in a comment below or on our Facebook and Twitter pages!
Check out more 3D printer tests!
Compare hundreds of 3D printers!
Conclusion
- 3D Printer Content 8/10
- 3D Software 7.5/10
- Quality of 3D Printing 8/10
- Ease of Use 9/10
Positive points:
– Price
– Ease of Use
– Dual Extrusion
Negative points :
– Connectivity
– 3D Software
– Control Screen
The new Dagoma Disco Ultimate is ultimately the worthy successor to the 3D DiscoEasy 200 printer. A not so obvious mission when we know how popular the DiscoEasy is, especially in the Makers community. Despite its almost identical design, which we would have liked to see evolve, the Ultimate Disco presents some interesting new features, namely the Extruder+ and the standard Expert Pack. The two-color mode is a real success for the manufacturer, who had embarked on a risky gamble by wanting to integrate an efficient dual extrusion system while keeping a reasonable price level.
With its open architecture and in the absence of a heating plate, Disco Ultimate is limited only to standard materials (mainly PLA), and users looking for a machine capable of printing nylon, PC or other composite filaments will have to turn to other 3D printer models. In the same way, there is a chance that the absence of a control screen or a WiFi connection will confuse some people… But considering this 3D printer costs 399€, or 499€ for the two-colour version, it will be difficult to find many 3D printers that offer better quality/price ratio.


