


Lab 3Dnatives: Creality CR-10 3D Printer Test
As desktop 3D printers become more and more common, companies are trying to make cheaper and cheaper models. These cheap 3D printers claim to retain a high-quality print whilst cutting price. One of these companies is Creality, the Chinese manufacturer who have a bestselling printer in their CR10 3D printer.
We have recently tested numerous 3D printers. Today, we are testing the CR-10 DIY 3D printer. Creality is a relatively new company, only founded in 2014. According to Creality’s website, they sold 3,000 3D printers in 2014 and more than 10,000 in 2015. In addition to their DLP 3D printer, the DP-001, the company’s product range includes several industrial 3D printers as well as numerous DIY kits.
The Creality CR-10 can be bought for just over $350. We are testing whether this low price means low quality, or whether it stands up to its higher-priced competitors, such as Makerbot. In addition, is this printers’ hype deserved? For whom is the CR-10 suitable, and how good is its usability?
1. Unpacking the Creality CR-10
On opening, you can clearly see the CR-10’s orange aluminium frame. The heated print bed is wrapped in foil for protection and the package’s contents are well padded.
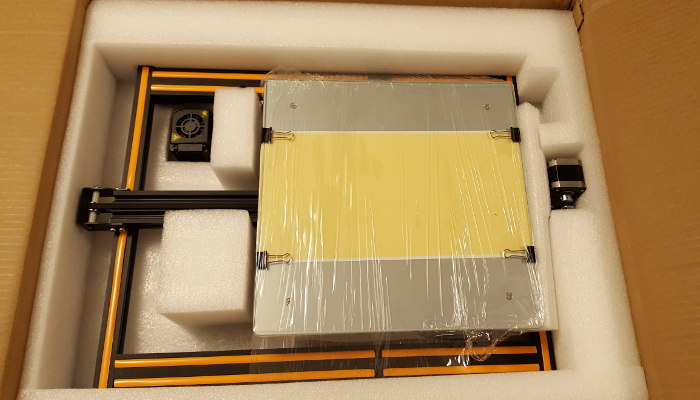
The Creality CR-10 was well-packed.
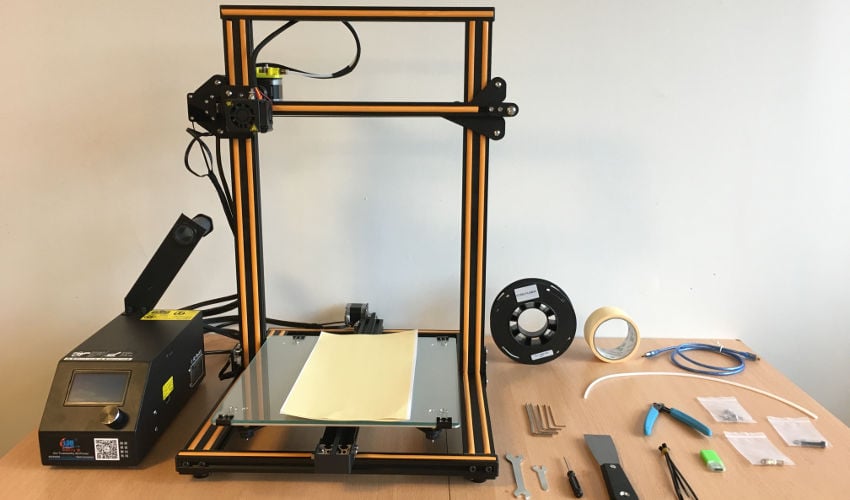
In addition to two large parts and the black control unit, other accessories are included such as two self-adhesive film rolls for the printing bed, the coil holder, cable ties, a filament guide tube, USB cables, a micro SD card, a spatula, and a small screwdriver, Allen key, and other spare parts. These parts ensure you don’t need your own tools to setup the CR-10 3D printer. The instructions come in English to help verify you have all the parts. However, these instructions are not in clear English, so you will need to use the extra instructions on the MicroSD card to set the printer up.
The CR-10 has a simple and pragmatic look, but you cannot compare it to Ultimaker or Zortrax 3D printers. The model weighs a hefty 13kg and has a print volume of 300 x 300 x 400mm. The nozzle diameter is 0.4mm, but can be replaced with 0.3 or 0.2mm nozzles. The recommended printing speed for the Creality CR-10 is 50mm/s, and the CR-10 can print materials such as ABS, PLA and wood.
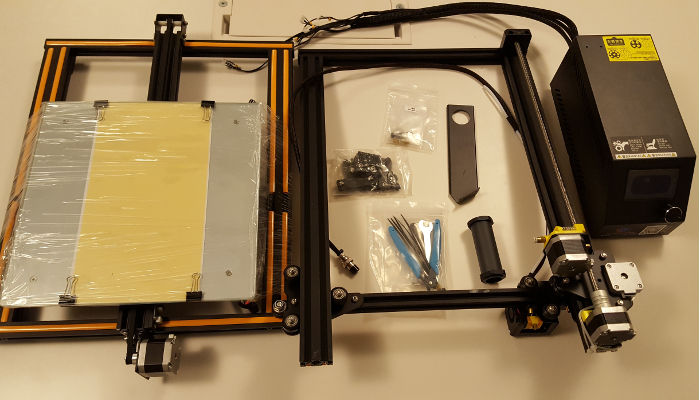
These components had to be assembled independently.
2. Setting up the CR-10
Before starting, open the MicroSD card’s instructions, as these, in contrast to the paper instructions, are helpful. Firstly, the two frame parts must be put together and attached using the screws on the bottom. It is helpful to have a second person help to hold the frame whilst screwing the bolts in. In addition, fix the two axles on the sides are further with the screws to make the CR10 more stable. Then, connect the cables to the appropriate places.
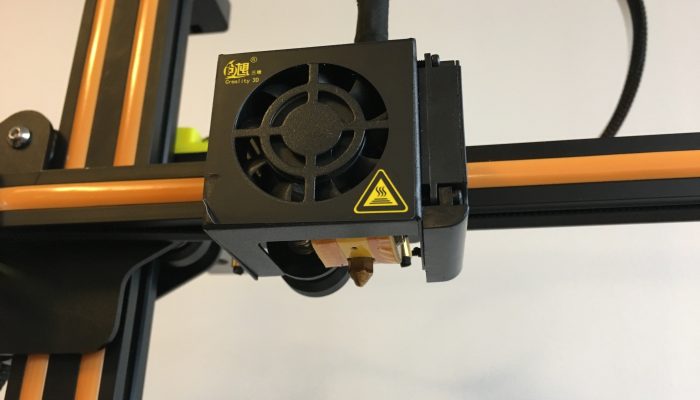
The printhead of the CR-10.
Now you still choose the appropriate number of volts for your country, attach the coil holder on the control unit, and then you’re finished. It took us 45 minutes to set the CR-10 up, can be quicker if you know what to do.
To calibrate the print bed, simply turn off the CR10, as the axes can easily be moved manually when offline. Use the printhead to steer the four corners and the center of the print bed to check if it just barely fits between the bed and the nozzle. You may need to readjust the bed at the bottom of the bed.
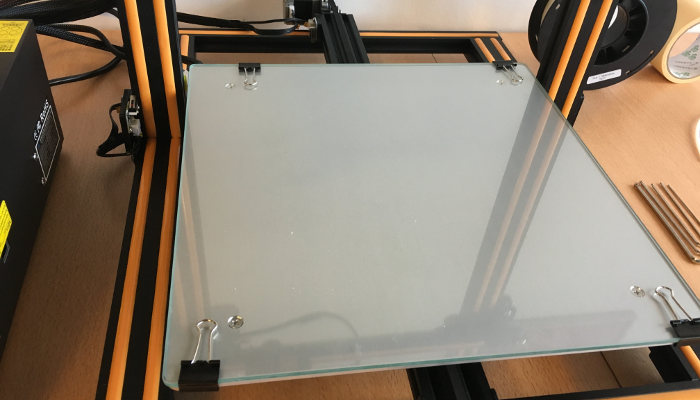
The CR10’s pressure bed is made of glass, which can be easily removed.
3. The Creality CR-10’s Software
You can either use the free 3D software Cura or the excellent but paid software Simplify3D. If you do not want to waste too much time on configurations, join one of the numerous CR-10 Facebook groups , where you can get help from the community. In addition, you can also control your CR-10 with a Raspberry Pi, or simply load your G-code onto the included Micro-SD card and tune in via the printer’s control screen.

The menu of the Creality CR10 can be controlled easily.
4. Creality CR-10 Print Quality
According to the manufacturer, they can process different plastics such as ABS, PLA, TPU with the CR-10. We immediately started printing a small boat (3DBenchy) with Simplify3D, followed by our favourite death test. Overall, the results for a first test with the original settings were pretty good.
We bought Superman and Hulk 3D models from Malix3design. We have used Green, Blue and PLA in Red Metallic from Arianeplast.
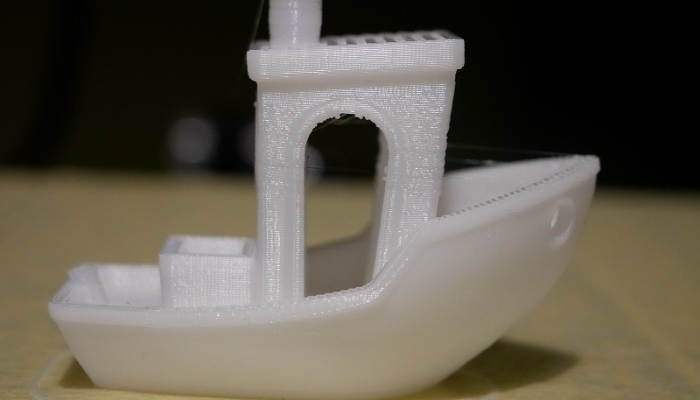
3DBenchy test print.
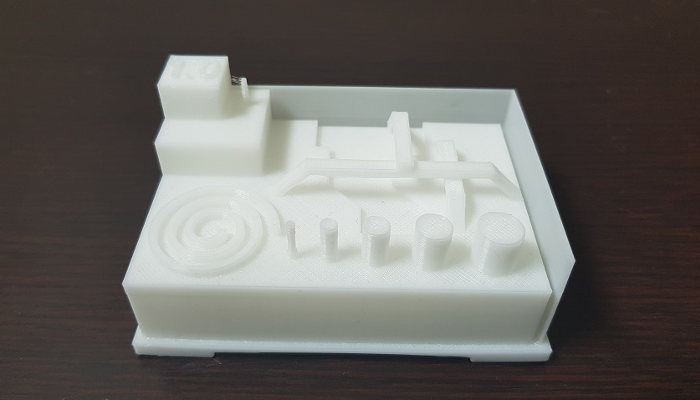
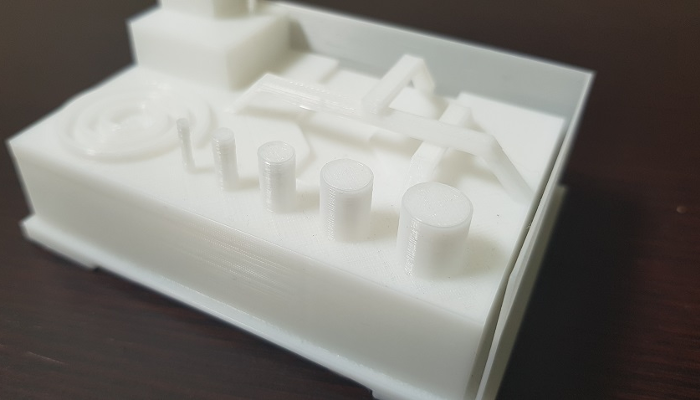
Makerbot’s torture test.
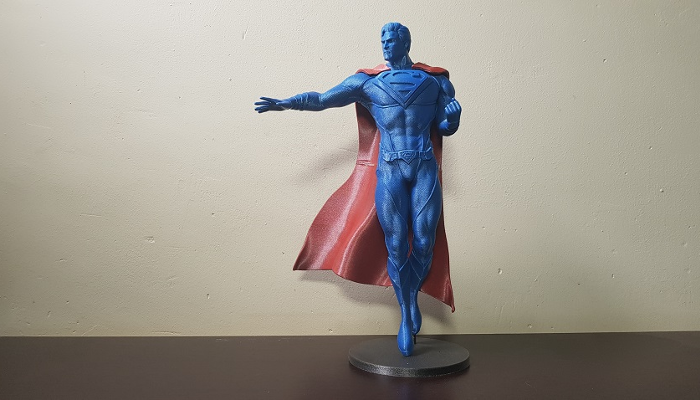
Superman: 9 parts, 150 microns, enlarged to 150%, 60 mm / s, 10% infill, 90h total duration, retracting 6 mm

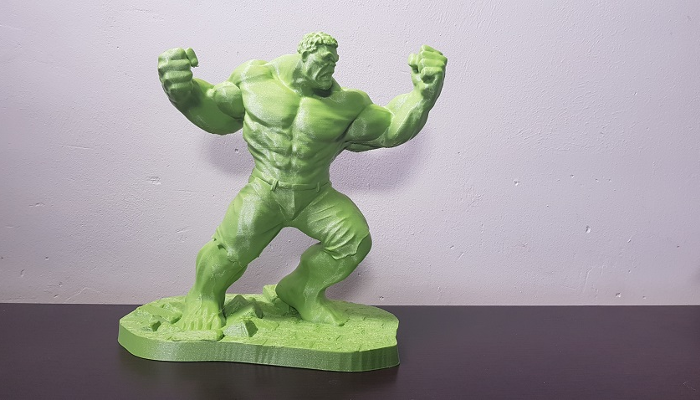
Hulk: 200 microns, 10% infill, with support, 60 mm / s, about 800g filament, 64h pressure duration, retracting 6mm
You can compare the Creality CR-10’s specs in our Comparator here.
What do you think about our Creality CR10 test? Let us know in a comment below or on our Facebook and Twitter pages! Sign up for our free weekly Newsletter, all the latest news in 3D printing straight to your inbox!
Conclusion
- Equipment Included 8.5/10
- Software 8/10
- Print Quality 8/10
- Ease of use 8/10
Positive points:
– Value for money
– print volume
– print quality
Negative points:
– Unclear menu navigation
– Fan quite noisy
– Printer smells when printing


