


3Dnatives Lab: Testing the S7 3D Printer From UltiMaker
In 2010, as part of the Reprap movement, a team of Dutch enthusiasts decided to build their own FDM printer, the Elserbot, in a Fablab. A year later, in 2011, this same team founded the company Ultimaker by commercializing the Ultimaker Protobox/Original FDM printer. Since this founding in 2010 by Martijn Elserman, Erik de Bruijn and Siert Wijnia, Ultimaker has become one of the pioneers of desktop FDM 3D printing.
Over the years, the company has continued to expand its FDM 3D printer line and developed one of the most popular slicers to date, Cura. At the same time, the firm created Management Console (ex-Cura Connect) and Digital Factory, both remote control interfaces.
Meanwhile, Ultimaker recently underwent a major change when it merged with its historical competitor Makerbot last year. This merger resulted in the new UltiMaker brand, and the S7, released on January 24, is the first product to be commercialized. Although it is the first printer resulting from the merger of the two entities, the UltiMaker S7 follows in the footsteps of the S series, which has proven itself with the S3 and S5 models. In essence, the S7 has been put forth as an improved version of the S5, after a year of research and development, aiming to address all its shortcomings. Furthermore, it promises to improve the accessibility and ease of use of FDM 3D printing.
A few days before its release, we had the opportunity to put this new machine on our test bench. Read our full review below and discover all the features and characteristics of the UltiMaker S7 direct from the 3Dnatives Lab.
Unwrapping the UltiMaker S7 3D Printer
We started our test by unpacking the S7, which comes fully pre-assembled except for the spool holder. Once the printer is removed from its box and freed from the transport protections, we installed it on a table for testing. At first glance, although taller, the S7 looks very similar to the S5. This can be explained by the fact that it reuses many components from the S5. For example, the two printers share the same Cartesian movement and print core system, the same manufacturing quality and the same 330 x 240 x 300 mm (19.5 x 23 x 31.5 inch) printing volume.
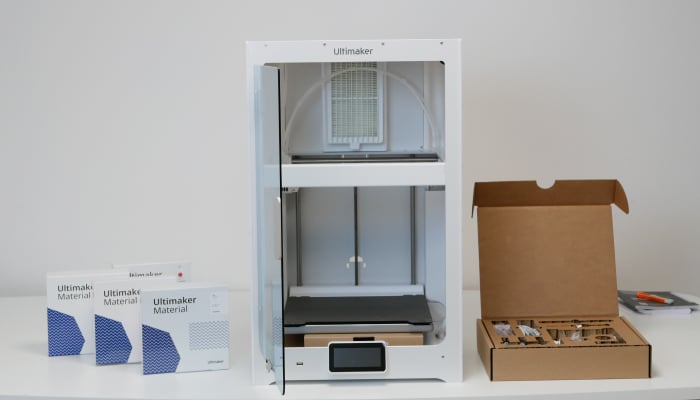
The UltiMaker S7 uses the same elements as the S3 and S5 FDM printers sold by the brand
Once the enclosure door was opened, we discovered the various accessories that come with the machine. Within the accessory box, UltiMaker provides 3 print cores (2 AA and one BB), a spool holder for two spools (equipped with an RFID/NFC reader to recognize the loaded spools), a screwdriver, a RJ45/Ethernet cable, a blank USB flash drive, grease and lubricant. In addition to the maintenance accessories (lubricant, grease) provided, we would have appreciated having a few additional tools such as a pair of cutting pliers, a pair of fine needle-nose pliers or a pair of tweezers. In the 3D printer, we also found the build plate and two spools of filament.
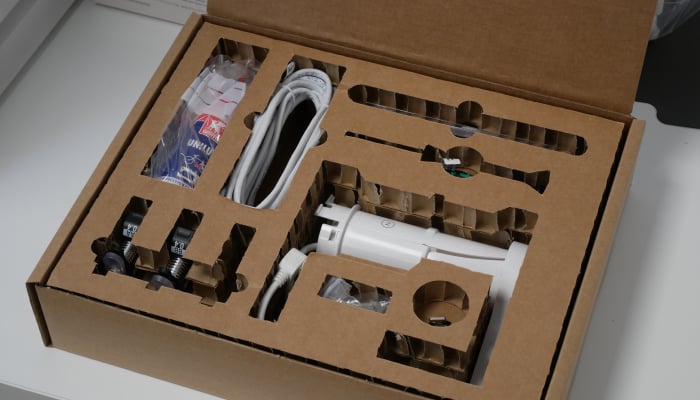
The accessories supplied with the machine
Upon closer inspection of the S7, although it is visually very similar to the S5, we saw some notable differences:
- First, the S7 has a fully enclosed print chamber (as a reminder, the S5 was open at the top) and is equipped with a so-called Air Manager for better temperature control and air filtration. More concretely, through this a thermometer monitors the temperature of the printing chamber and adjusts the speed of the extraction fan to regulate the temperature.
- Second, UltiMaker has equipped the S7 with a new flexible magnetic steel print tray with a PEI coating. This reversible tray replaces the glass tray previously used in other UltiMaker 3D printers. UltiMaker justifies this change as a way to increase reliability. Based on customer feedback, UltiMaker has concluded that about one in six failed prints is due to poor adhesion of the first layer. So, with its new textured PEI-coated plate, UltiMaker promises a 50% reduction in print defects related to poor first-layer adhesion.
- Third, the UltiMaker S7 boasts an inductive sensor for improved bed-leveling. The S3 and S5 are equipped with capacitive sensors for probing. But UltiMaker realized that this sensor could sometimes be destabilized by electromagnetic interference. So the S7 uses inductive sensors, which are less sensitive to noise and electromagnetic interference to ensure better data acquisition.
- Fourth, the S7 is equipped with sensors and pins to avoid handling errors as much as possible. Thus, the printer checks that the tray is installed and that the front cover is closed before starting a print. Moreover, the holes at the four corners of the printing plate are aligned on small metal studs to ensure the correct alignment of the plate.
- Fifth, the camera’s wider viewing angle and increased resolution provide better visibility of prints for remote monitoring.
- Sixth, the front of the S7 features a single glass door instead of the double swinging door found on the S5.
- Seventh and last point, the S7 includes 5 GHz Wi-Fi connectivity (in addition to the 2.4 GHz already present on the S3 and S5).
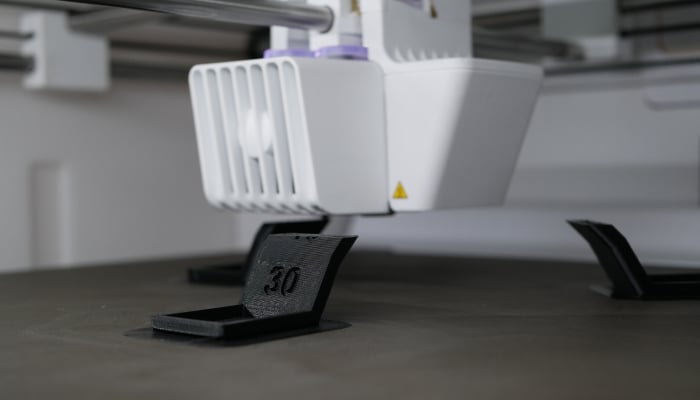
The S7 is equipped with strong magnets to fix the flexible magnetic plate during printing
Apart from these 7 notable differences, the UltiMaker S7 joins the S3 and S5 to strengthen the UltiMaker S line. A family of Cartesian FDM 3D printers that features dual bowden extruders and interchangeable proprietary print heads called “print cores.” Another feature of the S series is that all printers have:
- A 4.6-inch color touch screen;
- A motion system using steel rods and ball bearings, 3 Nema 17 stepper motors, pulleys and belts;
- A chassis made of machined aluminum sheets and acrylic panels, with some injection molded plastic pieces.
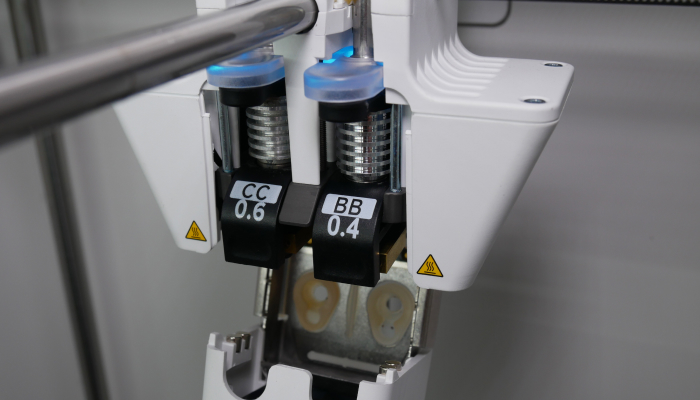
UltiMaker S 3D printers use interchangeable print heads
Installing the UltiMaker S7 3D Printer
The UltiMaker S7 is almost ready to use right out of the box. All you have to do is install the magnetic printing plate, the second print core, the filament holder and load the filament to start printing. While inspecting our S7, however, we noticed that the printer we were testing was not sufficiently lubricated and that the steel rods of the Y-axis were a bit loose. We therefore decided to correct this before continuing our test and avoid potential printing problems. These problems could also occur on the S3 and S5 3D printers during transport, but they are easy to rectify.
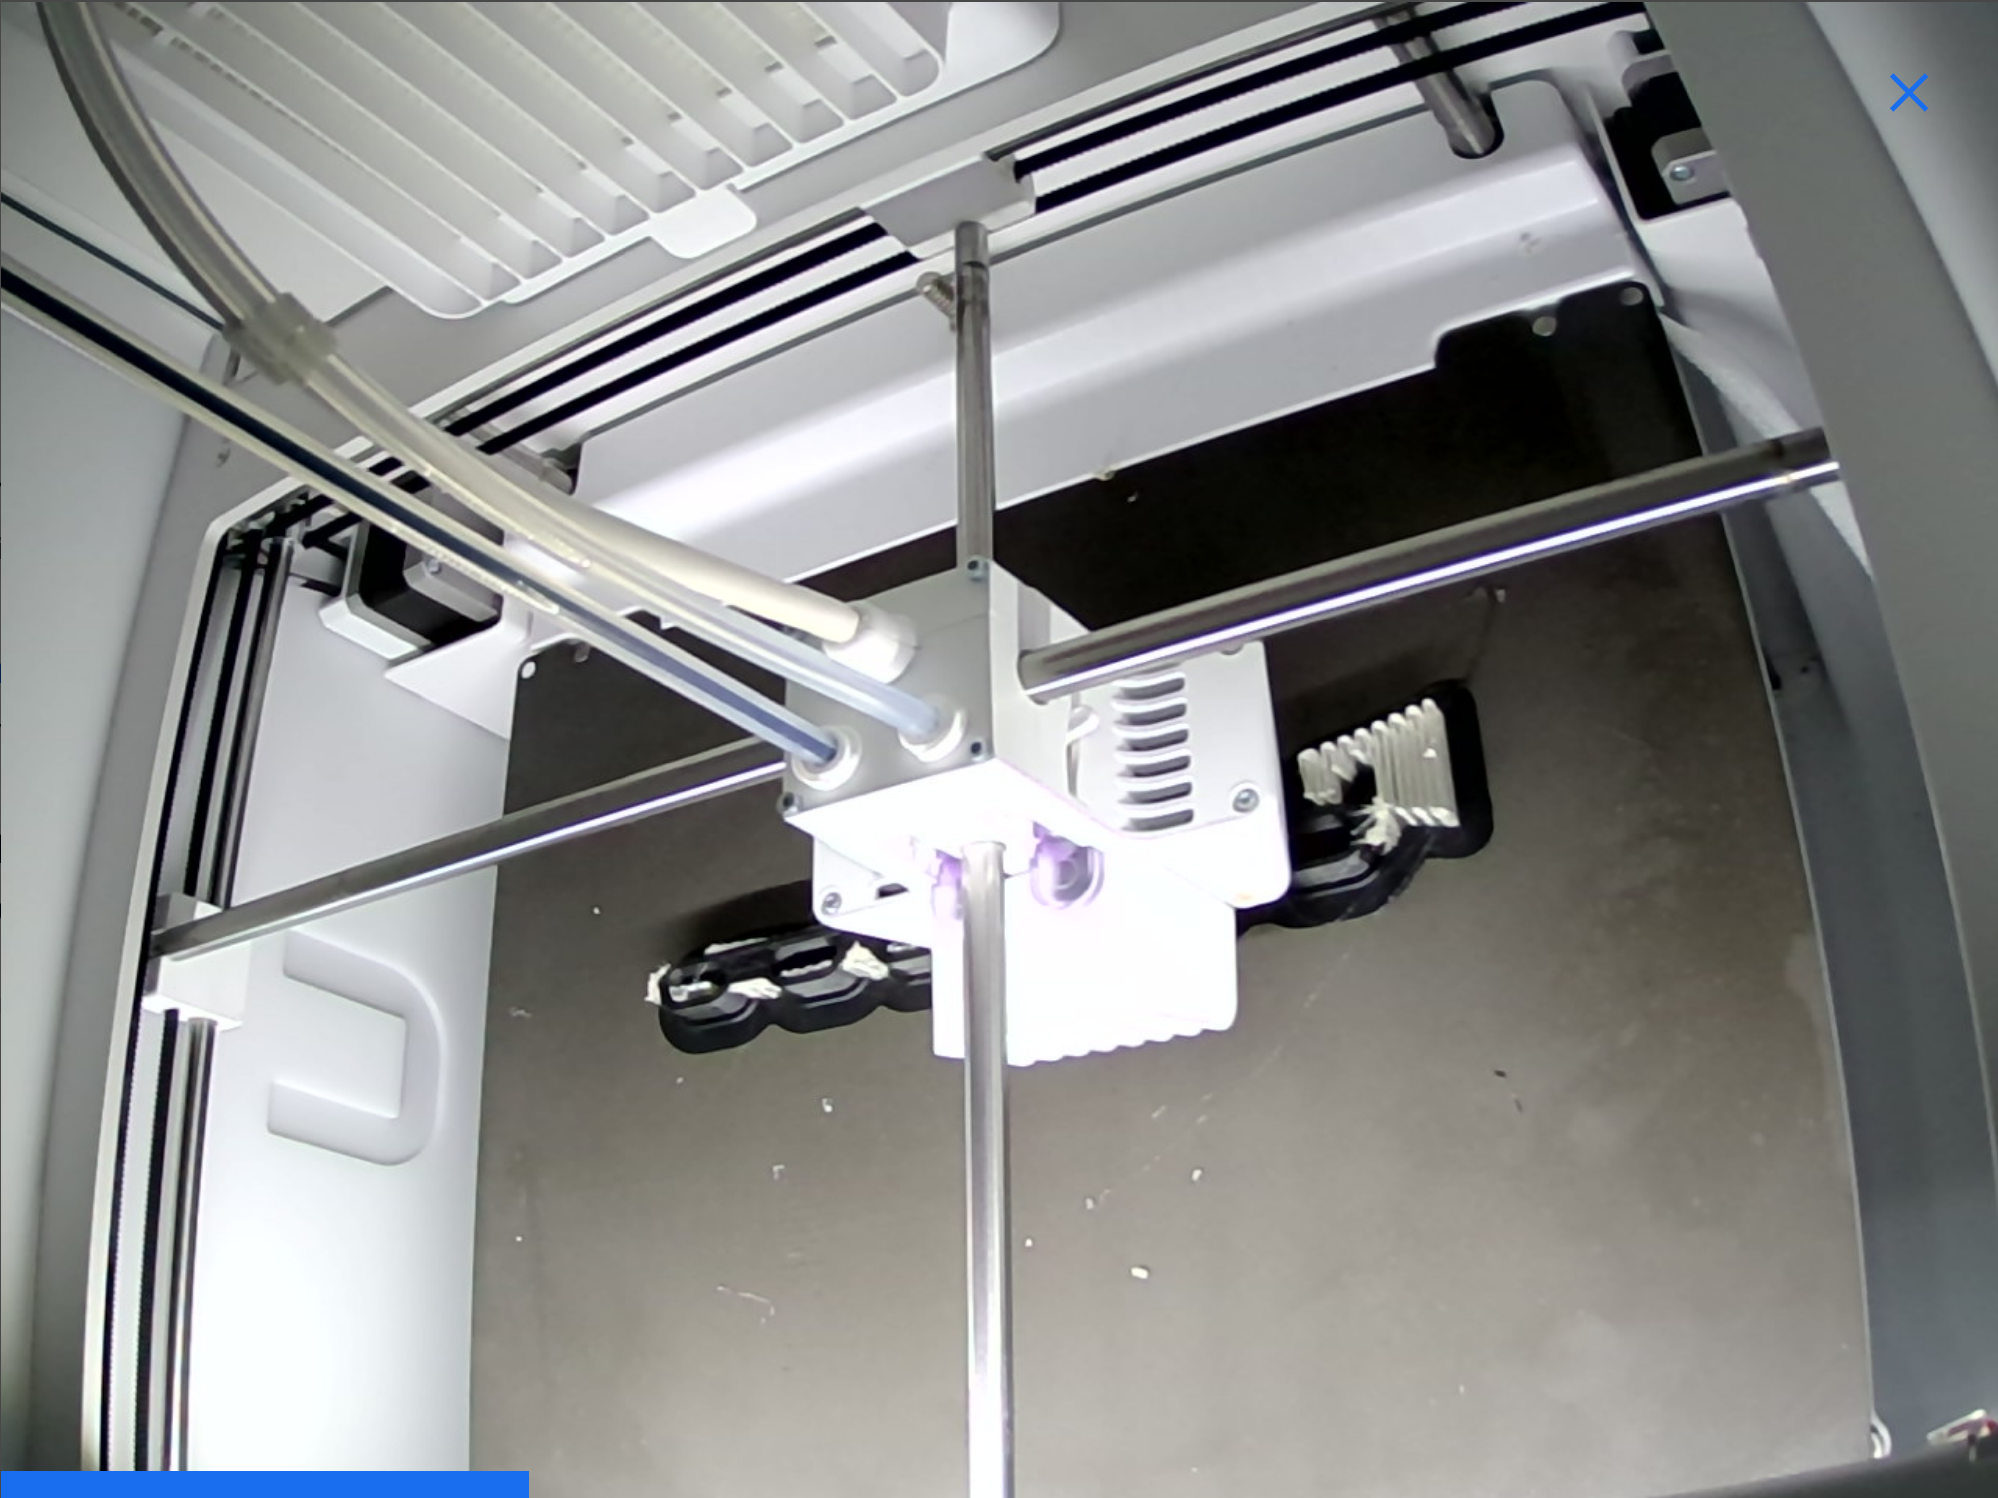
The print head of the S7 moves along steel rods
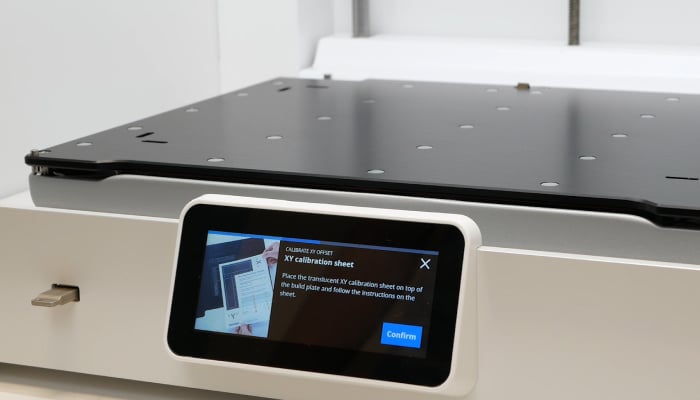
As you may have noticed, we haven’t mentioned manual leveling of the tray yet. And for good reason, this step is eliminated from the installation process thanks to the factory calibration performed by UltiMaker during assembly. This means that the tray will never have to be manually leveled and the induction sensor will ensure that the print is perfectly parallel to the tray.
Like the S5, the S7 will be compatible with the metal expansion kit released by the manufacturer a few months ago. With this kit, users can print green metal parts that will then be sintered by a partner service to form a final metal 3D print. Although we were not able to test this kit ourselves, we were able to get our hands on both green and sintered parts and were able to witness the performance of the UltiMaker S printers on printing metal-filled filaments.
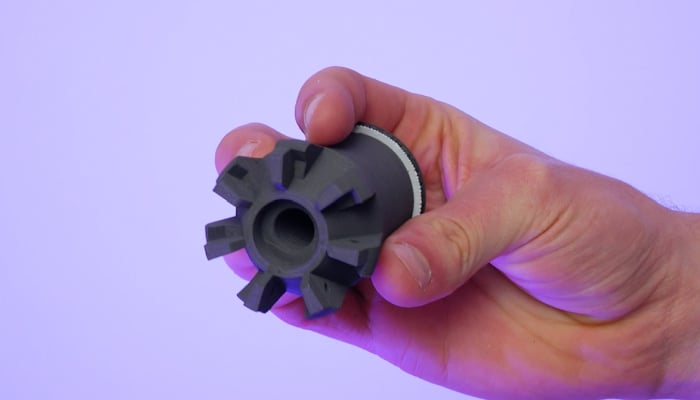
The kit allows users to print green parts that can be sintered by a network of partners
However, although the functionalities of the S7 bring it closer to the S5 equipped with the pro bundle (thanks to the integrated air manager in particular), it will be necessary to add the material station to take full advantage of a similar offer and benefit from the storage of filament in ideal conditions as well as the automatic change of filament.
Cura Software & Digital Factory Interface
As mentioned earlier, the S7 shares strong similarities with the rest of the S line in terms of components and manufacturing, but these similarities are reinforced on the software side. Indeed, all three printers use the same, in-house open source slicing software, Cura, and can be controlled remotely, locally or not, through the Digital Factory UltiMaker web interface.
While all three printers now use the same version of Cura, the slicer has changed significantly since the S5 3D printer was launched in 2018. Since then, UltiMaker has added more than 280 third-party materials to Cura as well as its lineup of 12 proprietary materials. In addition to a diversified portfolio of available materials, Cura is regularly updated to improve print speed, pre-print time (optimization of the heating and probing sequence), reliability or print profiles. Moreover, it is important to note that Cura is already clearly the most popular slicer on the market. It is open source, compatible with a wide range of machines, and includes all the basic features as well as more advanced features such as tree supports and lightning infill.
For this new machine, the S7, a new Cura update, 5.2.2, was released on launch day to include the S7 profiles. In addition to the Cura slicing software updates, UltiMaker ensures the longevity of its machines through regular firmware updates. When we first started up our S7, we were asked to update it with the latest firmware available. Although the S7’s firmware still had some small bugs and slowdowns at the time of our test, we noticed that UltiMaker is actively working to correct them via regular updates.
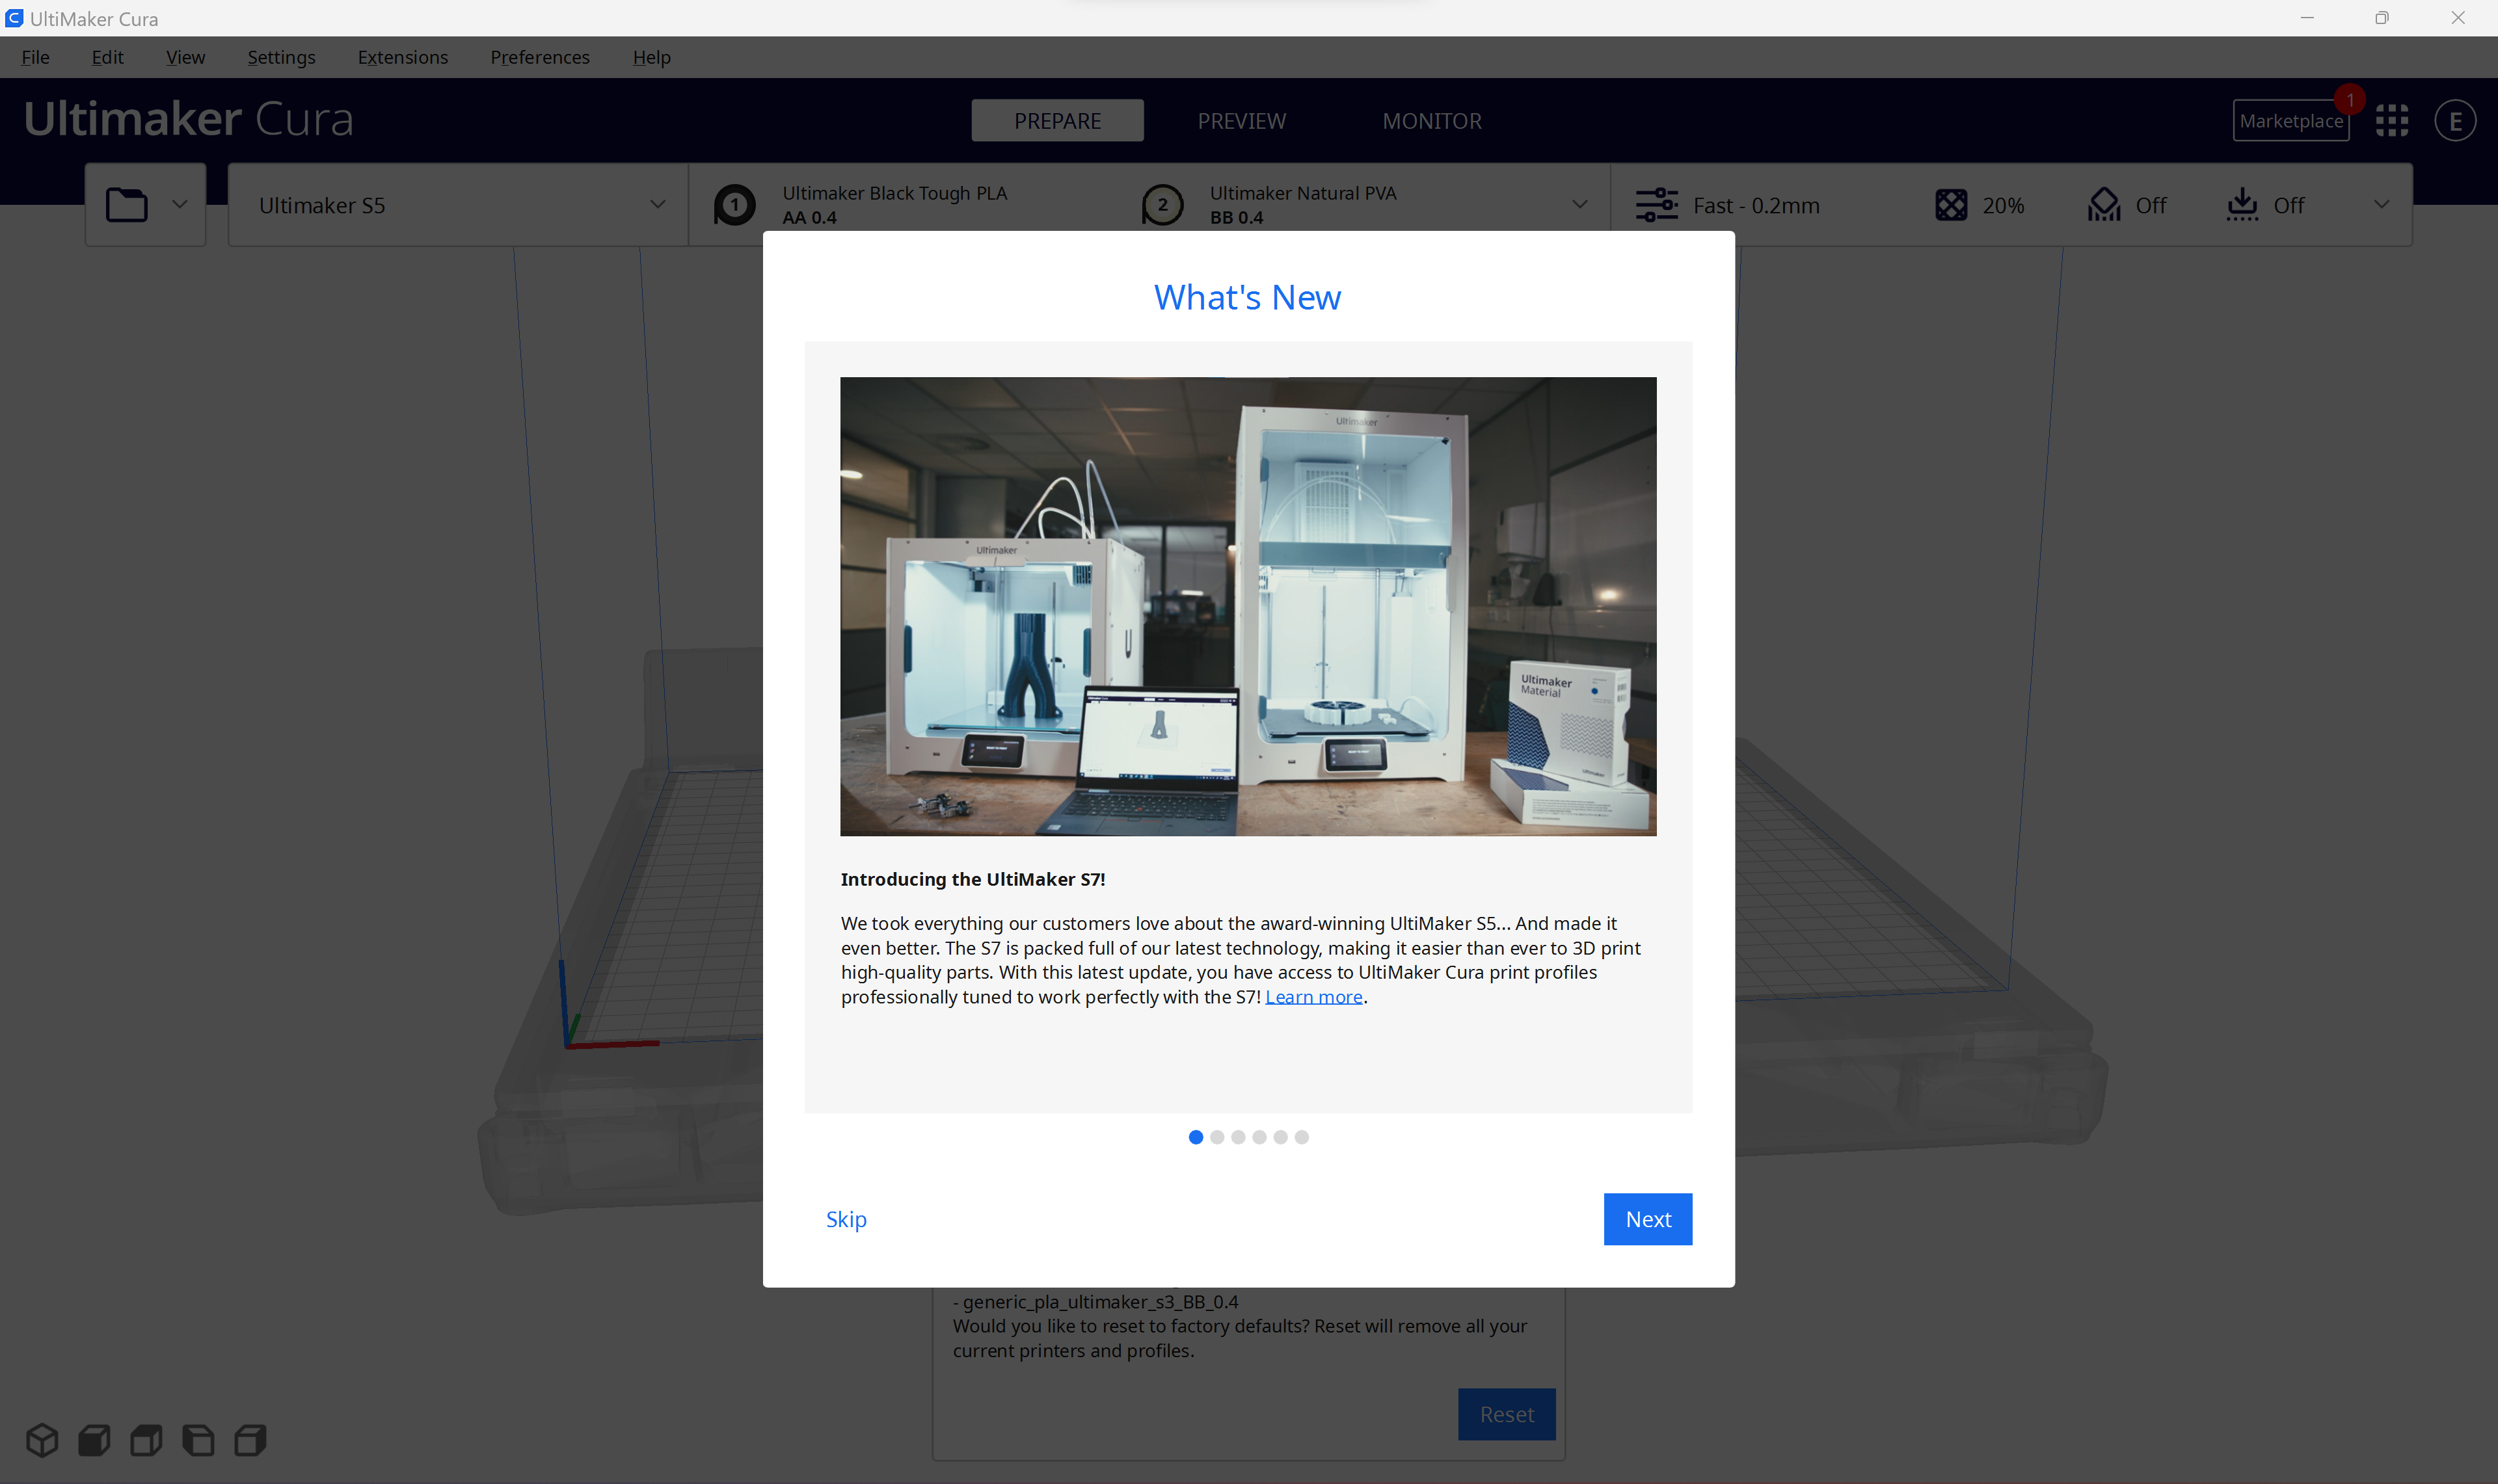
Cura was updated on the day of the S7 release to include its print profiles
Last but not least, users also have access to the Digital Factory. Through this, UltiMaker 3D printers can be controlled remotely for personal use or in collaboration with the creation of a team of users. In addition to the remote control of the printers, the Digital Factory also advises the user on maintenance to ensure optimal operation of the machines over time.
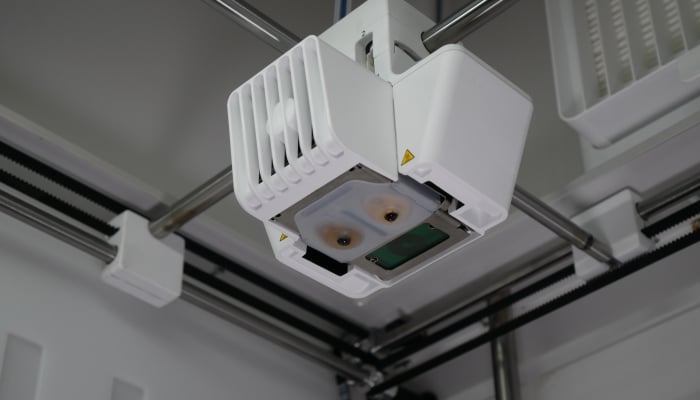
A new camera allows you to monitor your prints remotely
First Prints
Once our first file was imported and sliced in Cura, we started our print, via the supplied USB drive, with the PLA Tough spool that came with the S7. Once the printing was finished, we unfortunately discovered that our various models had fallen off the tray and that the printing had failed. As this first test was done before the official release of the S7, we still had a version prior to the update incorporating the S7 profiles, so we sliced it with the default profiles of the S5.
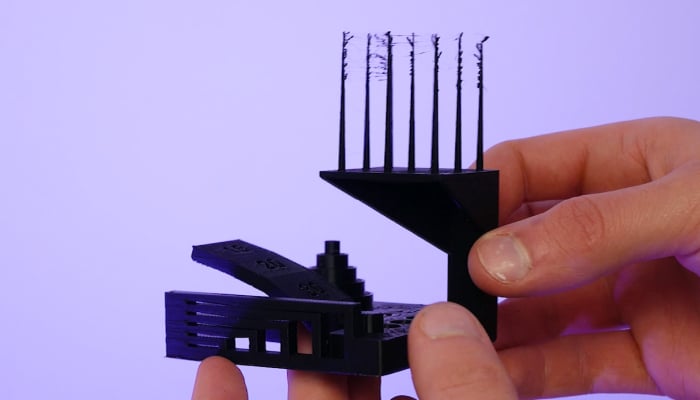
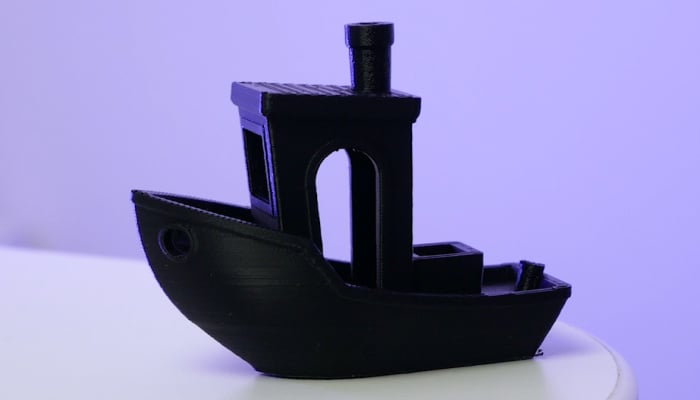
But when the new version of Cura was made available, we decided to repeat the test with the new profiles which were specifically developed for the S7. Additionally, we cleaned the plate with isopropyl alcohol. This time, the printing went as expected and the models were faithfully reproduced with validated tolerances down to 0.2 mm. The model shows some ‘spaghetti’, a phenomenon that could be eliminated by fine-tuning the extruder retractions.
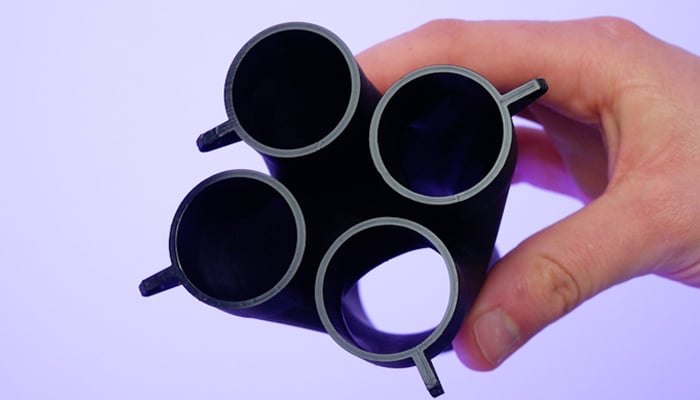
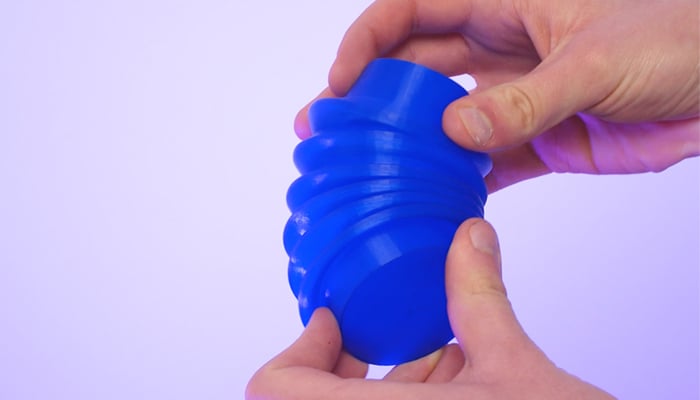
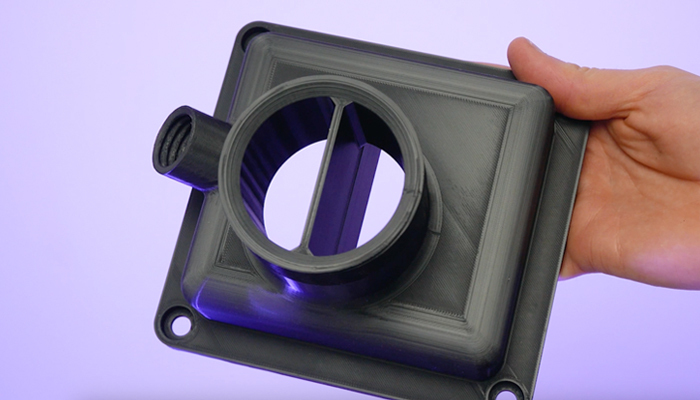
During our tests, we had the opportunity to test a variety of materials that show the capabilities of this new FDM 3D printer. PLA Tough allowed us to judge the capabilities of the machine (tolerance, dimensional compliance, bridging, cantilevering, …) while more complex materials such as PA-HT CF15 allowed us to test the compatibility offered by the available print cores as well as the benefits of the enclosed print enclosure and the integrated Air Manager. With the variety of print cores available and the ability of the UltiMaker machines to reach extrusion temperatures of 300°C, the UltiMaker S printers are compatible with fibrous materials and metals. In addition, the printing plate is heated and can reach 110°C.
On our first print in PA-HT CF15, we noticed a lot of spaghetti and on one of our models, the layers come off. These printing problems are characteristic of a wet filament and are also recognizable by the sound of boiling water during printing. Once this first print was complete, we dried our filament and restarted our tests. Once the filament was dry, the prints ran successfully and were able to reproduce the details of the sliced models in fine detail. Or in any case, we did not observe any particular printing defects.
In addition to testing single-extruder prints, we decided to use the second print core to print more complex designs requiring soluble substrates. Once these prints were made, we simplified the post-processing by immersing the print in the “PVA Removal Station” which allows the water to be agitated to accelerate the dissolution of the soluble PVA supports.
Conclusion
- 3D Printer Features and Accessories 8.5/10
- Software 10/10
- Printing Quality 9.5/10
- Ease of Use 10/10
Pros:
- Regular software updates
- Dual extrusion
- Material compatibility
- Integration into the UltiMaker ecosystem
Cons:
- Price
- Pre-printing and printing time
After several years of waiting since the launch of the S3 and S5, and following the recent merger with Makerbot, it would not have been surprising to see a completely redesigned line of 3D printers coming out of the Dutch manufacturer. But, the UltiMaker S7 is not a new printer seeking to break the codes established by its predecessors, but rather a real improvement of the S5, a sort of S5+ or S5 Extended, aiming to correct the few shortcomings of its predecessor. Indeed, this machine is positioned as an evolution of the S5 equipped with the air manager. After all, the S5 remains, even today, one of the most popular professional desktop FDM 3D printers on the market.
With the improvements made on the S7, UltiMaker ultimaker makes a proven printer more reliable and, by reusing the same architecture as the S3 and S5, UltiMaker ensures continuity and compatibility of the S7 with the entire ecosystem. That being said, keep in mind that the print quality offered by the UltiMaker FDM printers comes at the cost of the print speed. You will have to be patient as the process of starting to print and the speed of printing itself makes the manufacturing process relatively long.
Furthermore, compared to the UltiMaker S7’s older siblings, it would have been nice to have a larger print volume: the S5 has a print volume 2.718 larger than the S3, so a similar ratio between the S5 and the S7 could have been imagined. The procedure to start printing and the print speed itself make the manufacturing process relatively long.
Thanks to its constant improvement and regular software updates, UltiMaker ensures a real longevity to its printers. Thus, UltiMaker machines do not look outdated over the years and guarantee a good user experience and high print quality over time.
Available for an entry-level price between €7,200 and €7,700 plus VAT, the S7 may seem like a relatively expensive FDM machine, but the easy experience and reliability of the S series is the real added value offered by the brand. To learn more about the S7 and all of UltiMaker’s products, you can visit their website HERE.


Ever since late 2020 I have been using the S3 which I constantly say “never seizes to amaze me” because I have had no material give me trouble except nylon which is a given because my S3 has no heated chamber but I did manufacturer my own 1/4″ thick Lexan enclosure with a hinged door to hold heat in and keep the breeze and dust out. I can definitely call this printer a set it and forget it unlike compared to my ender. I am jealous though of the fully enclosed chamber thanks to a detrimental patent expiring causing thousands of manufacturers to make open printers, and the new level sensor, and lastly not mentioned in this article the build leveling which makes sure your print is printed “straight up” even on a tilted print surface. I always like to mention how easily I can print PETG on my S3 just as easy as PLA on the ender