


3Dnatives Lab: Testing the Artec Ray 3D Scanner
Luxembourg-based manufacturer Artec 3D has specialized over the years in the development of portable 3D scanners such as the Eva, the Space Spider and the Leo. More recently, the company has also broadened its spectrum of applications by unveiling 3D scanners of a different type, such as the Micro, an automated stationary 3D scanner for scanning small parts, or the Artec Ray, a long-distance laser 3D scanner for large parts or indoor/outdoor scenes, such as wind turbines, ship propellers, airplanes or buildings.
First introduced in 2018, the Artec Ray is based on LiDAR technology, which stands for Light Detection and Ranging. On paper, it offers an accuracy of less than a millimeter, a long range of 110 meters associated with a wide field of view of 360º×270º, an acquisition speed of 208,000 points/s and a built-in battery with a maximum autonomy of four hours. These features as well as a recommended retail price of $60,000 (€56,000) clearly place the Artec Ray in the professional range of scanners. After the recent tests of the Artec Micro and Artec Leo, 3Dnatives had the opportunity to use the Artec Ray 3D scanner for a full test. So what are the possibilities offered by this equipment? Is it easy to use? What applications can be realized with the Ray? We took a closer look.
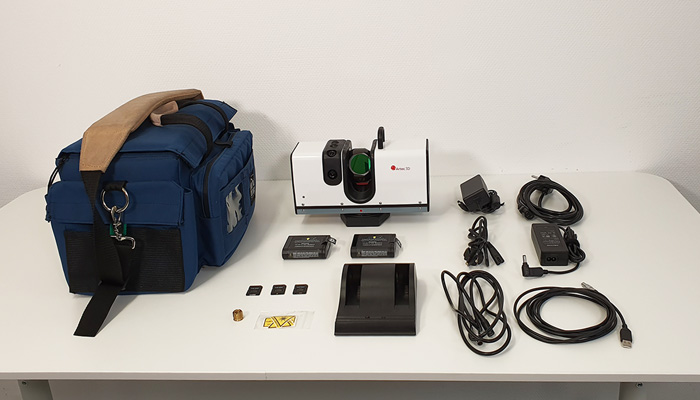
The Artec Ray scanner comes complete with power cables, a USB cable, two batteries and chargers, three SD cards, a tripod adapter and a carrying case
1. Unboxing the Artec Ray Scanner
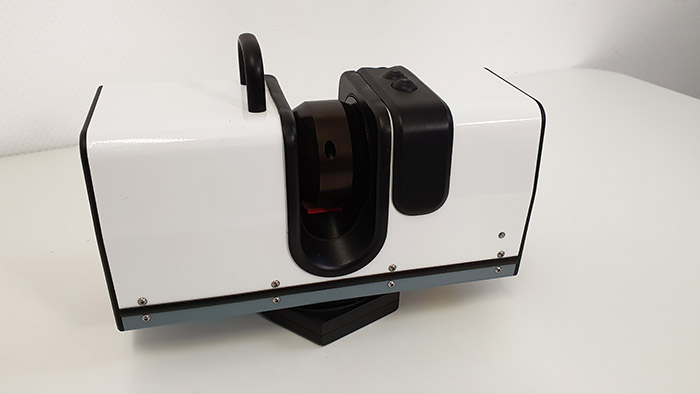
Visually, the Artec Ray looks like a rectangular prism of about 11.3″x7.9″x4.6″ (287×200×118 mm) for about 13lbs (just under 6kg). It includes a rotating mirror at its center as well as two 5-megapixel cameras to capture textures. It also has two LED indicators on the top of the scanner for real-time status (ON/OFF, ready to scan, scanning…), a power light on the base and a light for WiFi/Autonomous mode. On the top, Artec also thought of installing a carrying handle. Finally, on the side, there are slots for the external battery, an SD card and an ON/OFF button. The inputs for the power cable and the USB port have been positioned on the base of the scanner.
Regarding the accessories included with the scanner, it is delivered with power cables and two removable batteries Li-Ion 14V of 49Wh and their charger. We also find a 3m USB cable to connect the scanner to a PC, a tripod adapter, a carrying case, two 32GB SD cards and a SD card backup system. In the additional equipment, but not included with the Ray, the manufacturer also offers a tripod, magnetic targets, positioning spheres and a rigid, transport case.
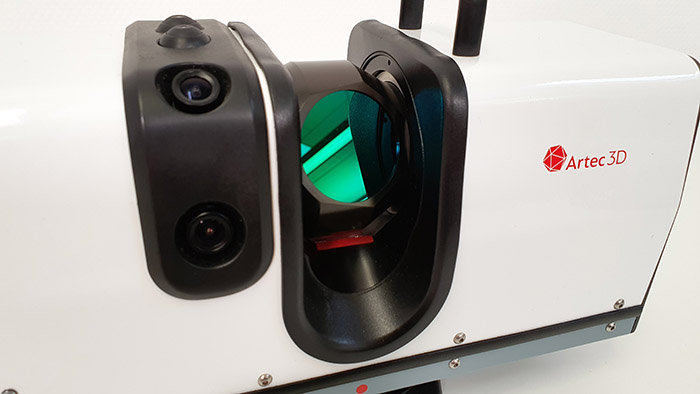
In the center of the Ray, you can see the rotating mirror that captures the reflection of the laser while the 2 cameras recover the texture
At the heart of the Ray, we find the LiDAR technology, a process that calculates the delay between the emission of a laser pulse and its reflection to determine the distance between the scanner and the object to be scanned, materialized by a cloud of points. Within the framework of the Ray, the laser used is a class 1.
Concretely, the Ray emits a laser while the mirror rotates on itself in order to capture the reflection of the laser on a 270° vertical field. Once the cloud of points acquired on the first plane, the base of the Ray rotates one notch clockwise to acquire a second vertical plane. The operation is repeated at 360° until the point cloud is complete. This cloud is then reworked by the scanner software to create the final mesh.
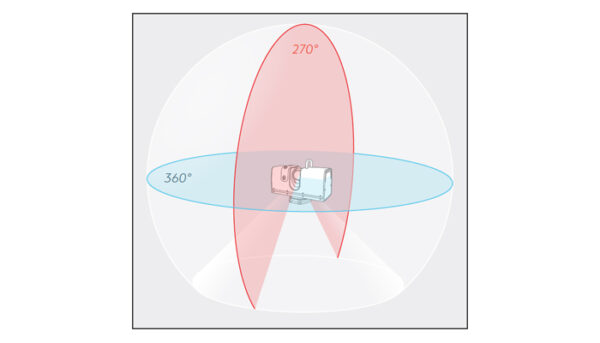
The Artec Ray acquires a point cloud at 270° in the vertical plane and 360° in the horizontal plane
2. Installing the Artec Ray 3D Scanner
To start using the Ray, the first step is to mount the scanner on a suitable tripod (not supplied by default) before connecting the power supply to the base of the 3D scanner (the non-rotating part). Then connect the Ray to a PC either via the USB cable or via WiFi using the Artec Remote application. Note that with WiFi, the scan data is saved on the SD card. It is also possible to use the Artec Ray in stand-alone mode, without using a PC. This mode is recommended for simple models or scenes to scan, and will require having the SD installed to save the data. The last step is simply to turn on the Ray using the switch on the side panel.
The other point to note concerns the removable batteries of the Ray. These provide a maximum of 4 hours of autonomy (2 hours per battery). If the user wishes to use the scanner on the mains, Artec recommends however to leave the battery inside the scanner in order to keep the center of gravity, at the risk of impacting the quality of the data.
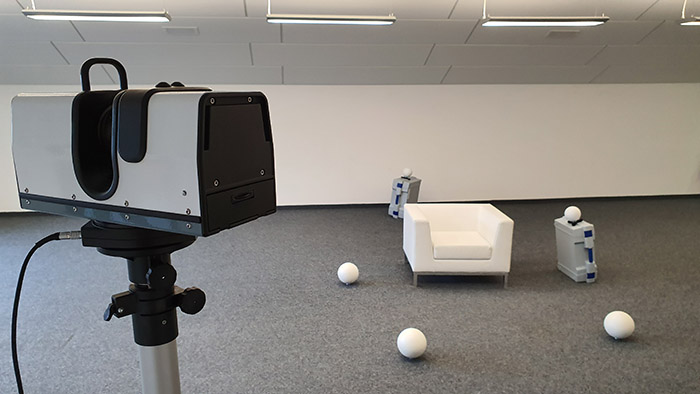
The Ray offers a maximum range of 360.9′ (110m) with an acquisition speed of 208,000 points/s
Once the Ray 3D scanner is ready, the model or scene to be scanned must be prepared. Typical of all 3D scanners, this preparation phase is key to ensuring optimal results. As the Ray is an optical scanner, it will have difficulty scanning reflective, dark or transparent surfaces.
In some cases, it will be recommended to use a matte spray. The objects will have to be immobile, uniformly lit and offer a minimum of geometry or texture. Overall, the start-up of the Ray does not require any particular calibration and remains relatively fast. The only stages which will take time finally remain the preparation of the scene and setting the parameters of the scanner, specific to each scan.
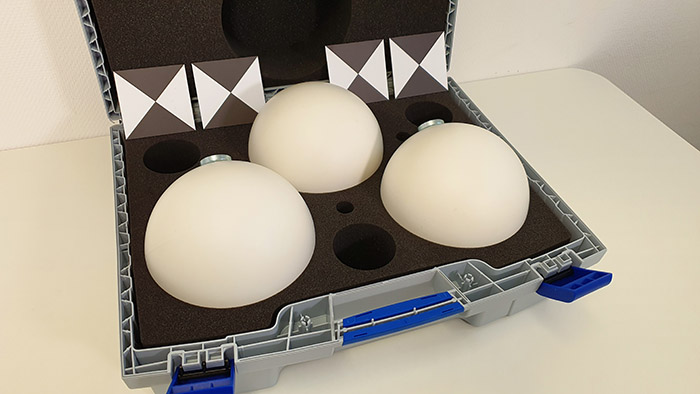
As with other Artec scanners, it will be possible to perform multiple scans from different positions in order to capture an object or a scene in its entirety and more generally improve the quality of the scan. In this precise case, and to be able to merge later the various scans between them, it will be necessary to use targets or spheres, not included with the scanner, to allow the Ray to position itself in space. Although a combination of the two is ideal, the main advantage of spheres is that they are visible from any viewing angle, while targets offer better scan quality, according to Artec. For target and sphere positioning, Artec lists many tips in the Support section of its website.
3. The Artec Studio Software
As for the software, and as with all Artec 3D scanners, it is the Artec Studio software that is associated. Available in 15 languages, this software allows you to set up the scan beforehand and to finalize the point cloud obtained after the scan in order to obtain the final mesh. Among the available export formats, we can find point cloud formats – BTX, PTX, XYZ and mesh – OBJ, PLY, WRL, STL, AOP, ASC, Disney PTEX, E57, XYZRGB.
As mentioned in our previous product reviews, Artec Studio will require a relatively powerful computer, namely a minimum configuration of Intel Core i5, i7 or i9, 32GB of RAM and GPU with 2GB of VRAM associated with Windows 7, 8 or 10 (x64). Another important reminder, the Artec Studio software represents an additional annual cost of 800€ unless you opt for an unlimited subscription of 2 000€. A 30-day trial version is also available for those who wish to test it.
The manufacturer has also developed a specific Android and iOS application for the Ray called Artec Remote. It allows to connect the 3D scanner in WiFi, to control it from a smartphone or a tablet and to save the data on the SD card. One can thus play on various parameters before the scan such as the resolution but also more advanced parameters such as the sensitivity, the horizontal/vertical resolution, the capture of the texture. Various information are also available such as the status of the scanner, the battery level or the available space on the SD card. In general, the manufacturer recommends using the Artec Studio software for complex projects or for novices, while the Artec Remote application is more recommended for advanced users or simple projects.

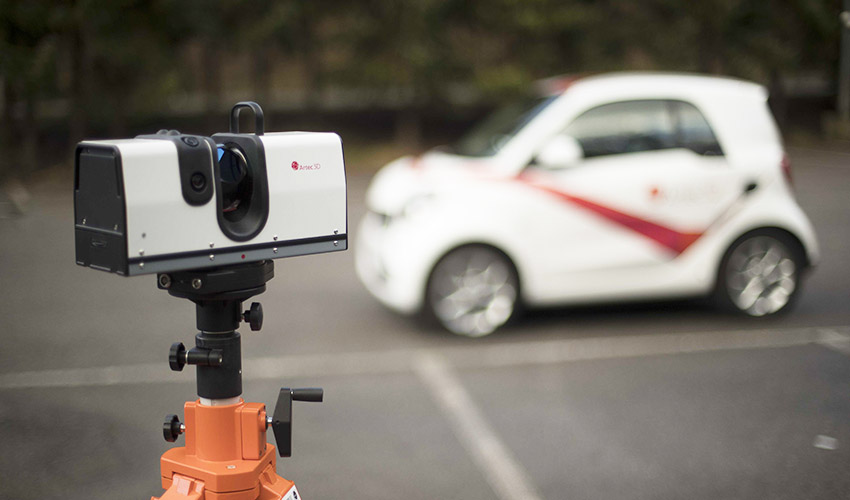
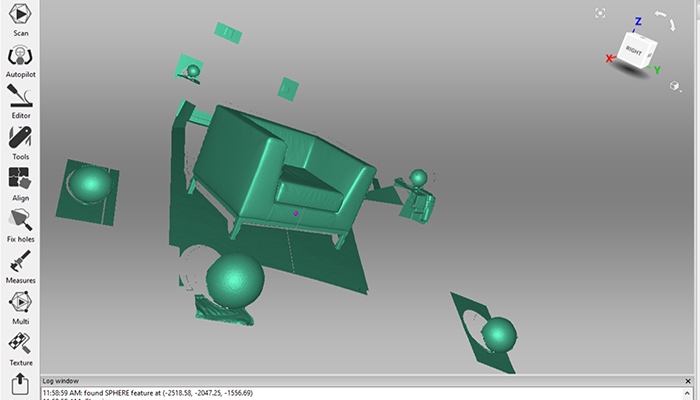
Car scan test – result after post-processing of the scene
4. First scans
When preparing for a new scan, it will be possible to launch the preview mode from the Artec Studio software or the Artec Remote application to obtain a contrast map of the scene. This preview allows you to specify a smaller scanning area to the scanner, if you are only interested in one area of the scene for example, in order to reduce the scanning time and the size of the final file.
Finally, before launching into the scanning, and depending on the scene, it will be necessary to adapt various parameters such as the density by degree, the sensitivity or the texture. The density by degree corresponds to the number of points by degree. It will be a choice to be made between the desired resolution and the time of scanning, of post-processing of the point cloud and of the size of the final file.
The preparation of the scene to be scanned with the spheres or positioning targets is a key step
Concerning the sensitivity, this parameter will be evaluated according to the distance as well as the ease of scanning the object or the scene (dark, reflective surface, without geometry…). The High Quality mode will be selected for simple scans at less than 50 m while the High Sensitivity mode will be preferred for scans up to 110 m to obtain better results on difficult surfaces. Finally, the texture should be selected if you want to acquire the color of the scene.
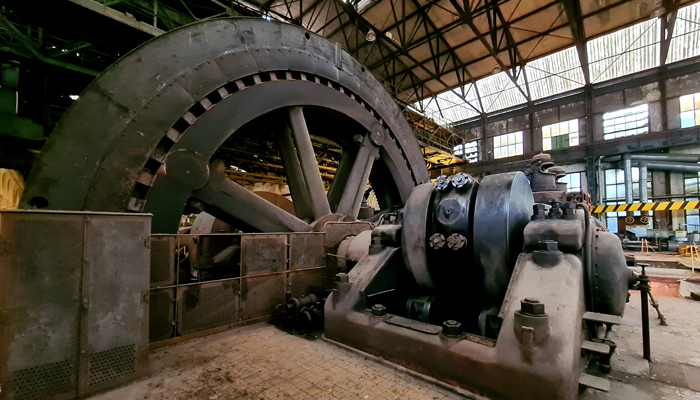
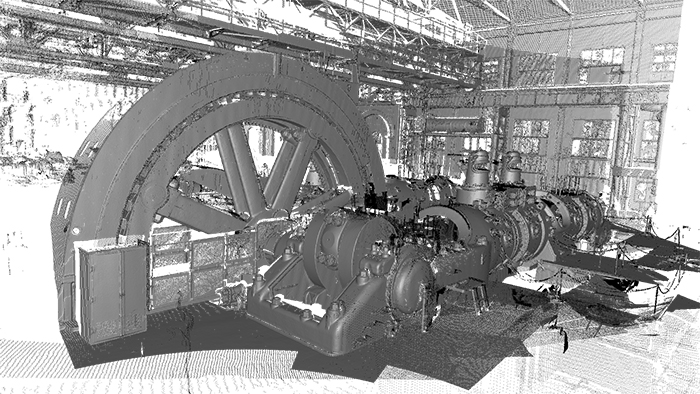
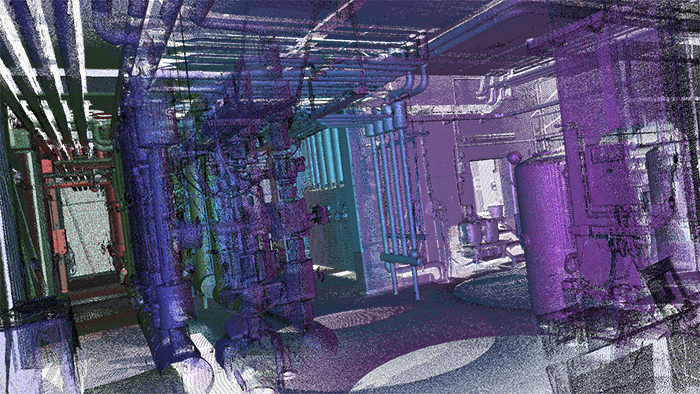
Compared to a portable 3D scanner, the Ray offers the great advantage of being autonomous and of simplifying and accelerating the scanning of large parts. While some objects would require a real mastery of a portable scanner, the Ray can indeed automate the scanning of this kind of models, provided of course to replicate the scanning of different positions to scan the object in its entirety. On the other hand, the post-processing of the data may be, quite logically, more time-consuming compared to a portable scanner, largely because of the volume of data captured by the Ray. In this article, you can see the results of different scans we have done or sent to us by the Artec team. You can find out more information about the Artec Ray on Artec’s website HERE.
8.5
You can find all the 3Dnatives Lab Tests here
Conclusion
- Quality of Device 8.5/10
- Software 9.5/10
- Scan Quality 10/10
- Ease of Use 9/10
Pros:
– Range up to 360.9′ (110 m)
– Scanning speed
– Quality of rendering
Cons:
– Price
– Tripod, targets and spheres not included
– MacOS/Linux compatibility
Artec 3D has taken a big step forward with its first laser pulse 3D scanner. The Ray 3D scanner is an efficient and versatile piece of equipment that can scan large parts in less time time, and is intended exclusively for professional users.
Among the main advantages of the Ray is the use of Artec Studio software, which has been in development for several years and allows for intuitive preparation of scans and processing of scan files. A range of up to 360.9′ (110m), the quality of the scans and the scanning speed are other advantages of the Ray. As for the other products of the manufacturer based in Luxembourg, it will be necessary however to put the price with a starting price of $60,000 (€56,000) to which it will be necessary to add the cost of the software as well as additional equipment like the tripod.


