3Dnatives Lab: Testing the Artec Leo 3D Scanner
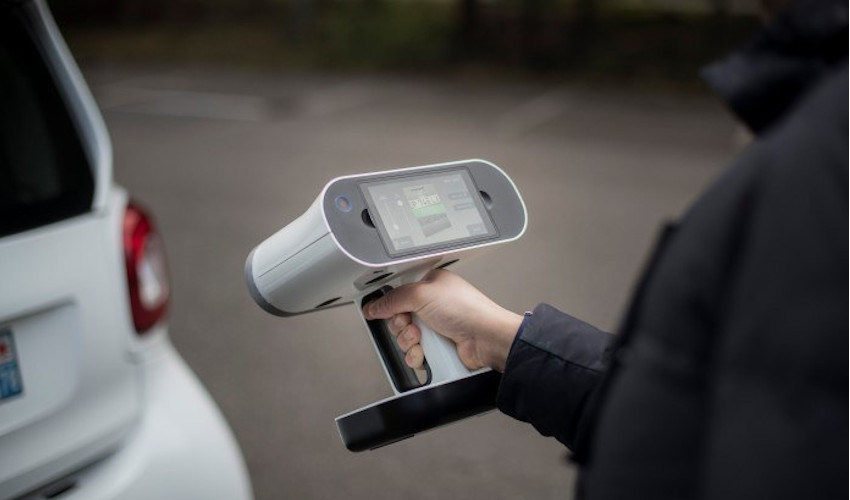
Over the years, the manufacturer Artec 3D has made a name for itself in the professional 3D scanner market thanks to the success of its portable Eva and Spider models. More recently, the manufacturer has evolved its range with the appearance of new products such as the Artec Leo, the Micro or the Ray, as the manufacturer hopes to cover an ever wider range of applications and sectors.
First announced at the 2017 CES show in Las Vegas, the Leo 3D scanner represents the latest generation of portable 3D scanners from Artec 3D but also one of the very first wireless models on the market. By integrating a battery and a touch screen, the Leo is indeed autonomous, allowing users to avoid needing to use a computer or a tablet to operate it. In terms of budget, the Leo remains in the middle range of professional portable 3D scanners with a base price of $29,800 (€26,700).
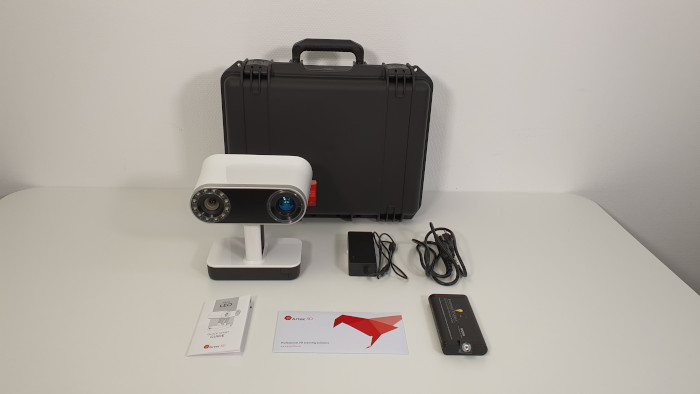
The Artec Leo comes in a protective case that includes power cables, a battery and instructions for use
After testing the Artec Micro a few months ago, we recently had the opportunity to get our hands on the Leo 3D scanner in the 3Dnatives Lab. What are the strengths and weaknesses of the Artec Leo? What kind of parts can be scanned with this equipment? Does the performance justify the price of this equipment? Read the full review of the Artec Leo 3D scanner below.
1. Unpacking the Artec Leo scanner
The Artec Leo comes in a protective case that includes the scanner’s power cables, a removable battery and the user’s manual. The first thing you notice when you unpack the Leo is its sleek, new design compared to other models on the market. This version has been revamped and modernized in contrast to its predecessors.
With slightly larger dimensions of 231 × 162 × 230 mm (9.1” x 6.4” x 9.1”) compared to the Eva and Spider, the weight of the Leo is almost tripled to 2.6kg or 5.7lbs (compared to 0.9kg/2lbs for the Eva and 0.8kg/1.8lbs for the Spider). This weight increase is mainly due to the integrated battery. Visually, the big difference comes from the addition of a large 5.5″ inch semi-HD touch screen on the front. This is inclinable in order to facilitate reading during the digitalization phases, with the possibility, for example, of digitalizing with the scanner upside down if need be.
When we look at the scanner more closely, we can see the presence of two lenses on the front. The right lens projects a grid on the object with a laser, in an invisible light spectrum, like a structured light scanner. The left lens is equipped with 12 LEDs and includes two cameras, one that recovers the distortion of the grid and the other that takes color pictures to obtain the texture of the object. On the processor side, the scanner is equipped with the NVIDIA Jetson TX1 platform, including various sensors (accelerometer, gyroscope and compass), allowing the Leo to position itself in space.
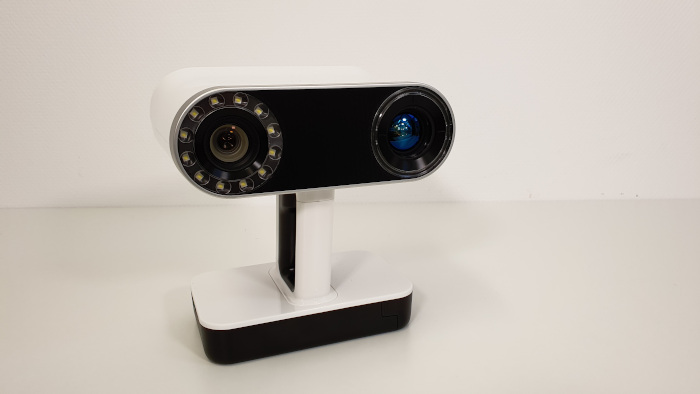
For the optical part, the Leo 3D scanner integrates a 3D acquisition camera combined with a camera for obtaining the texture
Other features on the Leo include an ON/OFF button on the front panel, a microSD card slot above the handle and a trigger to start/stop scanning on the scanner handle. The removable battery is installed on the base of the device, on which a power socket (to recharge the battery) and an Ethernet port are present.
In terms of performance, the Leo clearly presents itself as the successor of the Eva at Artec, with equivalent accuracy and resolution (0.1 mm and 0.2 mm respectively), but with a wider field of view and working distance, as well as improved texture resolution and speed of reconstruction and acquisition. The Leo has an acquisition speed of 35 million points/second (compared to 18 million points/second for the Eva).
Recently, Artec announced a software update, based on artificial intelligence, that doubles the resolution of the Leo (and also the Eva) to 0.2 mm for HD mode. In concrete terms, the Leo can capture a wide range of models from a distance of 35 cm (13.8”) to 1.2 m (47″ or 3’11”), such as a shoe, a vehicle body or interior, a boat propeller, a human body, or a piece of furniture. Its new sleeker design and performance earned it an Edison Award in 2020 for Applied Technology in the User Experience (UX) and Artificial Intelligence categories.
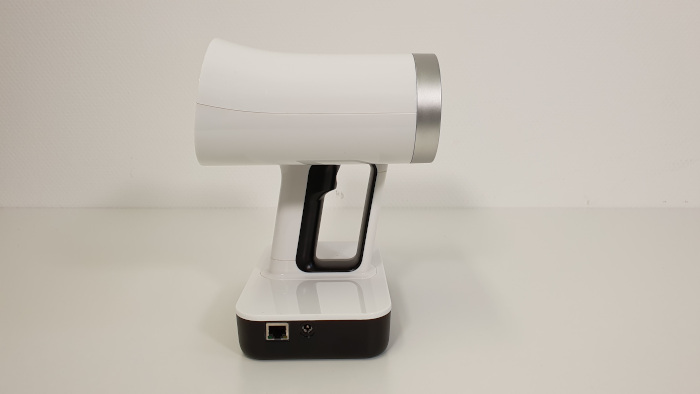
The Leo 3D scanner offers a sleek and modernized design compared to its predecessors
2. Artec Leo 3D Scanner Set-Up
Setting up the Artec Leo is relatively easy as it is ready to use right out of the box. The only steps required for the first use are to turn on the Leo with the ON/OFF button, connect it to the Internet, accept the user license and activate the product from the touch screen. Operations that can also be done from a computer if necessary.
The Leo scanner is then ready to work. However, an important step that is common to all 3D scanners is to make sure that the object to be scanned is compatible and, if necessary, to prepare it. This object must be immobile, include a minimum of geometry or texture, be uniformly lit and installed in a large enough space to be able to scan it as a whole.
As with any scanner, some objects such as dark, transparent or shiny parts can be difficult to scan. The solution is then to use a matte spray (for transparent or shiny parts) or positioning targets (for parts with a lack of texture or geometry for example). For dark parts, it would also be possible to play with parameters of the scan like the texture brightness.
To mitigate these potential scanning concerns, Artec 3D has developed VCSEL (Vertical-Cavity Surface-Emitting Laser) technology in Leo, which facilitates the scanning of traditionally difficult-to-scan textures, and allows scanning in direct sunlight during outdoor sessions.
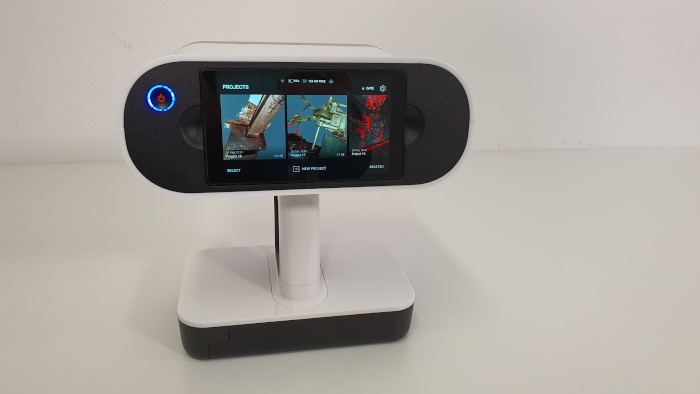
A large 5.5″ inch touch screen and tilting screen comes with the Leo
3. Artec Studio Software
Although the Leo is autonomous and does not require a computer for the scanning phase, it is necessary to bring the model back to a computer to clean or improve the file. To export the scan data once the scan is complete, the user can connect to a PC via an Ethernet connection (faster), WiFi via the network or direct (hotspot type), or by using a microSD card.
Artec Studio 15 is the 3D file processing software associated with the Artec Leo. It is available in over 15 languages and can be bought either as an annual subscription fee of $800 or a lifetime subscription fee of $2,000. A 30-day trial version is also available for those who wish to test it out before subscribing.
As with many 3D softwares, Artec Studio 15 requires a relatively powerful computer. Artec recommends running it on Windows 10 x64 with an i5 or i7 processor and at least 32GB of RAM. The manufacturer has also thought of Mac users by developing the ScanApp application, which allows you to perform a few simple operations and export the file (it will also be possible to run Artec Studio 15 using Boot Camp if needed).
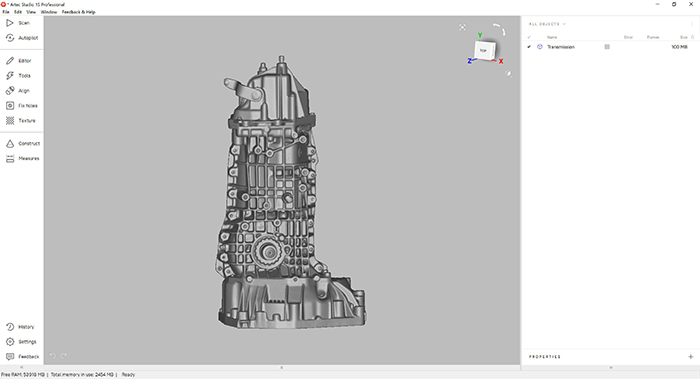
Artec Studio 15 software allows you to edit and finalize 3D models scanned with the Leo
One of the special features of Artec Studio is the Autopilot mode, which is especially designed for beginners and allows you to process a freshly scanned file almost automatically. Once the model is imported into Artec Studio, the Autopilot mode starts asking various questions that must be answered (scan quality, object size, etc.). In the second step, the user is prompted to clean the object of data that is not part of the final model. The third step consists of aligning the scans in case the user has made several scans of the same object. Finally, the last step performs various post-processing operations in a fully automated manner. All these steps are also available in manual mode in order to go further in the file processing parameters.
4. First Scans
To start scanning, the user can either use the touch screen of the scanner or the trigger located on the handle. The scanning can also be launched from a PC if necessary with Screen Mirroring, i.e. a recopy of the screen of the Leo directly on the computer.
A first click launches the Preview mode, which activates the “Distance color map” mode in order to see the optimal distance between the scanner and the object. If the object is green on the scanner screen, it simply means that it is at the right distance – conversely, if it is red or blue, it is either too close or too far. This mode can also be activated during the scanning process. A second click on the trigger then starts the “recording mode”, i.e. the recording of the capture.
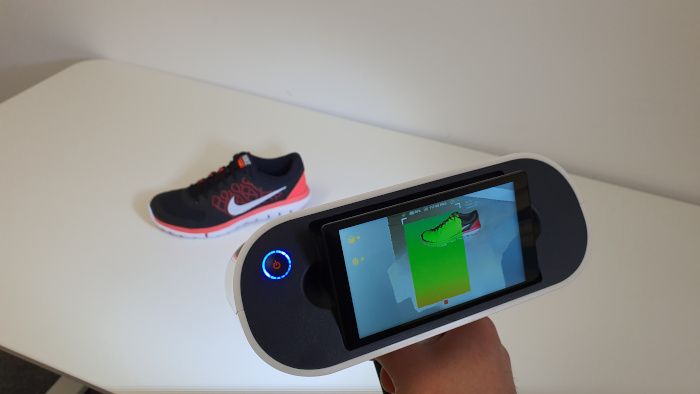
The “Distance color map” mode ensures that you are at the right distance from the model
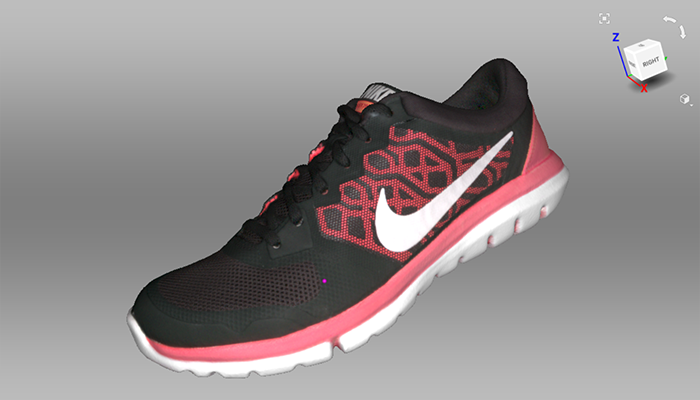
Sneaker scanning test: the fabric mesh and color are faithfully represented
Before starting, different parameters are offered to the user and can be adjusted directly from the touch screen of the Leo in order to optimize the quality or speed up the scan. Among the available parameters is the HD mode, a mode based on artificial intelligence that allows to obtain very detailed models with a resolution up to 0.2mm. This mode can also be activated to capture more accurately dark or shiny surfaces. The texture mode allows to choose whether to display or not the colors of the object during the scan. The base removal option offers, as its name indicates, the possibility to remove the horizontal or vertical plane on which the object is placed. In order to gain detail on certain textures, the operator can also modify the texture brightness to change the brightness of the scene. Finally, although the scan range of the Leo is between 0.35m and 1.2m, the optimal distance according to Artec is 0.5m. It will be possible to reduce this range with the Scanning Range option in order to focus the Leo’s attention on only a part of the scene to be scanned.
One aspect to take into account concerning the distance concerns the quality of the scan desired. Logically enough, the resolution will tend to decrease as soon as you move away from the object. The manufacturer therefore recommends scanning a large part from close range, although this will result in longer scanning times, in order to maintain an optimal scan resolution. For projects where the resolution will not be the most important criterion, it could be judicious to move backwards with respect to the object to gain in scanning time.
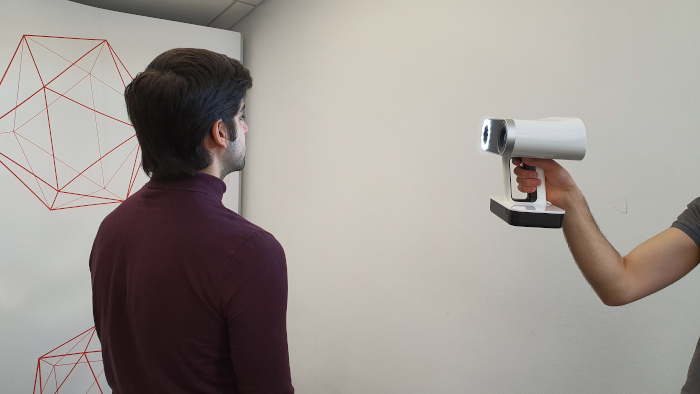
The fact that the Artec Leo is hands-free makes it much easier to scan large models
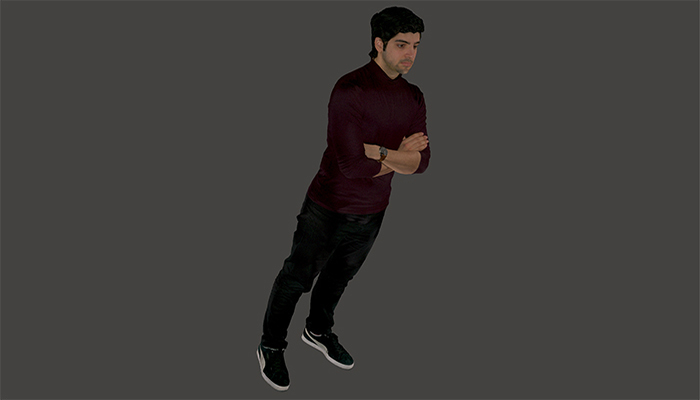
Scanning test of a person: despite dark textures (hair, pants, shoes), the result is very satisfactory
As with many handheld scanners, it can happen that the scanner loses sight of the object to be scanned, due to the operator moving too quickly or a model that is difficult to capture. To resume the capture, simply reposition the Leo on a part of the already scanned model which will then be automatically recognized by the scanner. The message “ready to scan” is then displayed on the screen allowing the scanning to be resumed. And although the problem did not occur during our tests, it is true that an additional battery would have been appreciated in order to be able to continue scanning in the event of an empty battery. It is possible to acquire a second one from the manufacturer on request.
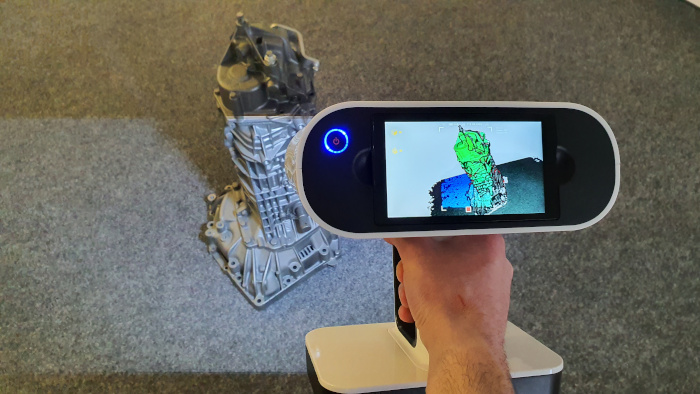
The Leo’s screen allows you to see the quality of the scan live
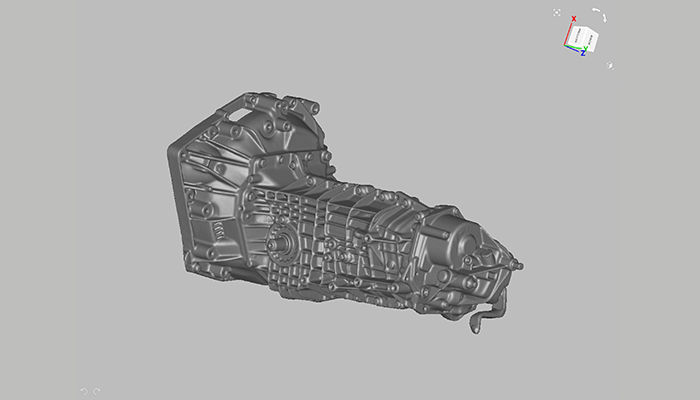
Scan test of an engine crankcase: The difficulty here lay in the scanning of the model’s numerous cavities
During the actual scan, the “Quality Overlay” mode allows the scanner operator to indicate the parts of the object on which it will potentially be necessary to go back, get closer or spend more time in order to guarantee a good quality final scan. A mode that can be deactivated if needed but that can be very useful for beginners in manual scanning.
In general, 3D scanning with the Leo is greatly simplified by the front screen, allowing you to concentrate on the model being scanned, as well as the absence of cables, offering real freedom of movement for the sometimes long scanning phases. The visual software aids integrated into the Leo screen also simplify this phase and limit possible errors. The results obtained will still require further processing in the Artec Studio software, a step in which the Autopilot mode will be of great help (see 3. Artec Studio software). You can find more information on Artec’s website HERE.
Find all our 3Dnatives Lab Tests HERE
Conclusion
- Quality of Device 9.5/10
- Software 9.5/10
- Scan Quality 10/10
- Ease of Use 10/10
Pros :
– Wireless
– Touch screen
– Ease of use
Cons :
– Price
– Weight
– MacOS/Linux Compatibility
With the Leo, the manufacturer Artec 3D offers the very first portable wireless model on the 3D scanner market, a technical feat that provides real added value compared to its competitors and that is based their years of experience in the development of 3D scanners. To get it, however, you’ll have to pay a starting price of $29,800 (€26,700), including a 2-year warranty, to which you’ll have to add the purchase of the Artec Studio retouching software.
The HD touch screen and the neat software interface offer an easy and intuitive overall experience combined with very good scan quality. The only drawback is the weight of 2.6 kg / 5.7lbs and the fact that the Artec Studio 3D software is not natively compatible with Mac and Linux. Nevertheless, this structured light 3D scanner is a welcome surprise for the market and suggests great prospects for the future of portable 3D scanners!


