


3Dnatives Lab: Testing the Ultimaker 3
Unveiled to the surprise of many last October, the Ultimaker 3 3D printer is the latest printer from the Dutch manufacturers, Ultimaker. Already well known for being one of the most popular brands of desktop 3D printers, the brand has decided to continue their reign on top by introducing their first model that is equipped with two extruders that are able to combine different materials and colors.
The double-extrusion of filament still remains a risky bet for manufacturers, as previously seen with MakerBot, FlashForge, and even 3D Systems. Several aspects come into play with both mechanical and software, often resulting in a more complicated grip and random results.
To see what this machine can really do, we decided to test the Ultimaker 3 within our 3Dnatives Lab, to see on our own if their latest printer is a success or a flop. In addition to this, we had many questions we wanted to find the answers to, such as if the printer was able to provide the same quality parts as seen with their other machines, if they succeeded in mixing materials, and if they had continued to create a reliable and easy to use machine. To find out the answers to our questions, continue reading our Ultimaker 3 test below!
Unpacking
With numerous tests under our belt here at the 3Dnatives Lab, it is now easy for us to see a real effort made on the part of manufacturers to not only strengthen but also simplify their packaging of their 3D printers. This is a trend that is also seen with Ultimaker, who have presented us with compact packaging, which makes it very easy to remove the printer, thanks to the incorporated straps. In addition, the packaging also allows for resistance to shocks and potential damages that may occur during shipping.
From an aesthetic point of view, the Ultimaker 3 appears similar in every way to its predecessors, with its feeder located on the side and its white panneling. The presence of a second extruder, however, is the only difference to this resemblance. It should be noted that the Ultimaker 3 has a slightly lower production volume of 215 x 215 x 200 mm in contrast to the 223 x 223 x 205 mm for the Ultimaker 2+ (but, there is more than 197 x 215 x 200 mm if you switch to dual extrusion mode). Additionally, this printer includes Wi-Fi capabilities and a USB port that replaces the SD card found on the Ultimaker 2+.
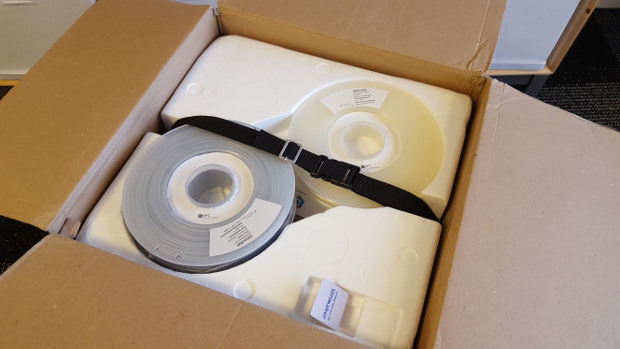
The Ultimaker 3 is delivered with a PLA and PVA filament coil
Supplied with the machine is a wide range of accessories, which includes: a glass printing bed, a cable cover, a spool holder, two filament guides, a PLA filament coil (350 g) and a PVA filament coil (350g) (that are both Ultimaker brand), an Ethernet cable, a USB stick, a tube of glue, oil for the X/Y axes, grease for the Z-axis rods, a screwdriver, an XY Calibration Sheet, a Z Calibration sheet, a Quick Start Guide, Power Cables, and a test print.
Another new feature on the Ultimaker 3 is a new Print Cores, which allows the printer’s extruders to be adapted to different filaments, reducing the risk of clogged nozzles and facilitating machine maintenance. There are thus, two Print Cores: The first is 0.4mm, which is called “AA” and is for the printing of classic filaments like PLA or ABS (one is already installed on the machine). The second one is also 0.4 mm and is titled “BB”. This one is used for the printing of support materials (only PVA based at present).
Other improvements that are found in the Ultimaker 3 include the presence of a control camera, an optimized ventilation system, extruders and light indicators to alert the user of current operations.
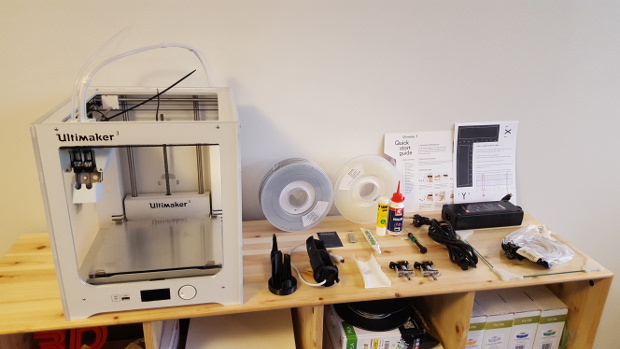
The various accessories included with the Ultimaker 3
Installation
Once unpacked, the installation of the various printer parts will take you around ten minutes to complete. The installation itself will include connecting the coil holder (which now allows you to track the type of material installed and the remaining amount of filament using an NFC tags), adding the cable cover, inserting the glass printing bed, and connecting the main cables.
The display of the Ultimaker 3 will light up once you turn it on. The display itself is similar to the screen found on older models. With the screen, we would have liked to have seen a color LCD screen, like what is found on a Form 2 Formlabs printer or the N2 Dual printer from Raise3D.
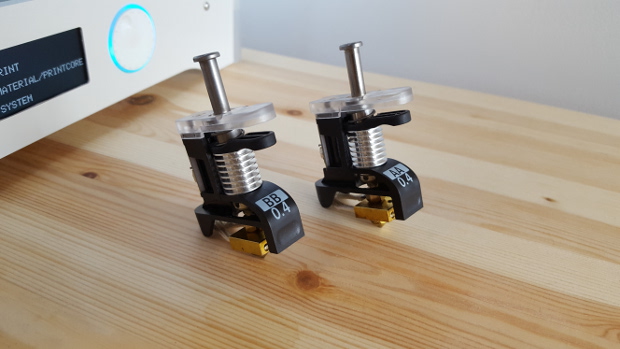
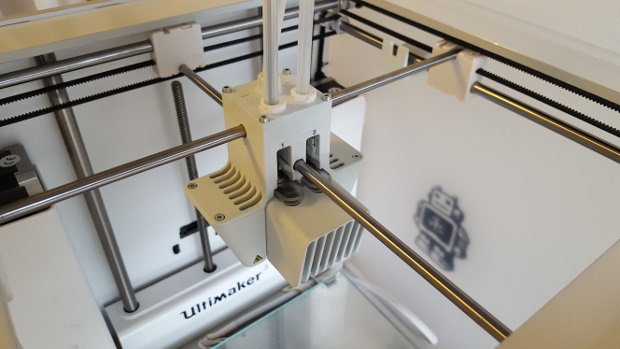
Print Core AA and BB are new components for the Ultimaker extruders
Once these steps were completed, our next step was to clip the Print Cores onto the print head and then load the desired filaments. It is important to note that you will have to load both filaments into the printer as soon as you want to make a single print. Even if this step remains largely similar to the old Ultimaker, the machine control screen will guide you effortlessly through this process. We should also highlight the NFC tag system, as it is quite efficient and recognizes each stage when you are loading all of the coils in accordance to the installed Print Cores.
A final important step is the calibration of the XY offset and printing bed. For the printing bed, it is advisable to start with a classic manual calibration, which you can find on the menu. You will also have access to a new procedure called “Active leveling”. This function allows the tray to be calibrated by checking and resetting from the 3 reference points on the bed and allows printing to automatically compensate for any calibration errors by lifting or lowering the bed. This process goes by fairly quickly (about 2-3 minutes) and can be done before each long print. In our case, we had some slight concerns about the calibration of the printing bed, due to an adjustment screw on the tray that wasn’t well attached, but it was nothing too serious.
The X, Y and Z offset calibrations are used to adjust the offset between the two Print Core nozzles. In the case of X and Y-axis, you will be offered a 3D grid to compare with a calibration sheet that is available through the manufacturer. Depending on the results observed, you will have to manually enter the observed offsets in order to adjust the offset as best you can.

The control screen of the Ultimaker 3
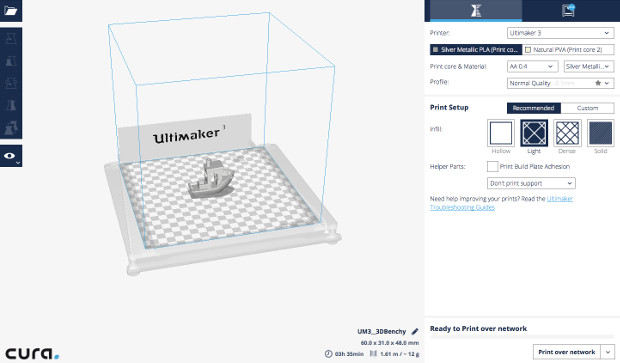
Software
For the software, it is, of course, Cura, the famous Open-Source program developed by Ultimaker. For the Ultimaker 3 however, you will need version 2.3 or later (Cura 2.7 has been available for a few weeks). Once installed on your computer, your first step will be to connect your 3D printer to your Wi-Fi in a few quick steps. This is a new feature that has been expected by their community for some time now. You can also connect your printer via an Ethernet cable or through the USB key. When Cura opens, the software will automatically recognize the materials and their colors, a new addition that is offered thanks to the NFC tags.
Many options have appeared in recent months within the Cura software, some of which are specific to the double-extrusion mode offered by the Ultimaker 3. In your first prints, it is very likely that you spend time testing and optimizing these parameters, some of which are still in their Beta form. Do not hesitate to contact your dealer’s customer service department if you need help or information. In our case, Makershop saved us many hours by explaining the value of each parameter and gave us a full article on the Cura parameterization for double extrusion, which can be found on their website.
First Prints
Some will say that the NFC tags aim to close the printer a little more; Ultimaker has, however, ensured that users will be able to use coils of other brands, although these will not be recognized by Cura. At the moment, the brand recommends using the dual extrusion mode with the following pairs of filaments: PLA-PVA, Nylon-PVA, PLA-PLA, ABS-ABS, and CPE-CPE (Copolyester). For our test, we were limited to PLA-PLA and PLA-PVA.
One of the weaknesses observed when printing is not so much the quality of the parts, but more the speed at which they are printed. It is quite clear that printing in two colors or two materials increases production times. However, modifying certain Cura parameters can optimize the speed. It is also possible to gain valuable time by playing on a parameter such as the conical supports (to reduce the size of the base of the supports) or the Infill, which will make it possible to obtain more or less dense fillings at different levels of the object/piece.
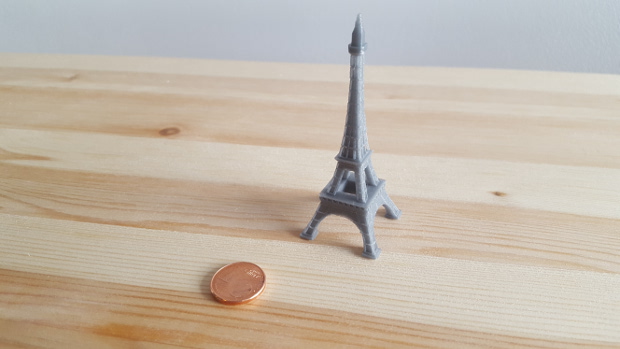
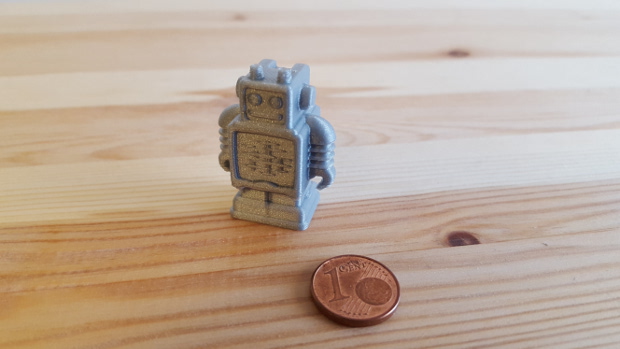
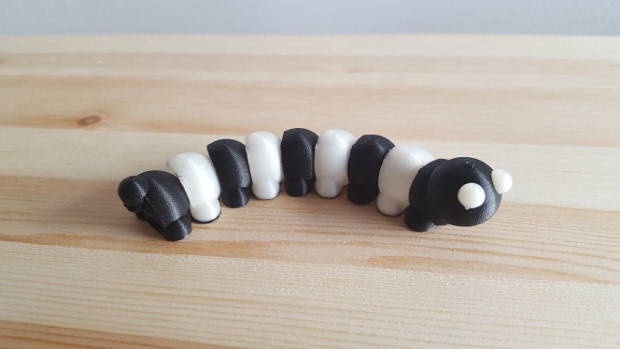
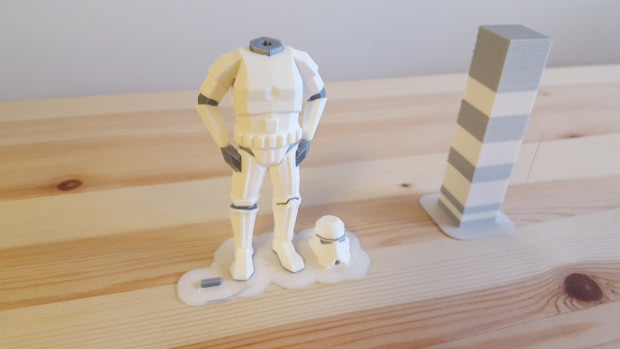
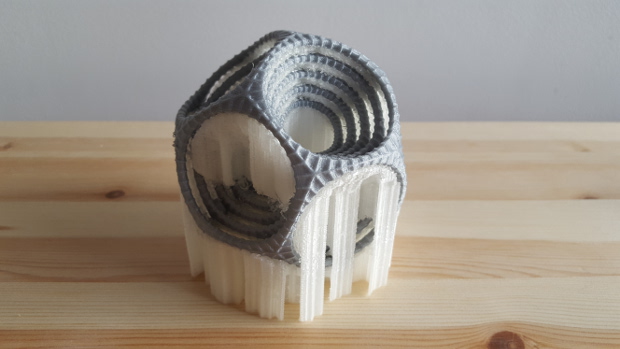
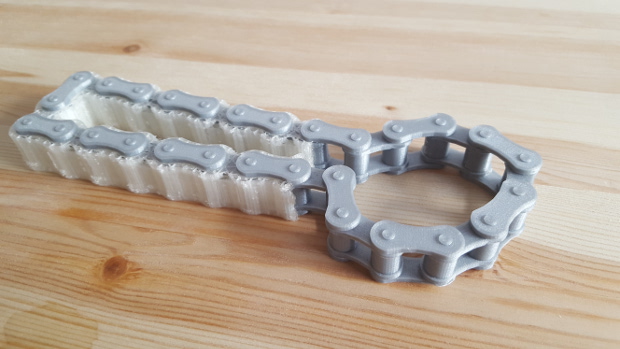
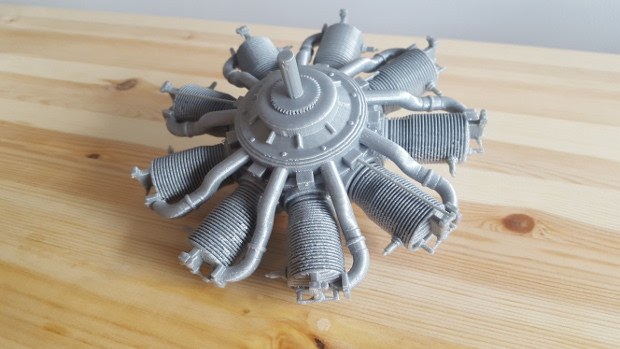
The use of Ultimaker filaments also makes the printing more reliable and ensures that they have the right parameters. Below you will find a series of pieces that we printed on the Ultimaker 3. The results speak for themselves; the quality is there despite the complexity of certain parts. In double-extrusion mode, the mixture of both filaments remains clean by simultaneously printing a prime tower to empty the nozzles.
Find all our 3D printer tests from the 3Dnatives Lab
Conclusion
- Printer Content 9.5/10
- Software 9/10
- Print Quality 9.5/10
- Ease of use 7/10
Positive points:
– Print quality
– Double extrusion
– Repeatability of prints
Negative points:
– Print speed
– Colour screen
– Prices
This first Ultimaker initiative in the field of double extrusion is proving to be largely successful. Although it remains accessible to many users, the Ultimaker 3 will need to relearn some codes specific to the use of two extruders. To obtain optimal results, you will pass through a phase of experimentation necessary to master the many parameters of Cura, a necessary step that will make you gain speed, quality and repeatability of the prints.
The addition of Print Cores and coils equipped with NFC chips, the development of specific materials for the 3D printer or the latest version of Cura, however, facilitate the overall experience associated with the Ultimaker 3. Once you have acquired a good understanding of the machine, you will then be able to really benefit from it, with the key to pieces of very good quality combining two materials or colours. An innovation that has a price, however, since it will still cost you the sum of 3594 €, a necessary investment sum for users looking for a professional FDM machine.


