


3Dnatives Lab: Testing MakerBot’s Method X CFE

MakerBot, founded in 2009, is considered a pioneer of desktop 3D printing and has operated as an independent subsidiary of Stratasys since 2013. The company has already introduced its sixth generation of 3D printers with the launch of the Method series. These are based on 220,000 hours of test printing and 30 patents, which have catapulted the American company back to the top. With the Method, Method CFE, Method X and Method X CFE models, MakerBot has been able to completely revamp its lineup of FDM 3D printers for professionals.
Key features of the range include an enclosed and heated chamber and a maximum build volume of 19 x 19 x 19.6 cm. The devices are equipped with two print heads which are capable of printing layers with a minimum thickness of 20 microns, these print heads are able to operate at a speed of up to 500 mm/s. In addition, as it is a Plug&Play machine, the series impresses with extruders that can be replaced in seconds. The CFE (Carbon Fiber Edition) versions, as the name suggests, can print parts with carbon fiber reinforced nylon filament. The 3Dnatives Lab had the opportunity to test the Method X CFE 3D printer, which is currently offered at a price of $5,249.25 (€6,247 incl. VAT). So what are the special features of this machine? What materials can it print? And how does the Method X compare to other 3D printers on the market? Read on for 3Dnatives’ full review of MakerBot’s Method X CFE 3D printer. You can also watch the video of the review below.
1. Unpacking the Method X CFE
For our test, we received the Method X CFE 3D printer with a separate wash tank to clean the SR-30 soluble support material. The machine was packed in another box, and unpacking it was relatively easy thanks to four clips that make it easy to lift off the top of the packaging. Inside the packaging is the 3D printer wrapped in foam and plastic wrap, which protect the machine from breakage or scratches during shipping.
When unpacking the machine, the first thing you come across are the accessories needed to use the machine and for post-processing: Angled cutting pliers, a wire brush, extruders (3 for the CFE edition), a iron steel magnetic build plate, and a spatula for removing parts from the build plate. We were also supplied with several filaments by 3Ddrucker.de: a 650g roll of ABS, a 650g roll of ASA, a 450g roll of SR-30, and a 450g roll of carbon fiber reinforced nylon.
The design of the machine was revised after the 5th generation of MakerBot 3D printers and impresses with a vertical format, which nevertheless remains true to the modern and minimalist style of the manufacturer. With dimensions of 437 x 413 x 649 mm, the Method X CFE is quite large and also relatively heavy at 29.5 kg, which is due to the solid metal frame (this ensures a stable stand and is essential for good printing results). The four models of the Method series are visually identical, but differ in the temperature in the build chamber as well as the included/compatible extruders.
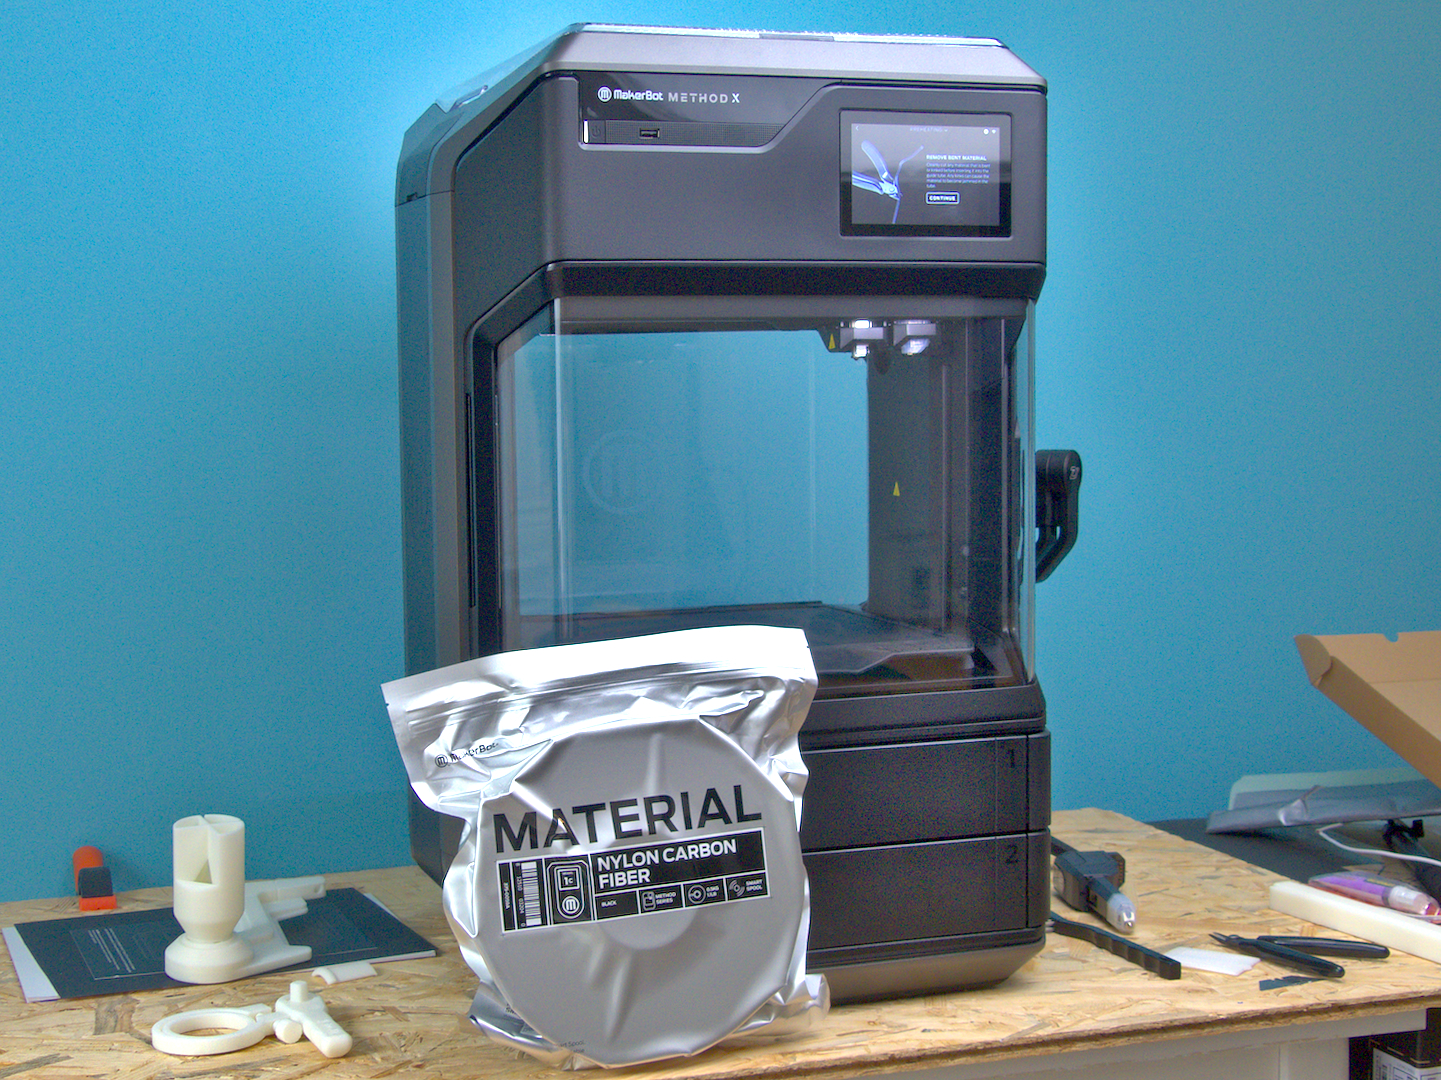
Within the Method series, the Method X CFE enables 3D printing of carbon fiber reinforced nylon parts.
The large and relatively transparent cover in combination with the integrated LED lights allows a good view of the parts during the printing process. On the top of the front panel, there is a power switch, a USB-A port, and a large 5-inch color touchscreen. In the lower part, there are two material bays where the two spools for the build and support material are stored in optimal temperature and humidity conditions. There is also an RFID reader, which identifies the type and amount of material of the inserted spool and passes it on to the slicer software (only works with original MakerBot material). There is also an integrated camera with a resolution of 640 x 480px, which can be used to check the printing progress remotely.
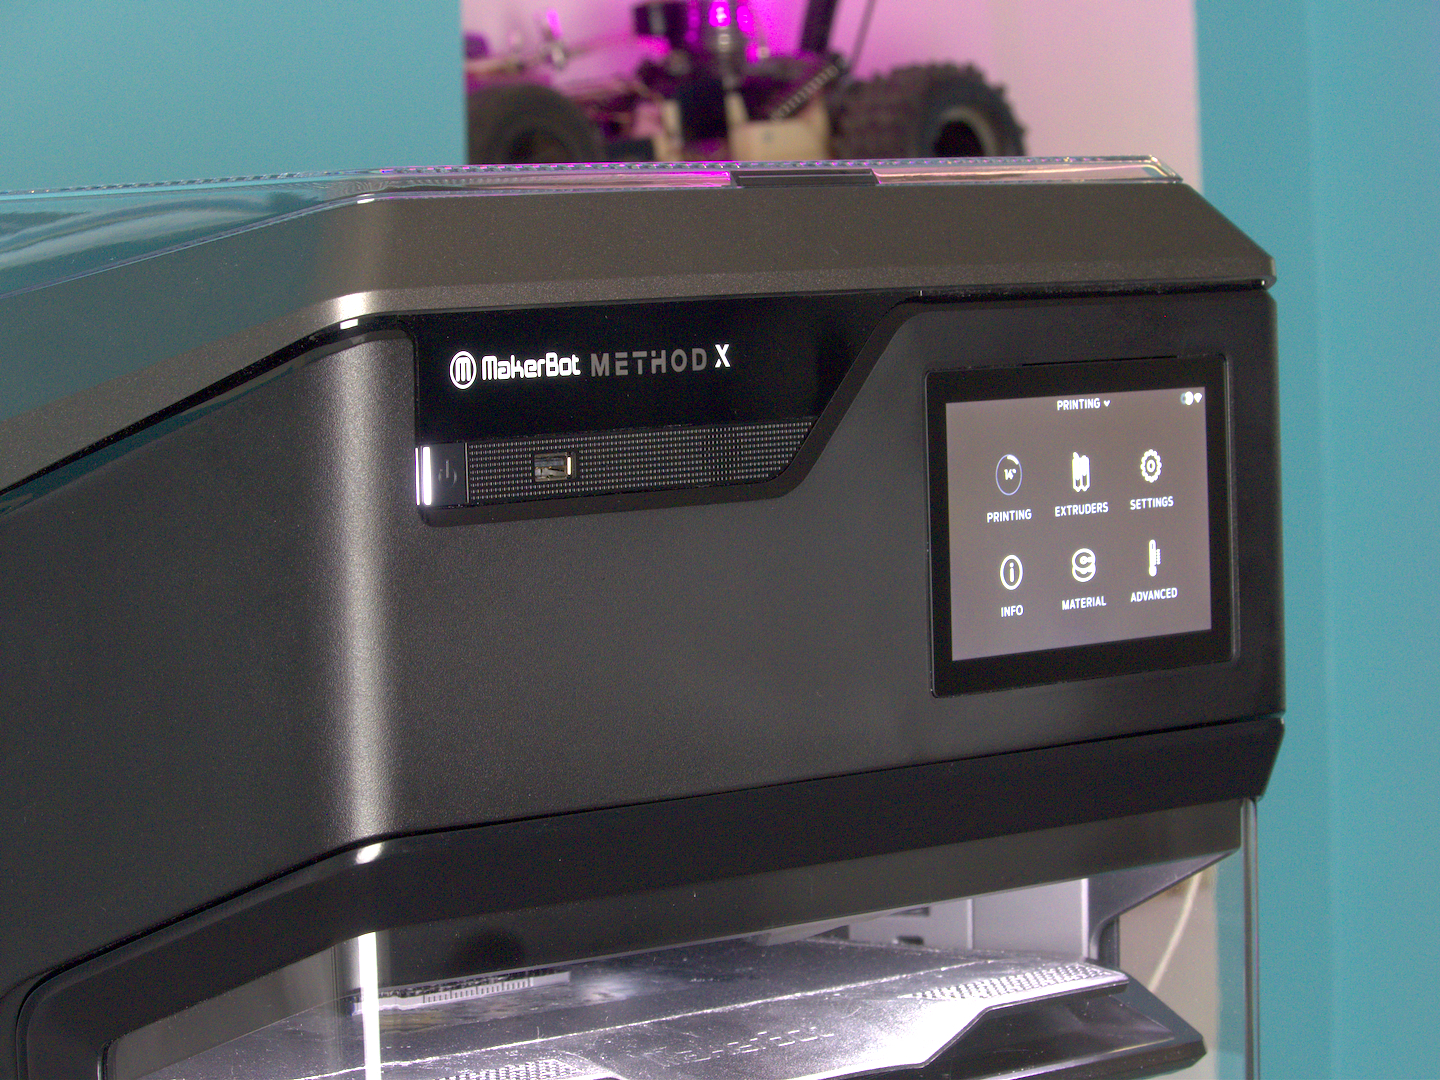
The power switch, USB-A port, and color touchscreen are located on the top of the Method X front panel.
2. Installing the Makerbot Method X CFE 3D Printer
Once the 3D printer is unpacked and started, the user is prompted to follow the instructions on the touchscreen to complete the installation of the device – taking less than 20 minutes to set up.
The first step should be to connect the machine to the Wi-Fi network to register the machine. This is done by creating a MakerBot account or logging into an existing account (which is similar to a Thingiverse account). The second step is to install the two extruders in their designated slots while positioning the cover on the top of the 3D printer. The steel build plate is inserted into the Method X CFE build chamber while the two filament spools go into the designated slots, and immediately the type of material inserted and the respective fill quantity will be displayed on the screen.
The operation of the printer is actually very intuitive and the ease of use during configuration prove that usability is MakerBot’s focus. However, we noticed some slight bugs with the touchscreen when we entered the Wi-Fi network access via the keyboard. A problem that will probably be fixed with the next firmware update.
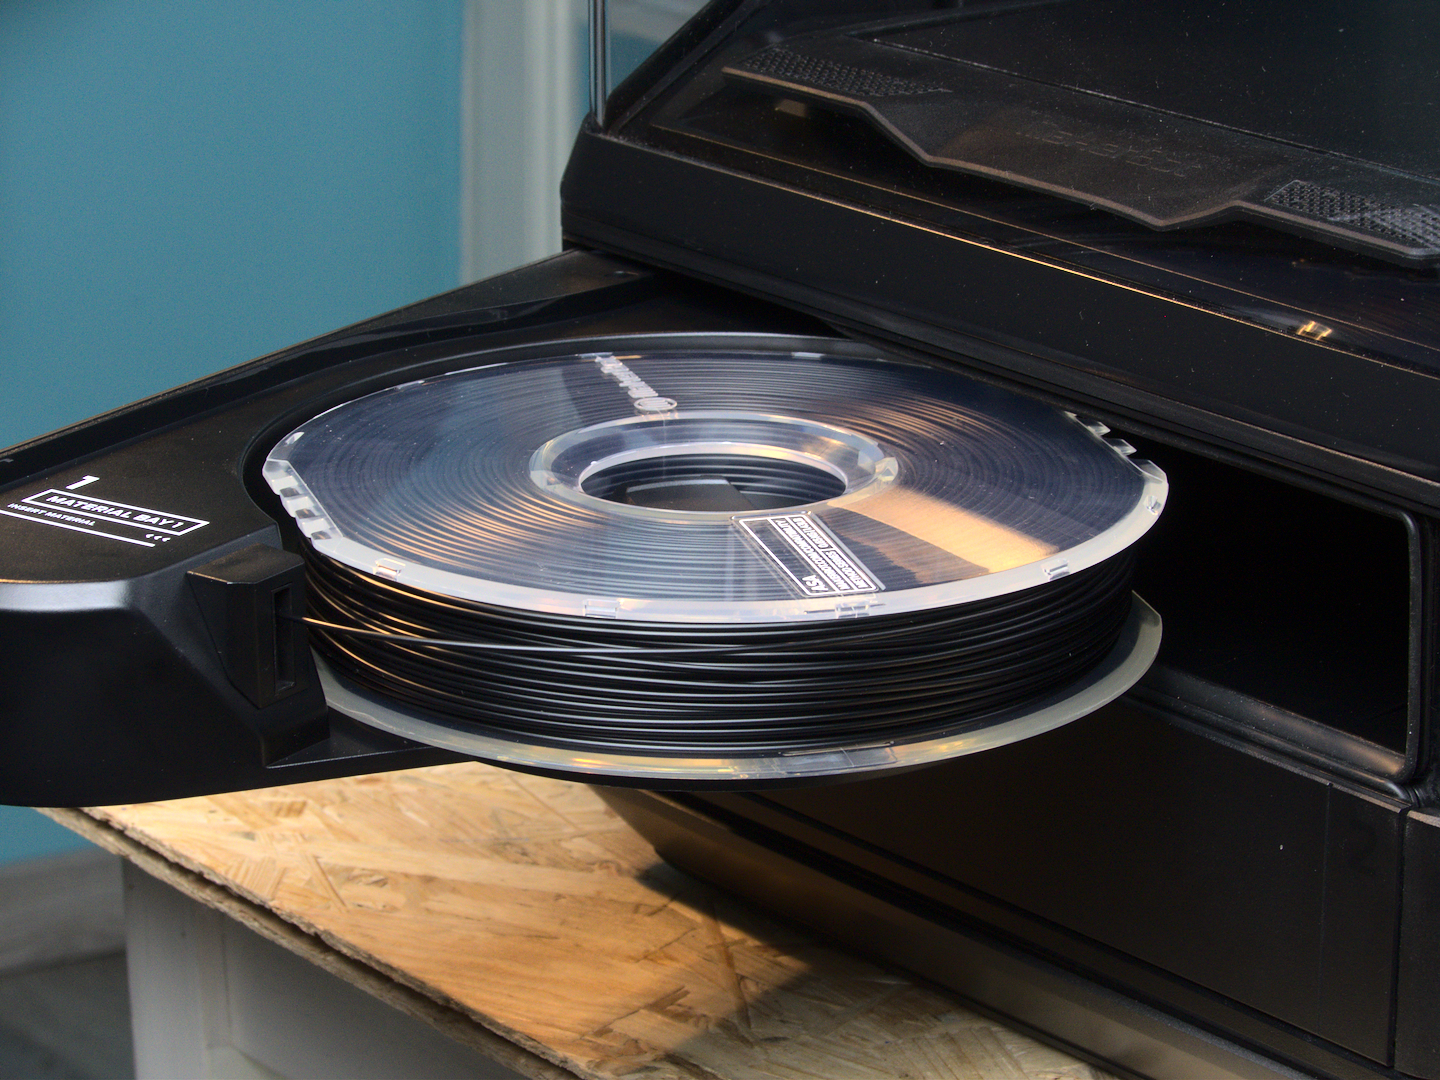
The Method X CFE includes sealed slots for storing two filament spools.
Depending on the printer model, different extruders (1, 2, 1XA, 2XA, 1C, LABS Experimental Extruder) are included in delivery; for the Method X CFE provided, these are the 1C, 2 and 2XA extruder. With this selection it is possible to print a wide range of thermoplastics: carbon fiber reinforced nylon, ABS, ASA, PC-ABS and SR30.
We started by using the Model 1C in the left slot and the Model 2 in the right slot. When inserting the SR-30 soluble filament into the printer, the printer identified the filament thanks to the RFID chip in the spool and gave a warning that the extruder we installed was not compatible with this material. Therefore, in order to use the SR-30 soluble filament (a material developed by Stratasys), the 2XA extruder had to be used.
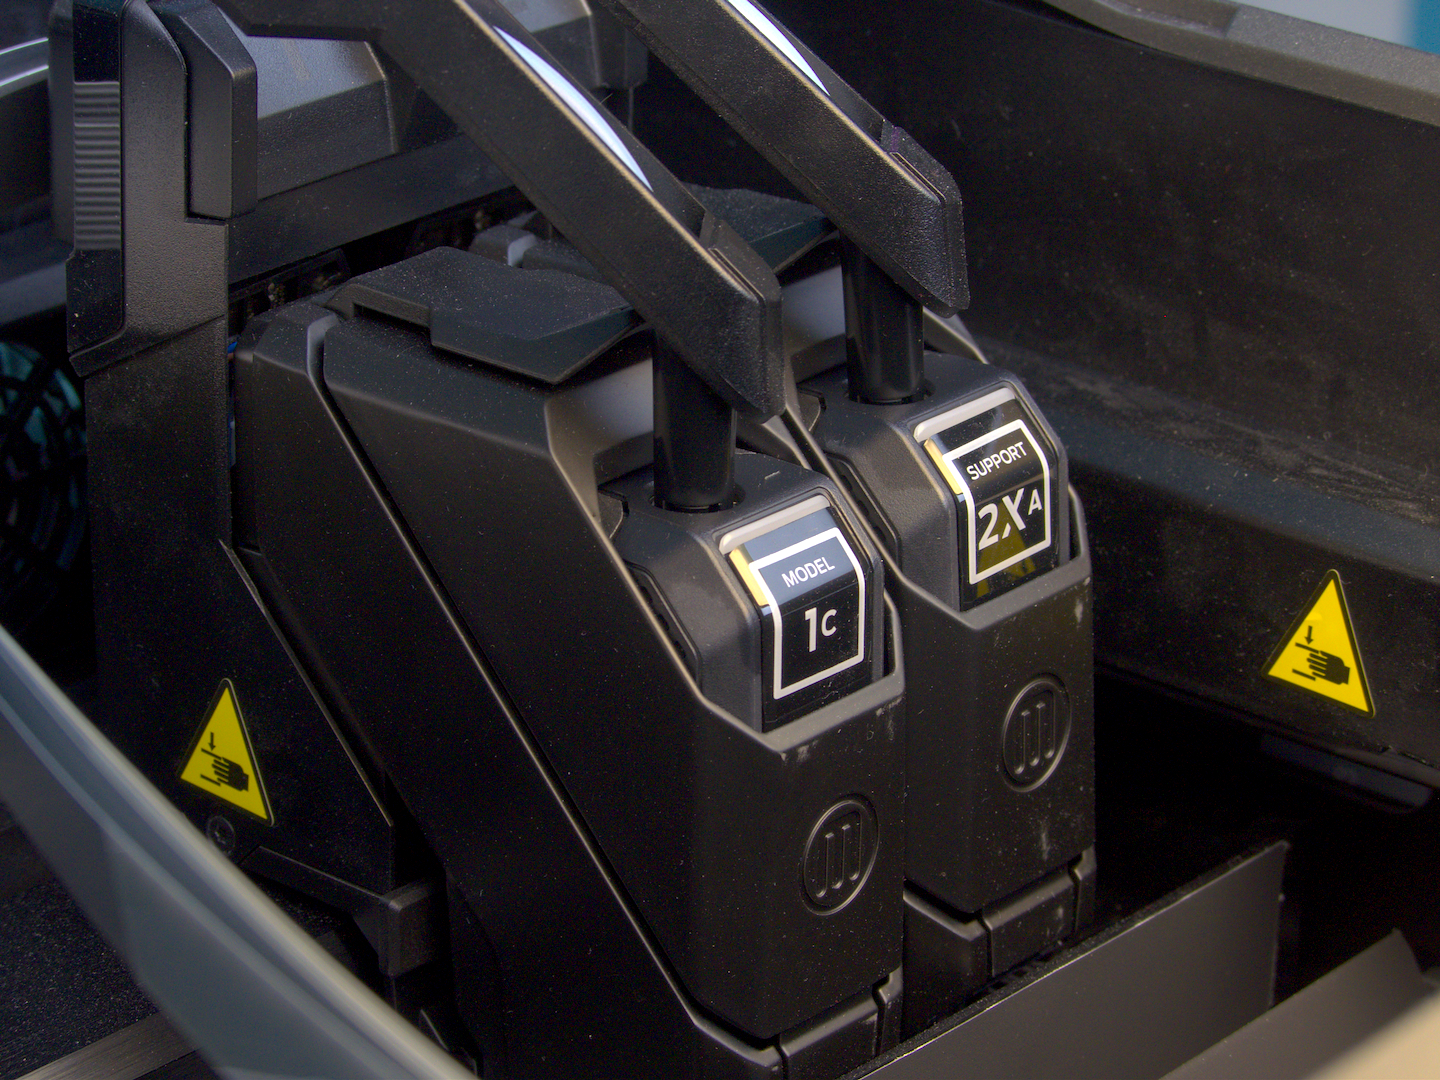
The Method X CFE is equipped with two easily interchangeable extruders.
The modular extruder system of the Method X makes it compatible with a wide range of thermoplastics such as PLA, Tough PLA, ABS or PETG, but also with more technical materials such as ASA, nylon, carbon fiber reinforced nylon, PC-ABS and PC-ABS Fire Retardant. In addition, soluble support material filaments such as PVA or SR-30 can be used. Although the machine is compatible with filaments from other manufacturers (this requires the MakerBot LABS extruder, available for € 415,- incl. VAT), the use of MakerBot materials is recommended by the manufacturer to ensure optimal print quality. Note that MakerBot brand spools can be placed in the two compartments provided, while filaments from other manufacturers can each be positioned on the outside of the printer using a spool holder that you can print yourself.
3. MakerBot 3D Printing Software
As for the software, MakerBot offers a proprietary slicer, which is available in both a desktop version (compatible with Windows 7/10 (64-bit) and macOS 10.12+), and a web version (CloudPrint). The two versions are very similar, with the CloudPrint version offering the possibility of connecting to Thingiverse, allowing slicing of the model without having to import it into the slicer first. This is an option that is handy for users of Linux or Chromebook, among others. The web version also offers some additional features – these include faster slicing, regular updates of the functions, adaptation of compatibility to the latest materials on the market, as well as the possibility to view and reprint past print jobs or the option to collaborate with other users on a joint project.
Keep in mind that both versions of the slicer have a wireless connection to the printer via the cloud, which allows the user to control the print remotely, follow the video stream from the camera integrated in the build chamber and monitor the print status. It is also possible to see which materials are currently installed as well as their quantity. Both versions are easy to operate and require only a few additional settings for printing. Alternatively, a file can also be read while completely offline via the USB port. Our only criticism: the print settings could be extended with additional parameters e.g. the choice of material for the first layer, the setting of the total print speed or the type of the first layer (at the current time “Raft” or Padded Base” is possible, Rims can be added alternatively).
The touchscreen interface is quite intuitive, but there is room for improvement in the speed of the touchscreen. The button on the front of the printer is only used to turn the printer on. Turning it off is done via the settings menu. Here, it would probably have been more practical if this button could also be used to turn the device off.

With the Makerbot Print app, you can slice your 3D models and control the printer via the cloud.
4. First 3D prints with the Method X CFE
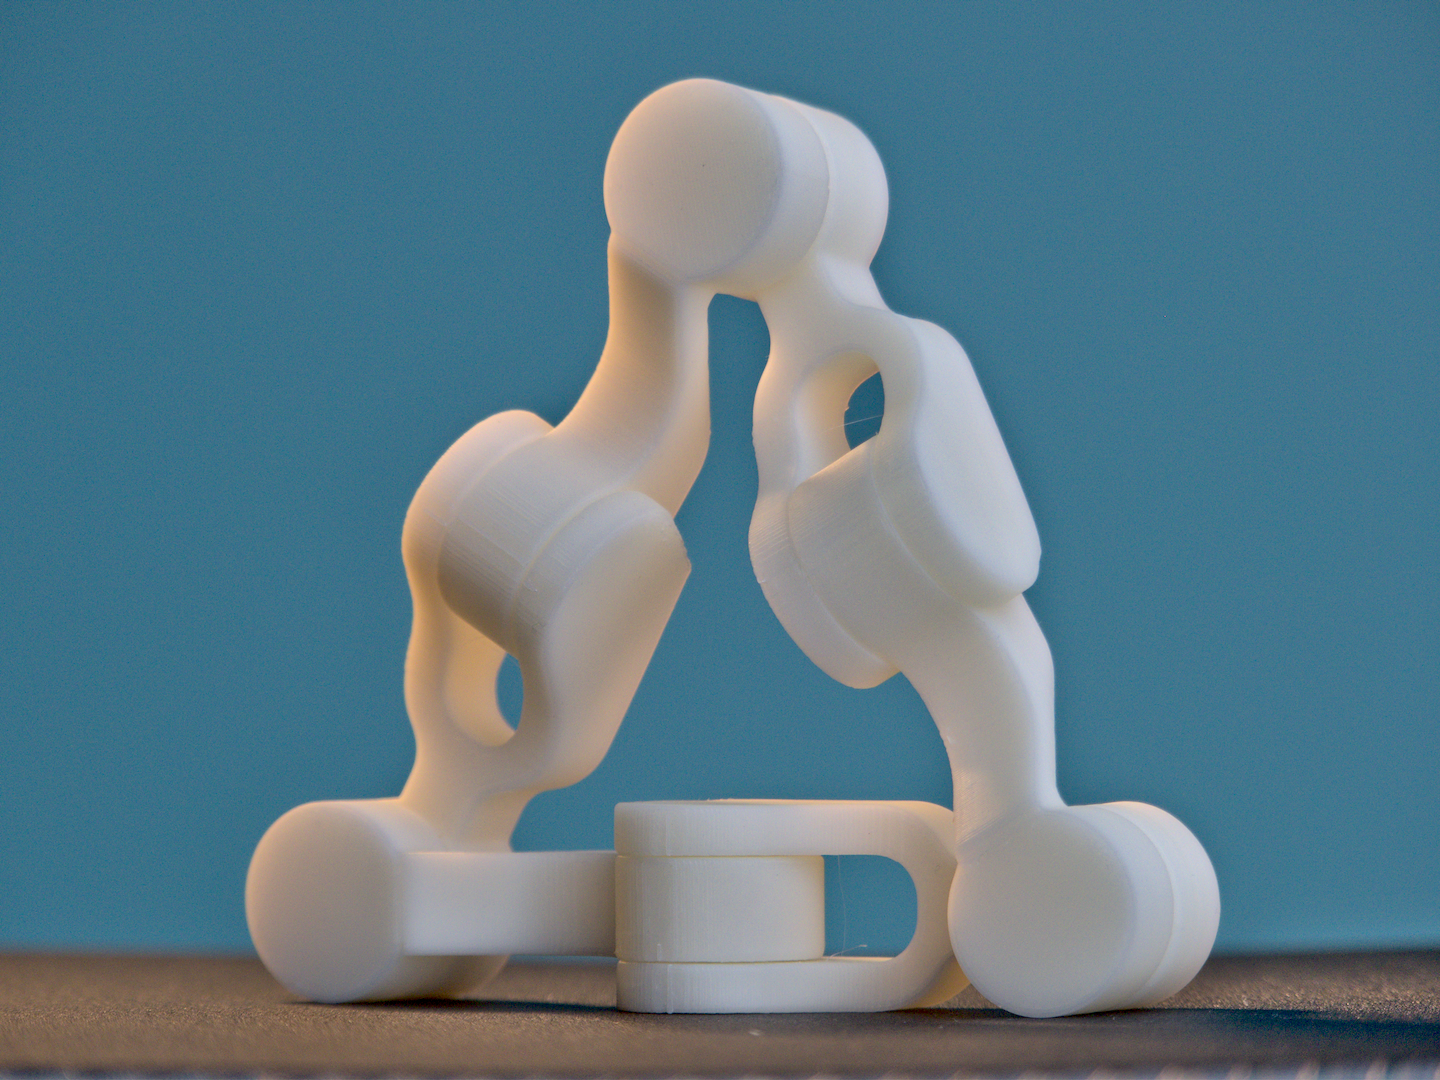
For our first print, we used the ABS provided to make a wrench from the Made in Space project. After printing, we managed to detach it from the build plate with just a few movements without using any special tools, as the plate is flexible enough. The wrench seemed to have been faithfully reproduced and works as expected. After this first print with ABS, we printed the classic 3D Benchy as well as a Kaleidocycle model to do a tolerance test. All prints were performed without any difficulties and the observed tolerances can be qualified as very good, as all parts rotate freely up to a value of 0.2 mm.
In a second print test, we printed a Statue of Liberty with fine details that also included cantilevered parts. In order for the Method X to handle this print, we decided to use the second extruder, which allows printing with SR-30, a support material developed by Stratasys. After printing and cleaning in the washout station (which we also borrowed from 3Ddrucker.de to wash out the SR30), the model was faithfully reproduced and showed no specific defects. The next step was to print a locomotive model with several small and complex parts. However, the print failed twice because the filament had difficulty adhering to the other layers in some parts of the part and eventually clumped around the nozzle. Finally, the print parameters, especially the print speed and retraction speed, had to be adjusted to get the desired result.
After ABS, we decided to try out the carbon fiber-reinforced nylon (PA-CF) using the 1C extruder which comes with this version of Method X. Basically, this material is considered an engineering material and thus is more difficult to print. The task was to print a suspension bracket for an RC car. This is a part that needs to be both strong and stiff, so PA-CF seems to be the ideal material. In the end, printing this supposedly complex material was easy and the result very satisfactory.
We then continued our test with ASA, a material similar to ABS and known for its UV resistance. Using this, we printed an astronaut statuette. However, because this model is very detailed, it requires supports in places that are inaccessible after printing. As a result, SR-30 was used as the support material. The start of the print went very well, but in the second third of the printing process the purge tower came off the build plate and pieces of filament stuck to the finished part. Nevertheless, the result was still satisfactory.
Lastly, a 3-part embroidery hoop was printed (consisting of inner hoop, outer hoop with screw and screw thread). We had previously tried to produce this with another printer, but the tolerances were not maintained and the screw did not fit into the thread. With the Method X, we observed the opposite effect with tolerances that were “too” good. The screw fit into the thread, but was slightly too small and slipped back under tension. However, this error is based more on the model, which does not provide for such precision.
Originally, we wanted to do another bridging and overhang test with the Method X. However, because these torture tests involve printing the part without print supports to check how the machine handles printing overhangs (i.e. unsupported parts), this test is not suitable for the Method X due to its heated build space. To be more precise, in an FDM 3D printer with a heated build space, such as the Method X CFE, the temperature in the print chamber remains high, which keeps the filament relatively malleable. Therefore, due to the conditions, it is impossible to print cantilevered parts (such as a bridge) without supports. The heated chamber ensures better adhesion between layers and reduces or eliminates warping. In summary, this improves the mechanical properties and dimensional accuracy of the parts.
If parts with large overhangs are to be printed, the corresponding support material, SR-30, can be used for this thanks to the second extruder. SR-30 is a soluble material specially developed and patented by Stratasys that is compatible with ABS, ASA or other high-temperature materials.
It would also have been interesting to compare the machine with other FDM printers using PLA. However, since this project requires a Makerbot Labs extruder for testing with third-party PLA or the Makerbot PLA, it was not possible for us to do so. Given the fact that very good results have been achieved with the more complex filaments, we assume that there should be no difficulties when printing with PLA.

Key model from the Made in Space project, printed with ABS.
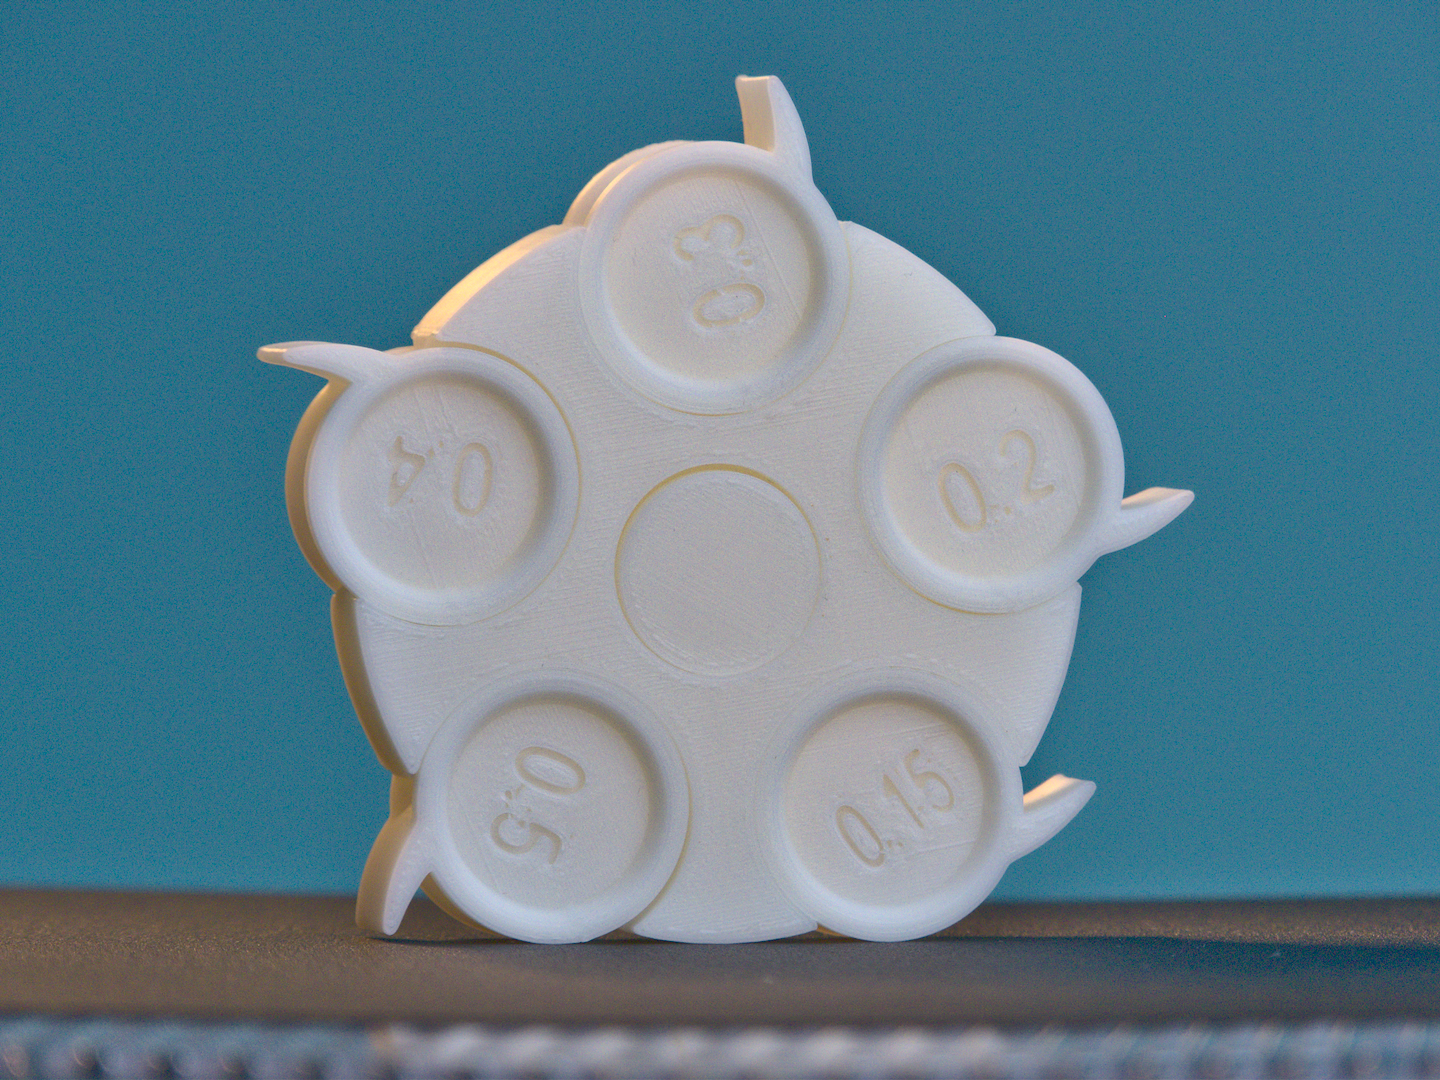
We observe a tolerance of about 0.2 mm // Tolerance test by Louis-Simon Guay on MyMiniFactory.
“Kaleidocycle” printed with ABS. Model by Enrique Coiras on Thingiverse.
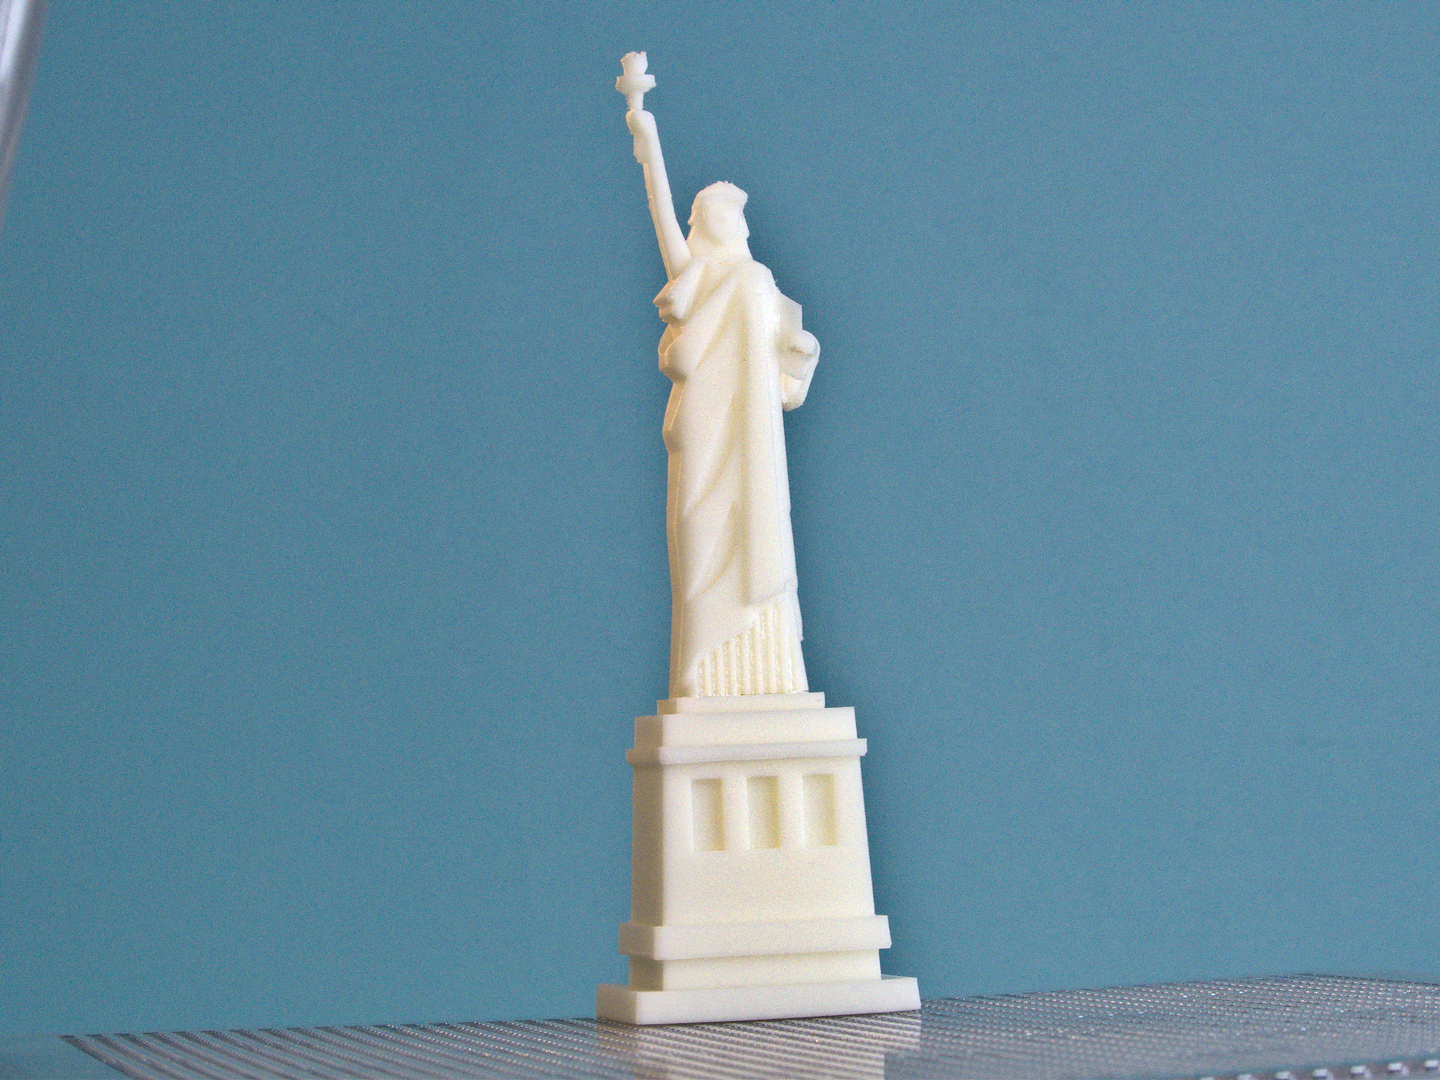
Statue of Liberty modeled by MyMiniWorld, printed with ABS and soluble SR-30 support material.
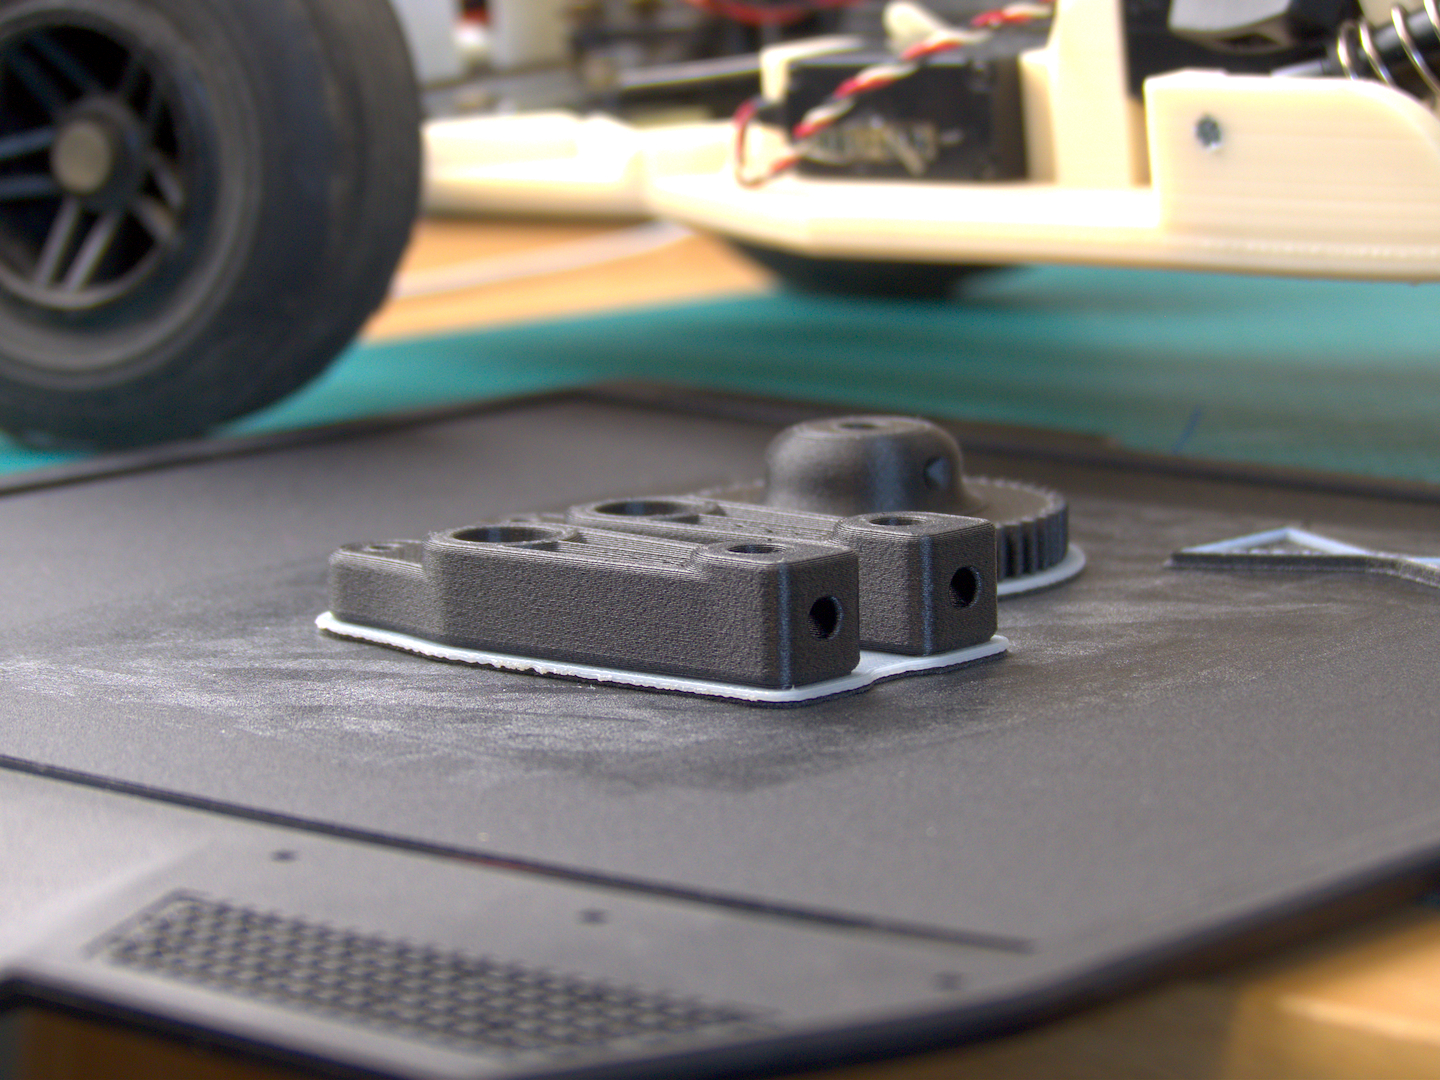
RC car suspension mount printed from Method X with PA-CF.
Conclusion
- 3D Printer Features and Accessories 9.5/10
- Software 8/10
- 3D Printing Quality 9/10
- Ease of Use 9.5/10
Pros:
- Intuitive operation
- Filament storage
- Plug&Play Extruder
Cons:
- Proprietary software and materials
- Build volume
After several hundred hours of printing, we were able to conclude our test of MakerBot’s Method X CFE on a positive note. In a way, the Method X CFE can be compared to a Tesla: an innovative device with intelligent and intuitive functions that make handling much easier. The only complaint is the limited modifiability of the device.
Thanks to the 21 sensors, the machine is able to self-diagnose certain problems, such as extruder clogging, an empty spool or problems with the compatibility of the material with the installed extruder. The Method X gives advice on storage and post-processing of the filament used and guides the user through all steps of machine operation. Basically, it can be said that the Method X CFE was designed based on MakerBot’s know-how. This can be seen, for example, in the Plug&Play principle, which provides a high degree of user-friendliness. Though we had some slight complaints regarding individual minor bugs in the slicer and partial delays in the operation of the display. That being said, already experienced users might also need some patience in getting familiar with the many settings of the device.
The price ($5,249.25/€6,247 (incl. VAT)) for the Method X CFE edition might scare off some potential users. However, it is a justified price to pay for a professional plug-and-play FDM machine – especially when the machine can print a wide range of standard and engineering thermoplastics.


Need Update on how to buy
Fingers crossed it doesn’t break after 1 year unless you buy the service plans. There are no COD repair options for this product (as I found out the hard way). I have a 60 pound boat anchor that currently prints slightly worse than my Ender 3 and no repair option that buy a 1 year plan for $1,100.
We are sorry to hear that! What is the exact problem you are experiencing? We’d be happy to help if we can.
How much did they pay you to write this? The printer is garbage. Material has quality issues. Bays are not sealed and easily allow moisture. Redundant setting in software don’t work. Bed plate is too flexible and cannot handle solid filled parts. Plenty of others all have the same issues. Our Mark Forged printers run 24/7 and this thing sits. Even failed trying to print “Tough” material on a 60 hour print that was done beautifully in 16 hours on the MF.
We’re sorry you felt the review was biased. We write (and film) all our reviews based on our actual experience with the machine and numerous tests. We did not find any of these specific issues, though as you can see in the review itself we had our own concerns which we addressed. That being said, we gave our honest grade and stand by it. We can only recommend that if you are having issues with your machine that you contact Makerbot’s customer service as they are in the position to offer you more tailored assistance.
Totally agree to Colton. For me the printer and the Software are completely unusable.
Pay euro 415 for an extruder so I can use 3rd party filaments? Yuk
I have a machine with what I believe to be a mechanical issue with one of the gears involved with Z travel, and material oozing. The matching can’t print anything taller than about 2” without loosing its place. Results are gaps in printing, or running a hot extruded into the model, gumming up the head and offer breaking the model.
Makerbot support has used the same tactic five times now over the last 6 months: suggest a drying kit, replace an extruded, ask for pictures, confirming shipping address (to send out return packing materials), and then… close the case/no materials sent. FOUR TIMES BOW, same pattern.
I can sort through fine tuning temps etc, but the gearing issue makes this printer unusable.